First at all, you use this guide by on your own risk! 🙂
Das Wichtigste zuerst. Ausführung auf eigene Gefahr! 🙂
Diese Kurzanleitung soll dabei helfen, mit Clonezilla ein Image der Systemplatte auf eine externe USB-Festplatte zu ziehen und danach zurück auf den PC zu spielen. Bitte beachten, dass falls ein Betriebssystem geklont wird,die Hardware immer absolut identisch sein muss.
This short guide is intended to help cloning with #Clonezilla an image on an external USB hard drive and then play back on the PC . Please note that if you want to clone an operating system, the hardware must be absolutely identical always.
| English | Deutsch |
| Using Clonezilla with an external USB-Drive. | Clonezilla mit einer externen USB-Festplatte benutzen. |
| The first step is to download the zip-file from the Clonezilla Web site. | Zuerst muss das Clonezilla-Zip-File von der offiziellen Seite heruntergeladen werden. |
| Once you have the file downloaded, extract and copy it onto your usb drive. Please ensure that the USB drive is formatted as a FAT32 drive. | Sobald das File heruntergeladen wurde, entpacken und auf das USB-Laufwerk kopieren. Das Laufwerk muss als FAT32 formatiert sein. |
| Open the USB drive in your Explorer. Open \utils\win32\ and run makeboot. | Das USB Laufwerk im Explorer öffnen. Zu \utils\win32\ navigieren und makeboot ausführen. |
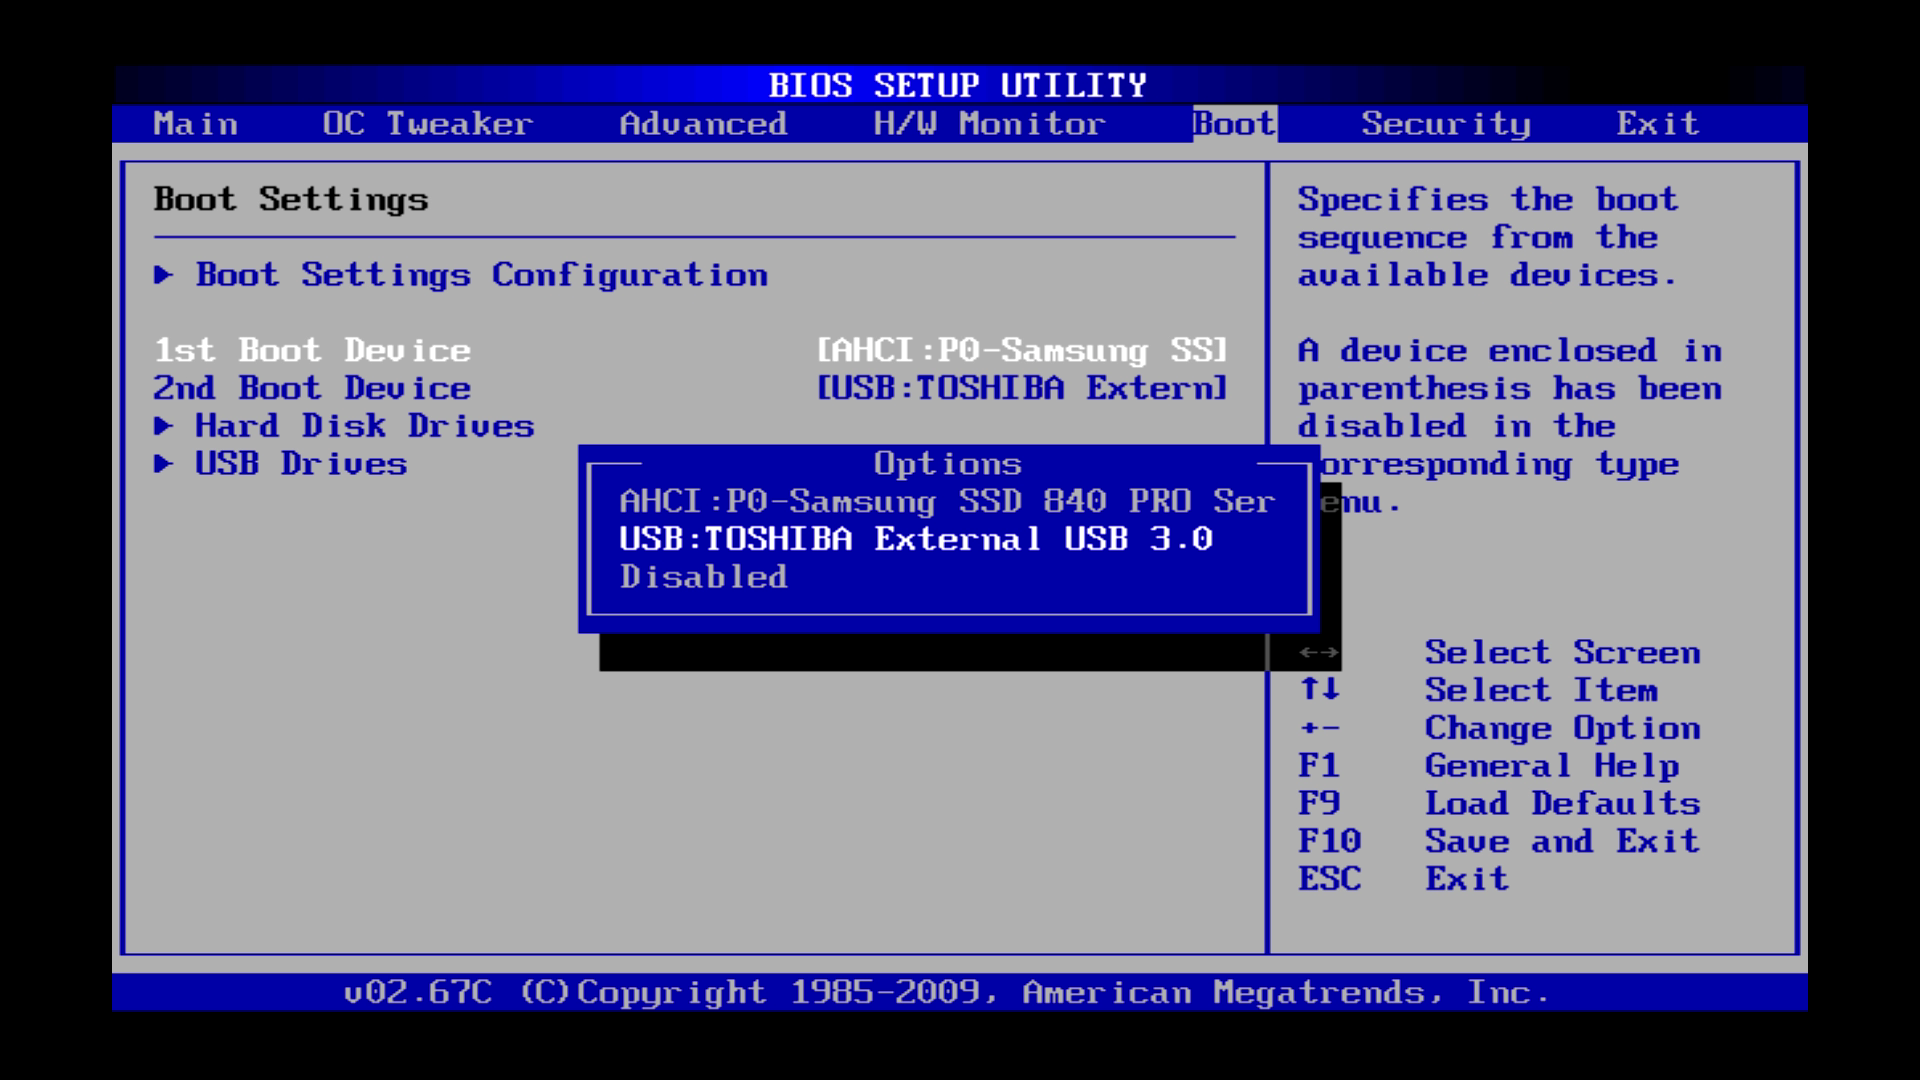
| Reboot. You have to boot from the Clonezilla media, please ensure that your USB Drive is the primal boot device in your Bios settings.
Please note that your BIOS might look very different compared with this one. For more instructions please have a look at your mainboard manual. |
PC neustarten. Vom USB-Laufwerk booten. Dazu muss das Laufwerk im BIOS als primäre Boot-Option eingestellt sein.
Das BIOS könnte völlig anders aussehen. Bitte in der Anleitung vom Mainboard nachschlagen. |
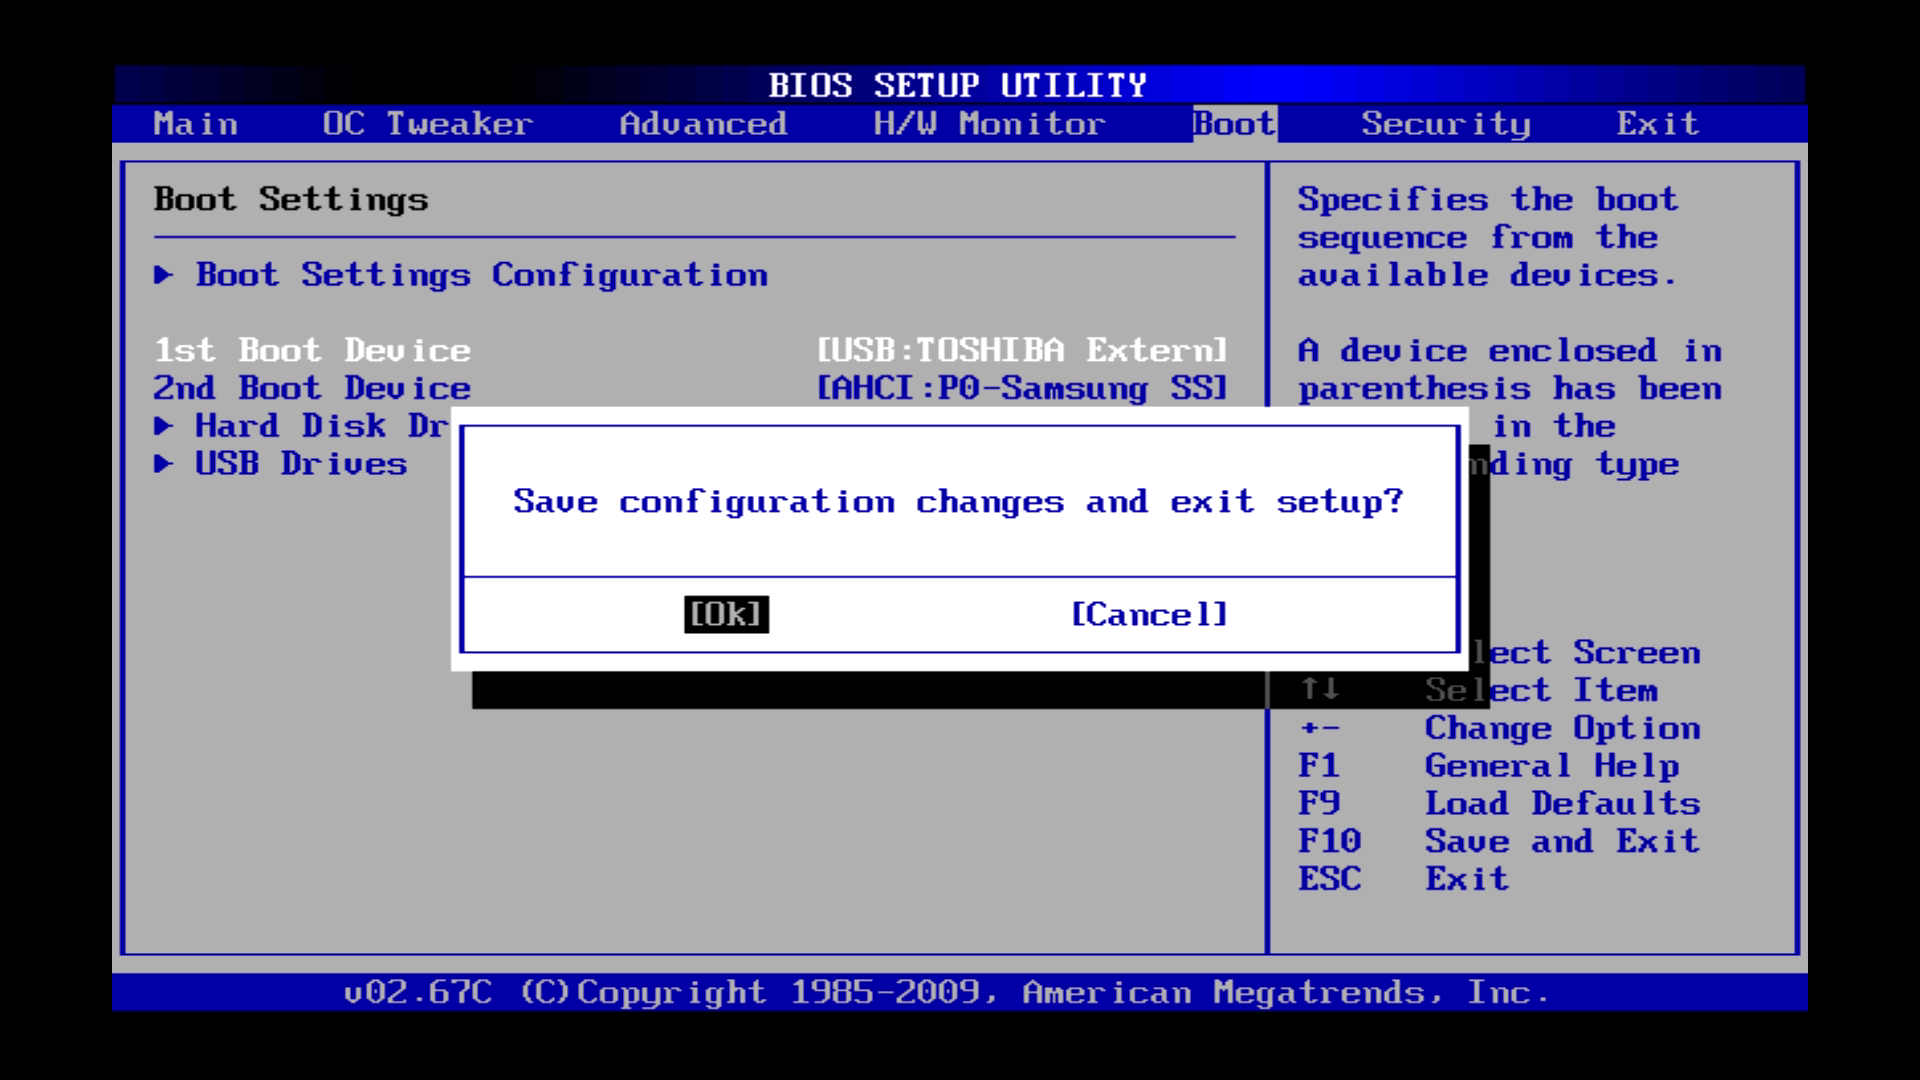
| Save and restart. | Speichern und Neustart. |
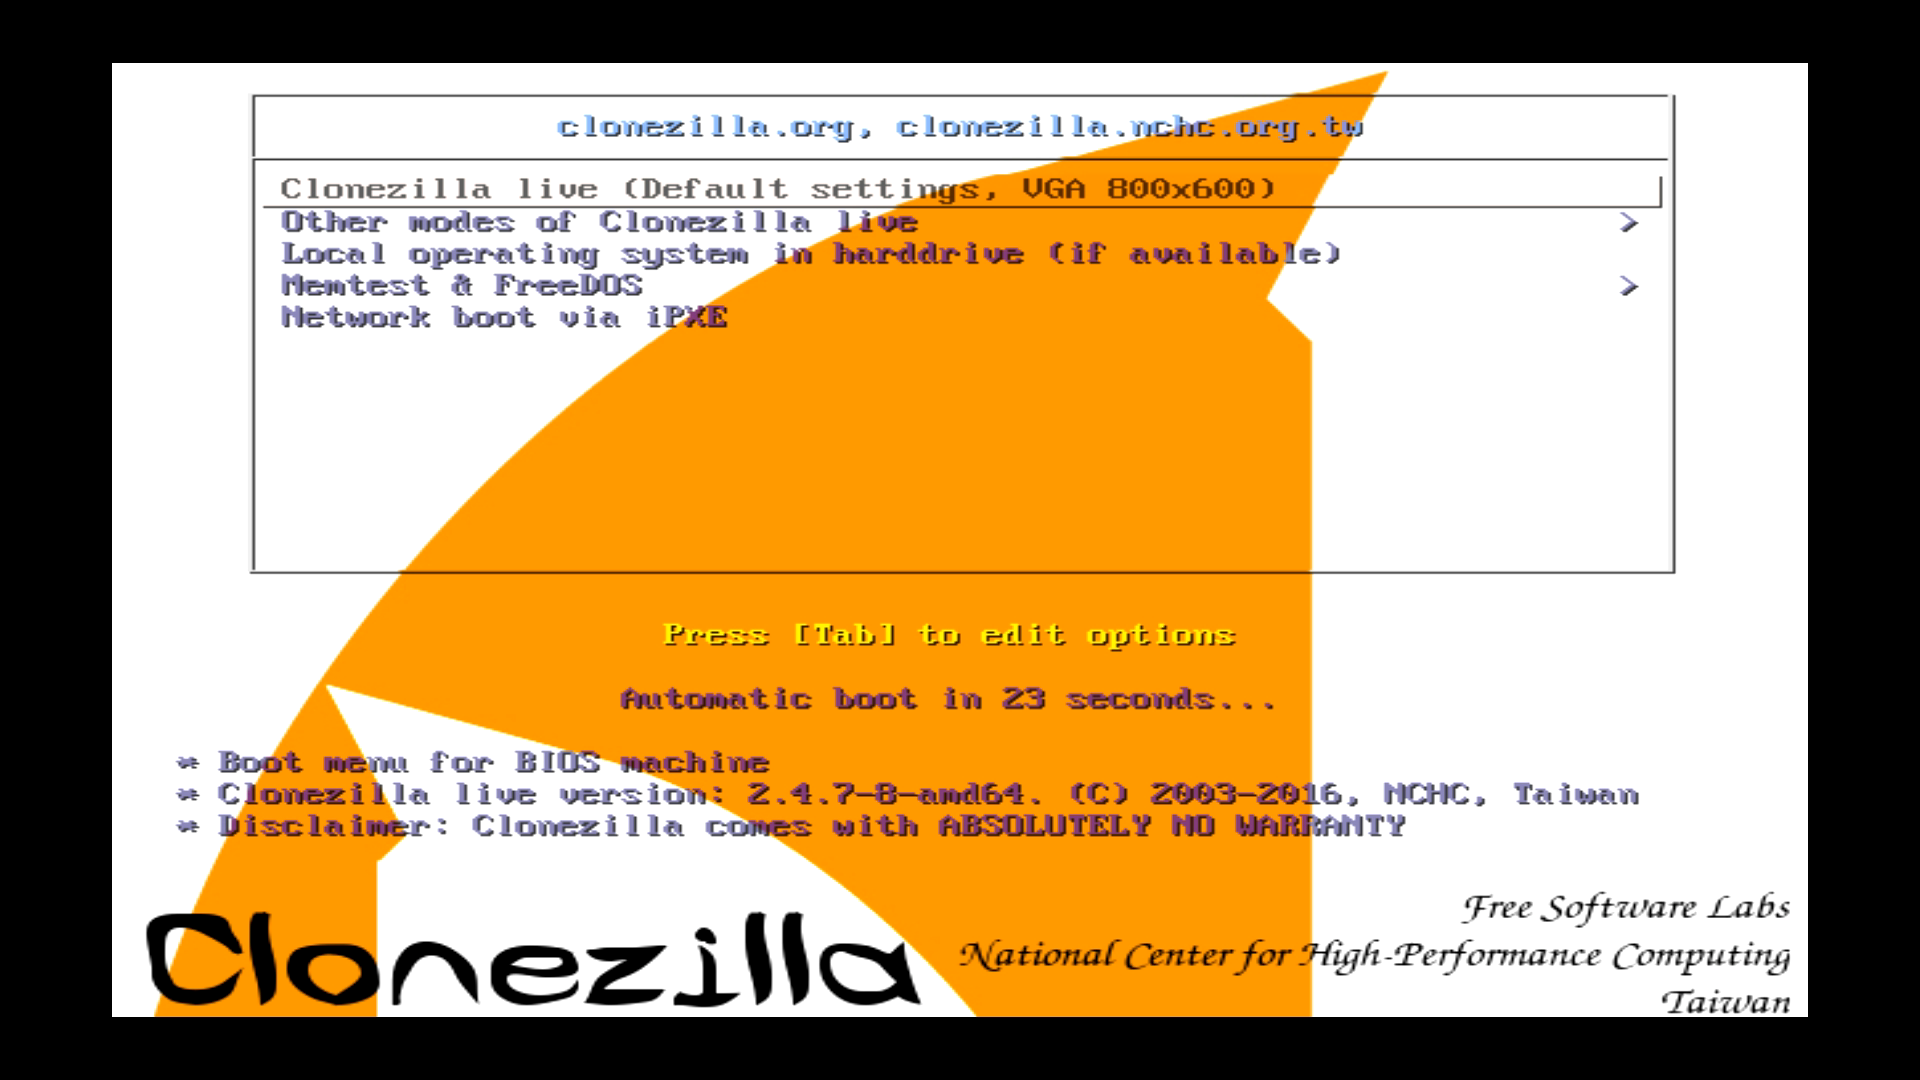
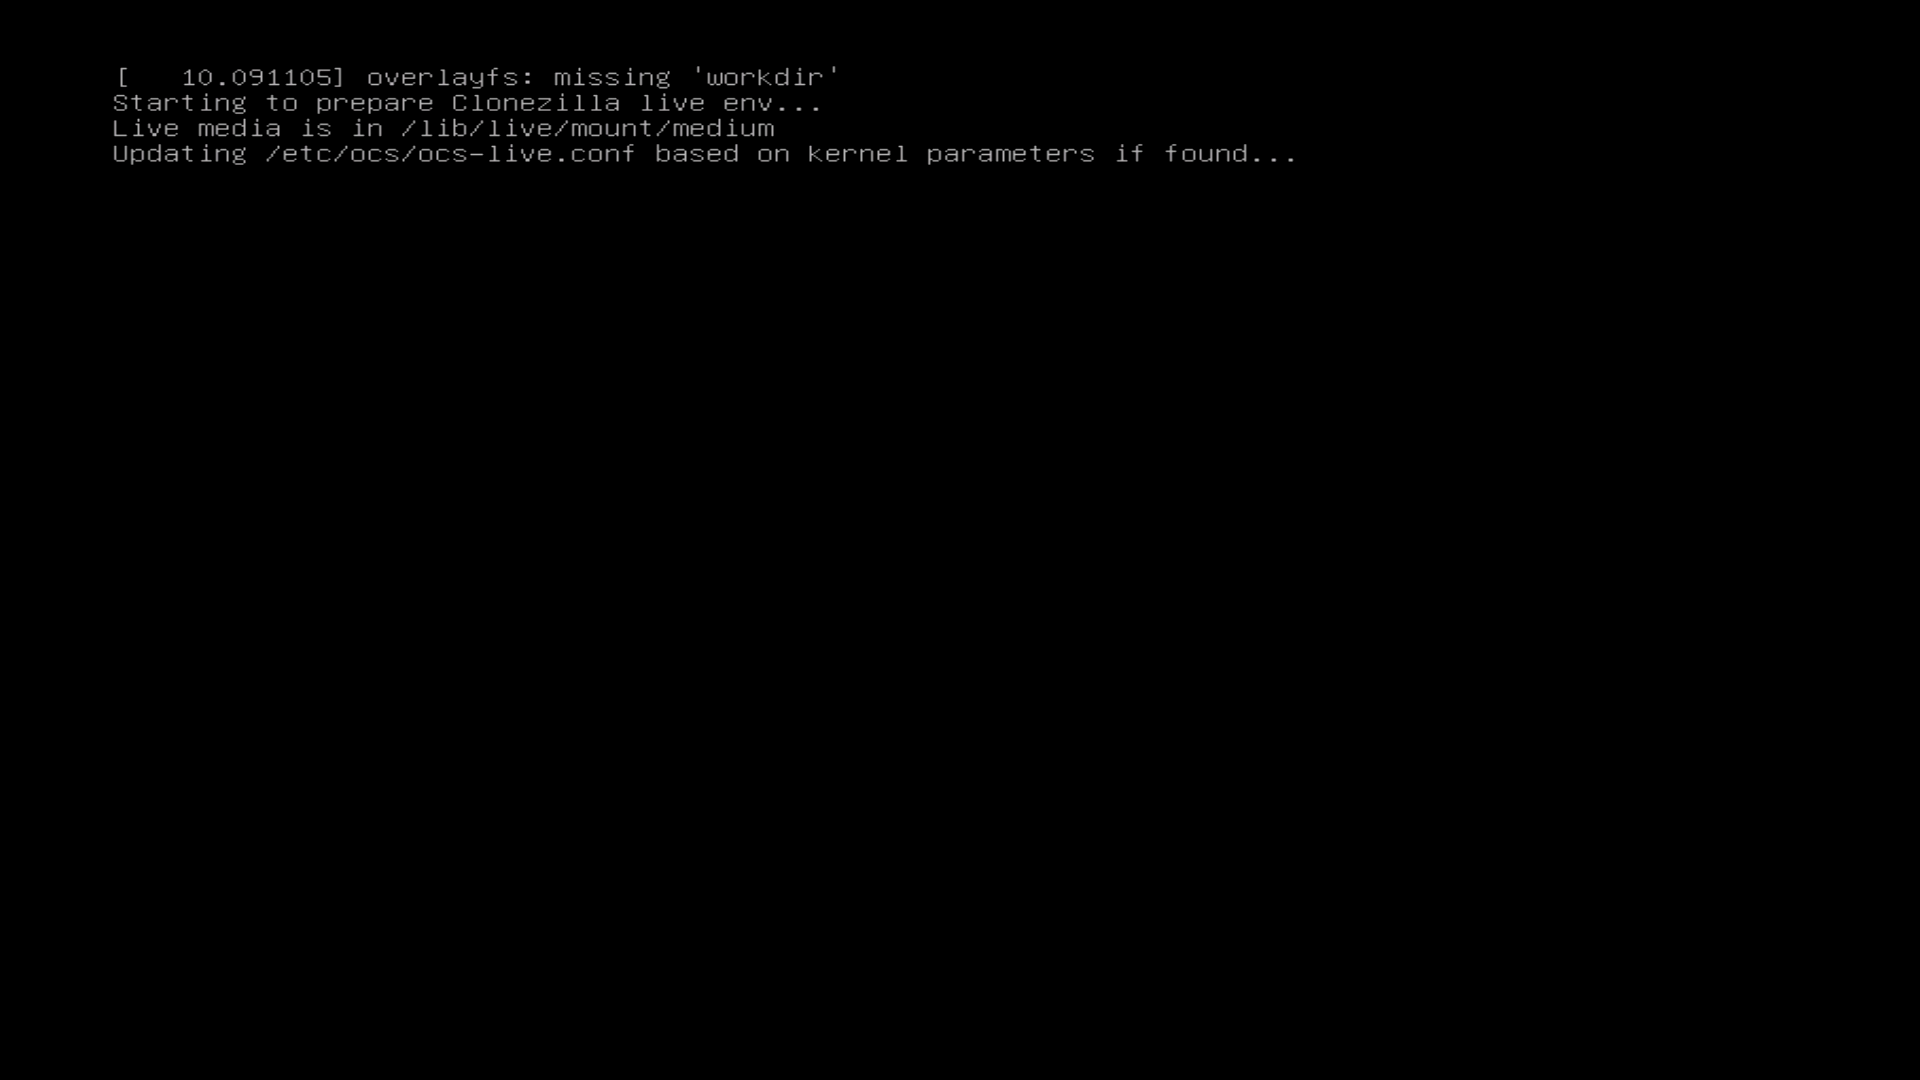
| After the restart, Clonezilla is booting automatically. | Nach dem Neustart bootet Clonezilla automatisch. |

| In the boot menu, choose a proper resolution. You can also choose Failsafe mode if there are any problems during the cloning process. | Clonezilla bootet. Nun eine passende Auflösung auswählen und bestätigen. Sollten Probleme auftreten, kann auch der Failsafe mode verwendet werden. |
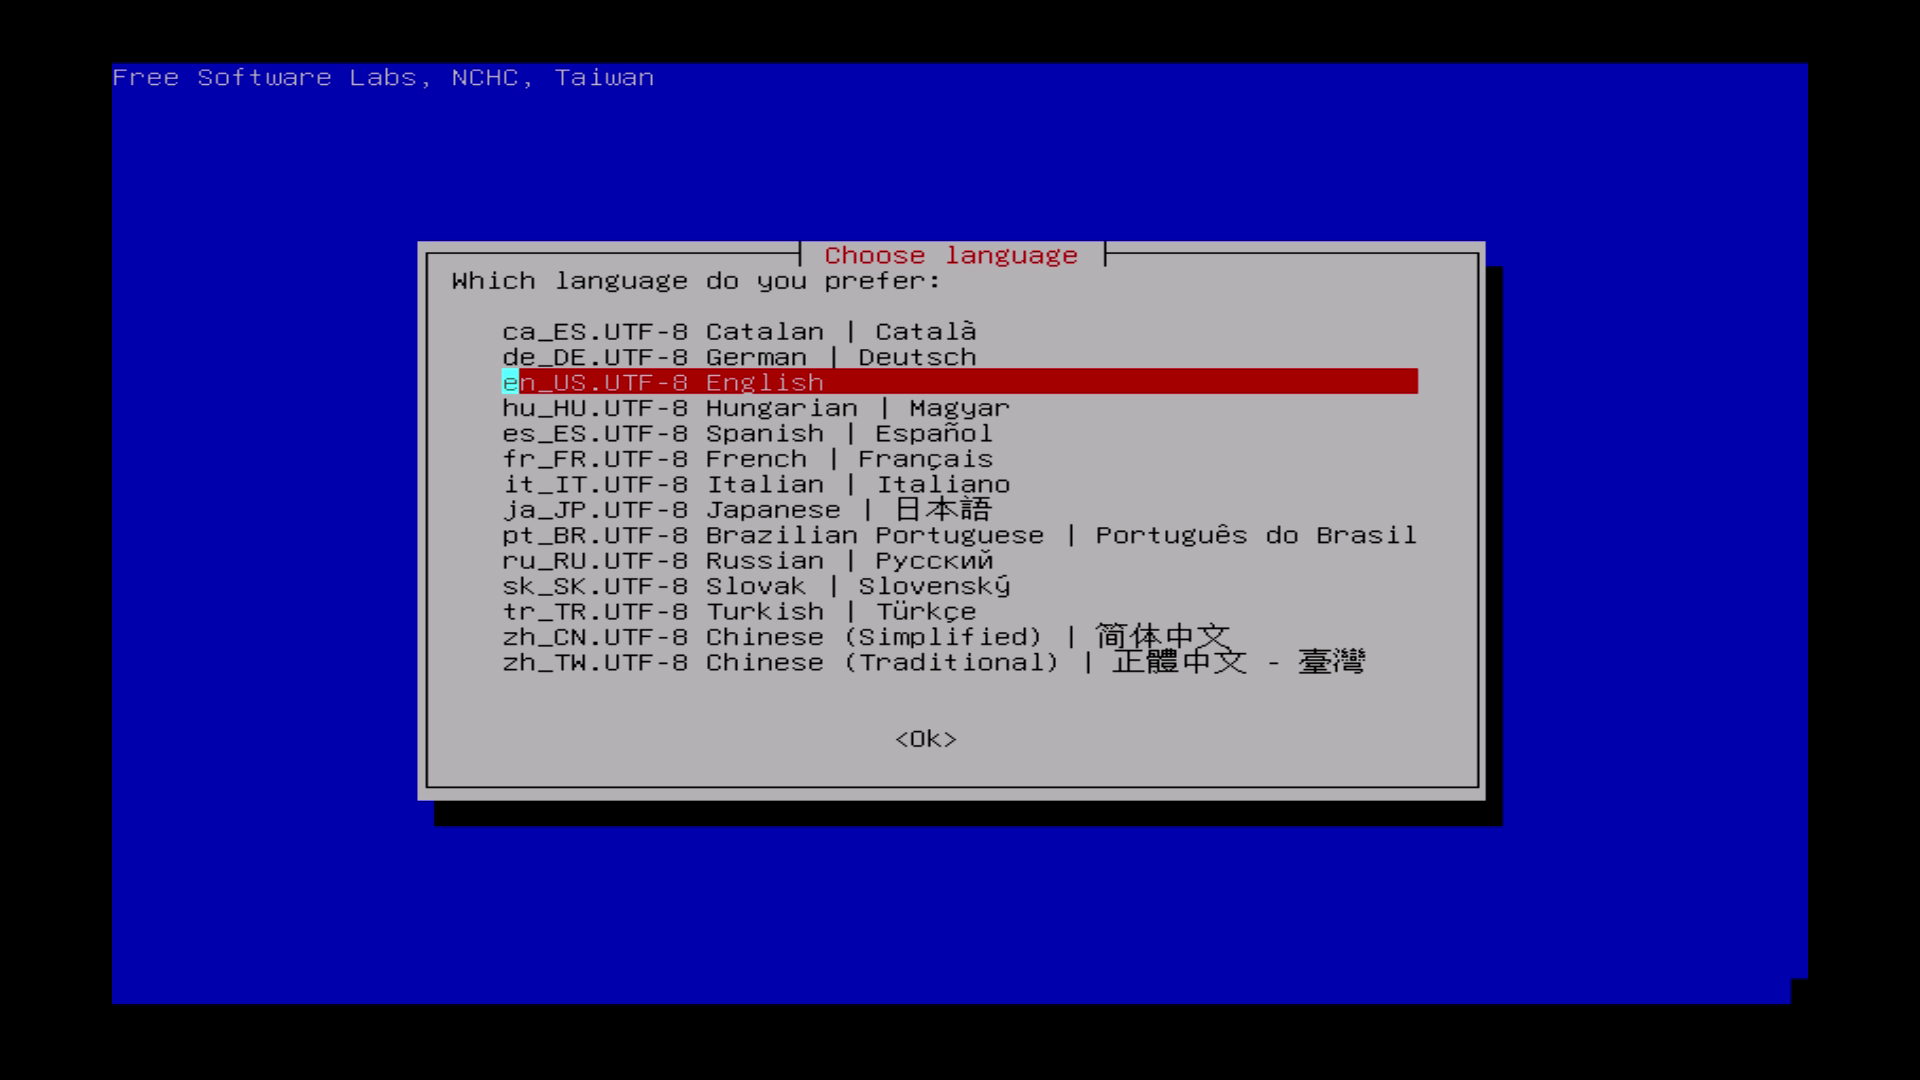
| Choose your language. | Sprache auswählen. Es ist nicht zwingend notwendig Deutsch zu wählen. Englisch ist ausreichend, allerdings kann am Anfang eine deutsche Erklärung sehr hilfreich sein. |
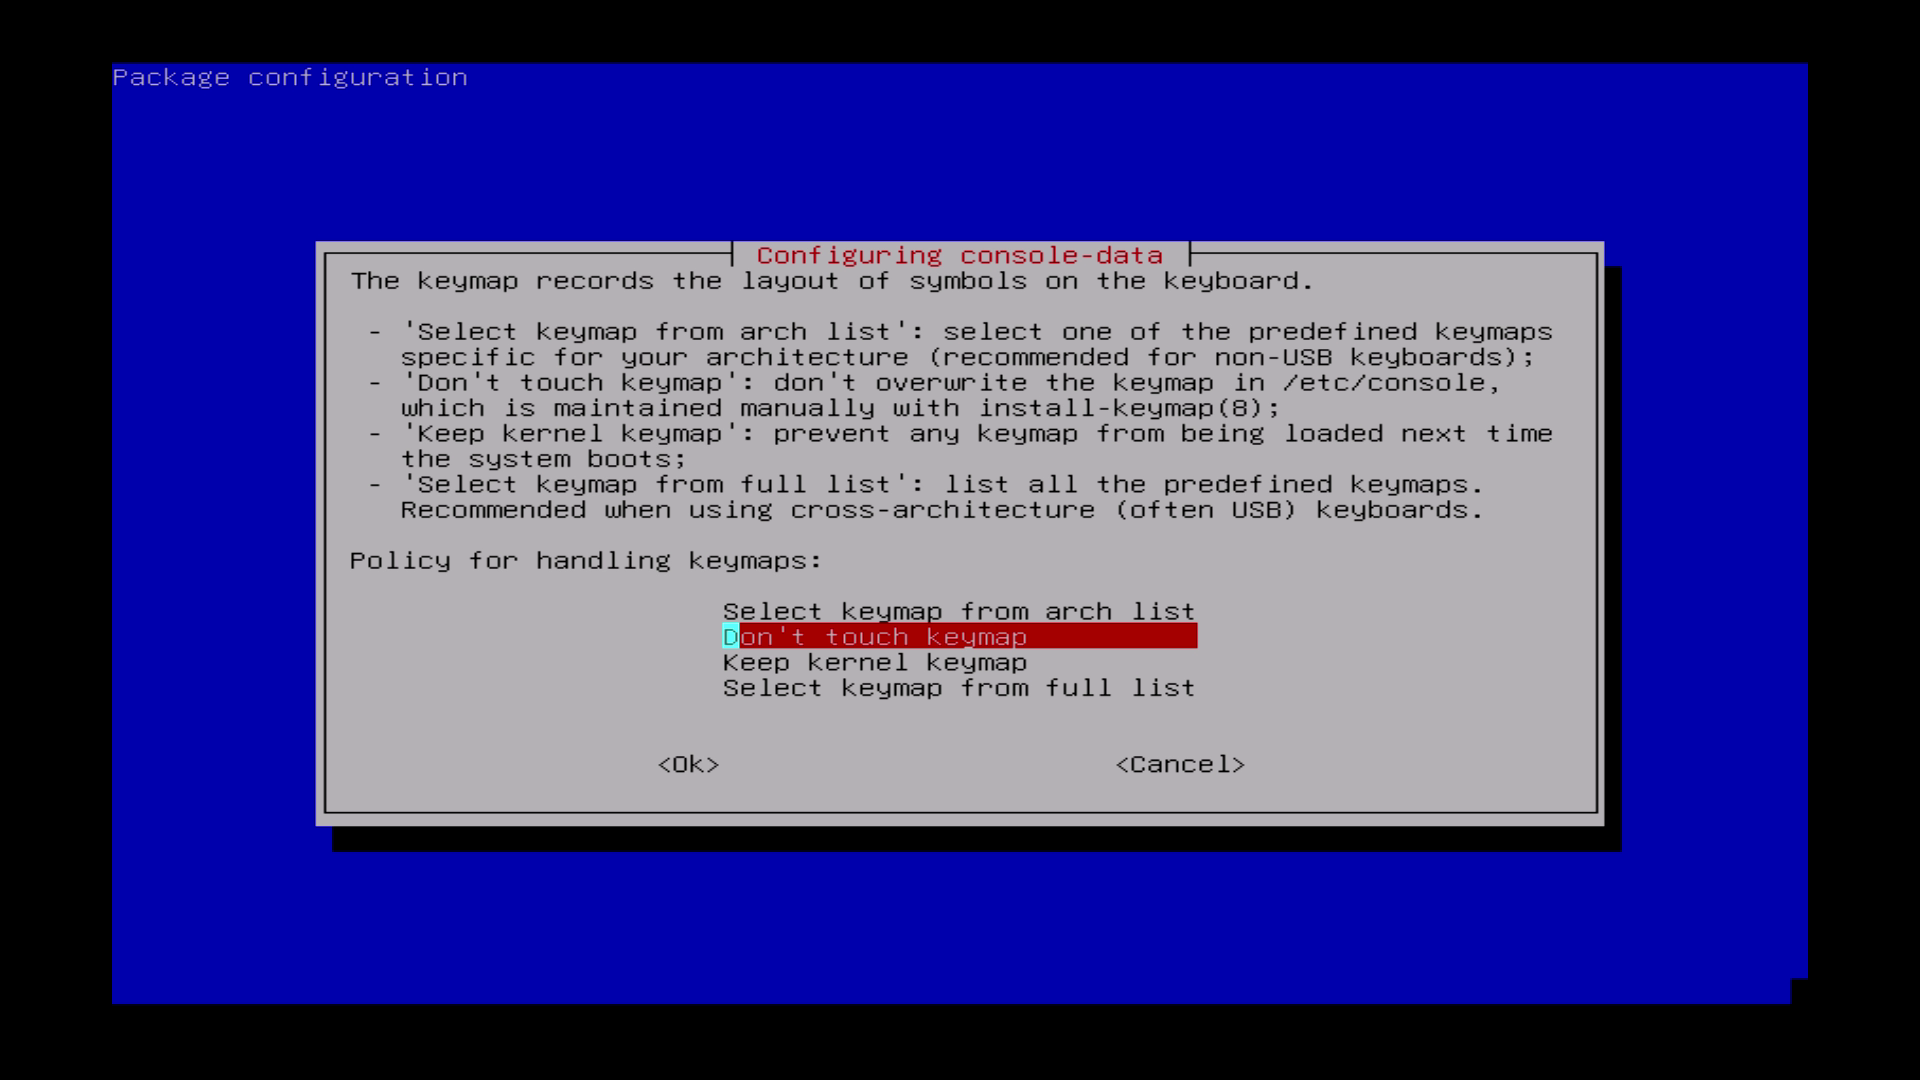
| The default keyboard layout is US keybaord, therefore if you are using US keyboard, just press enter. | Hier „Don´t touch keymap“ auswählen.
Bei diesem Layout stehen allerdings keine Umlaute zur Verfügung. |
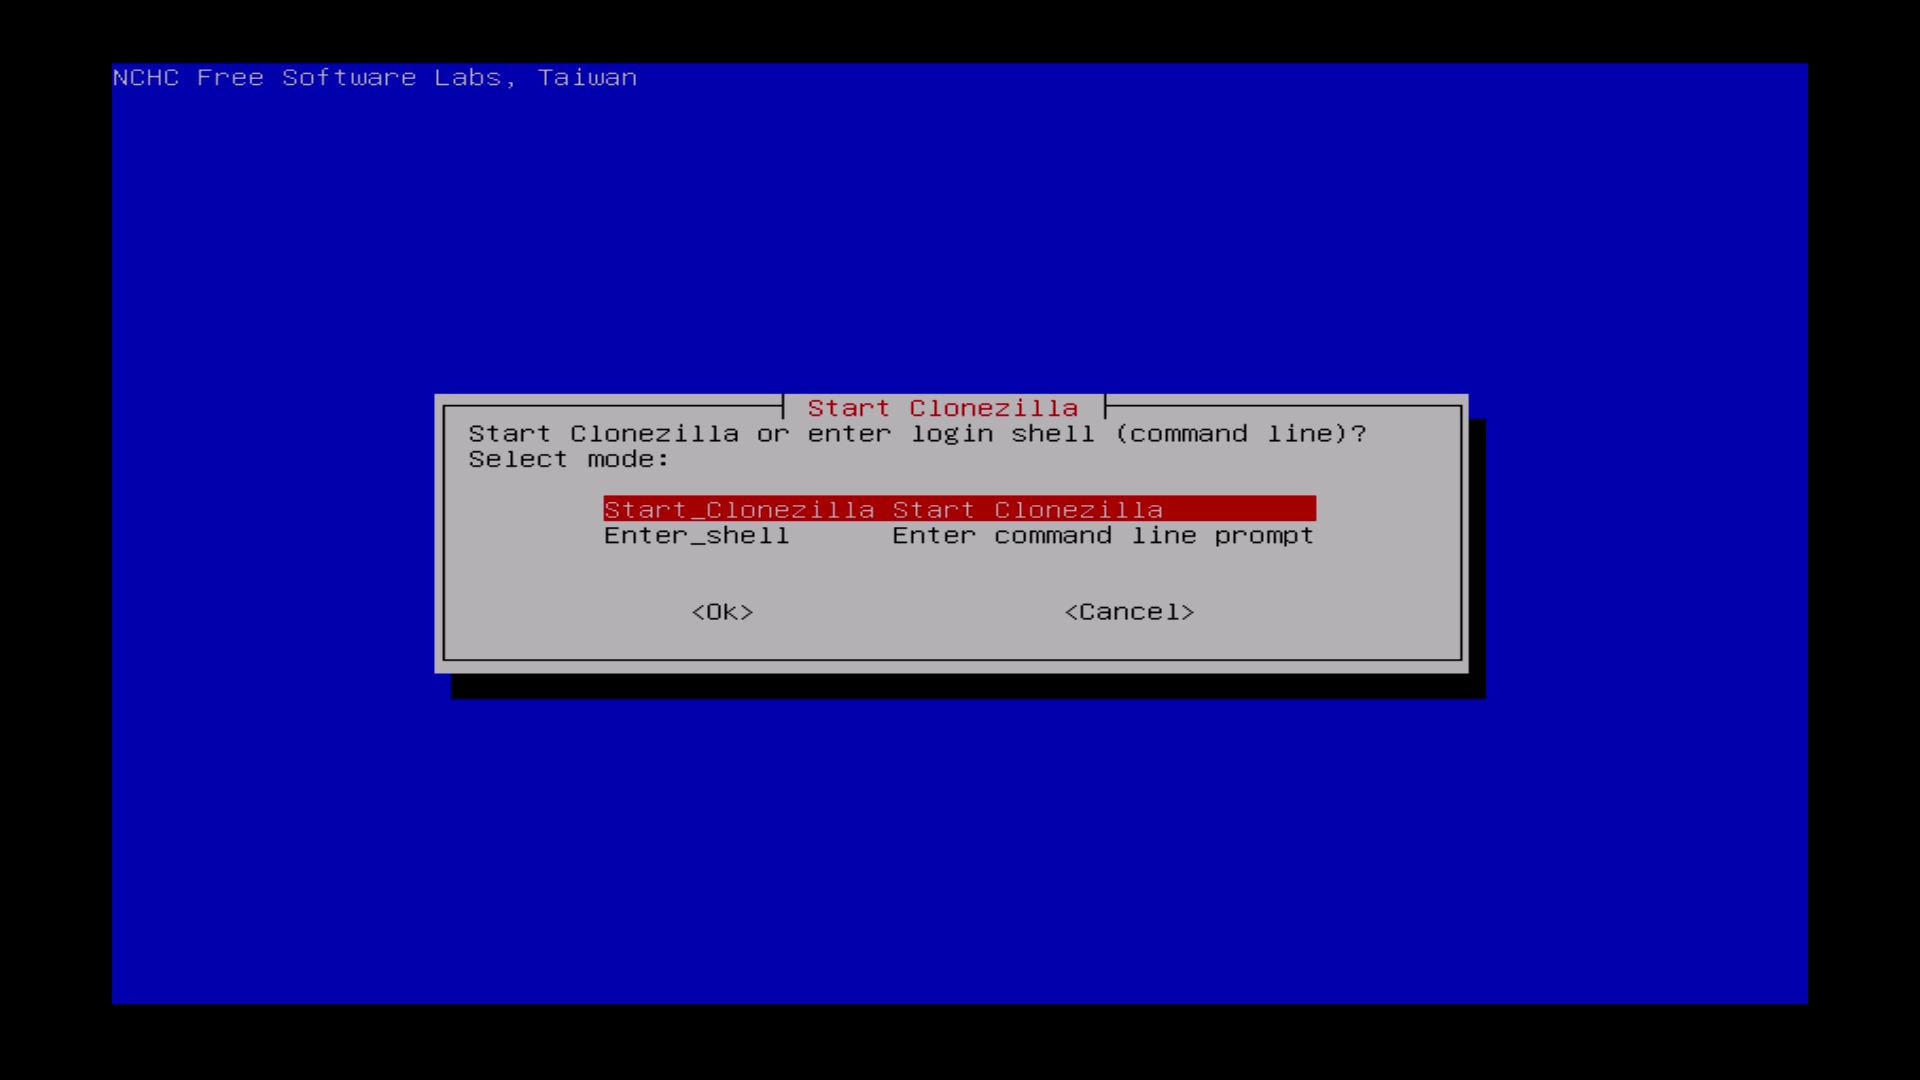
| Choose „Start Clonezilla“ | Start Clonezilla auswählen. |
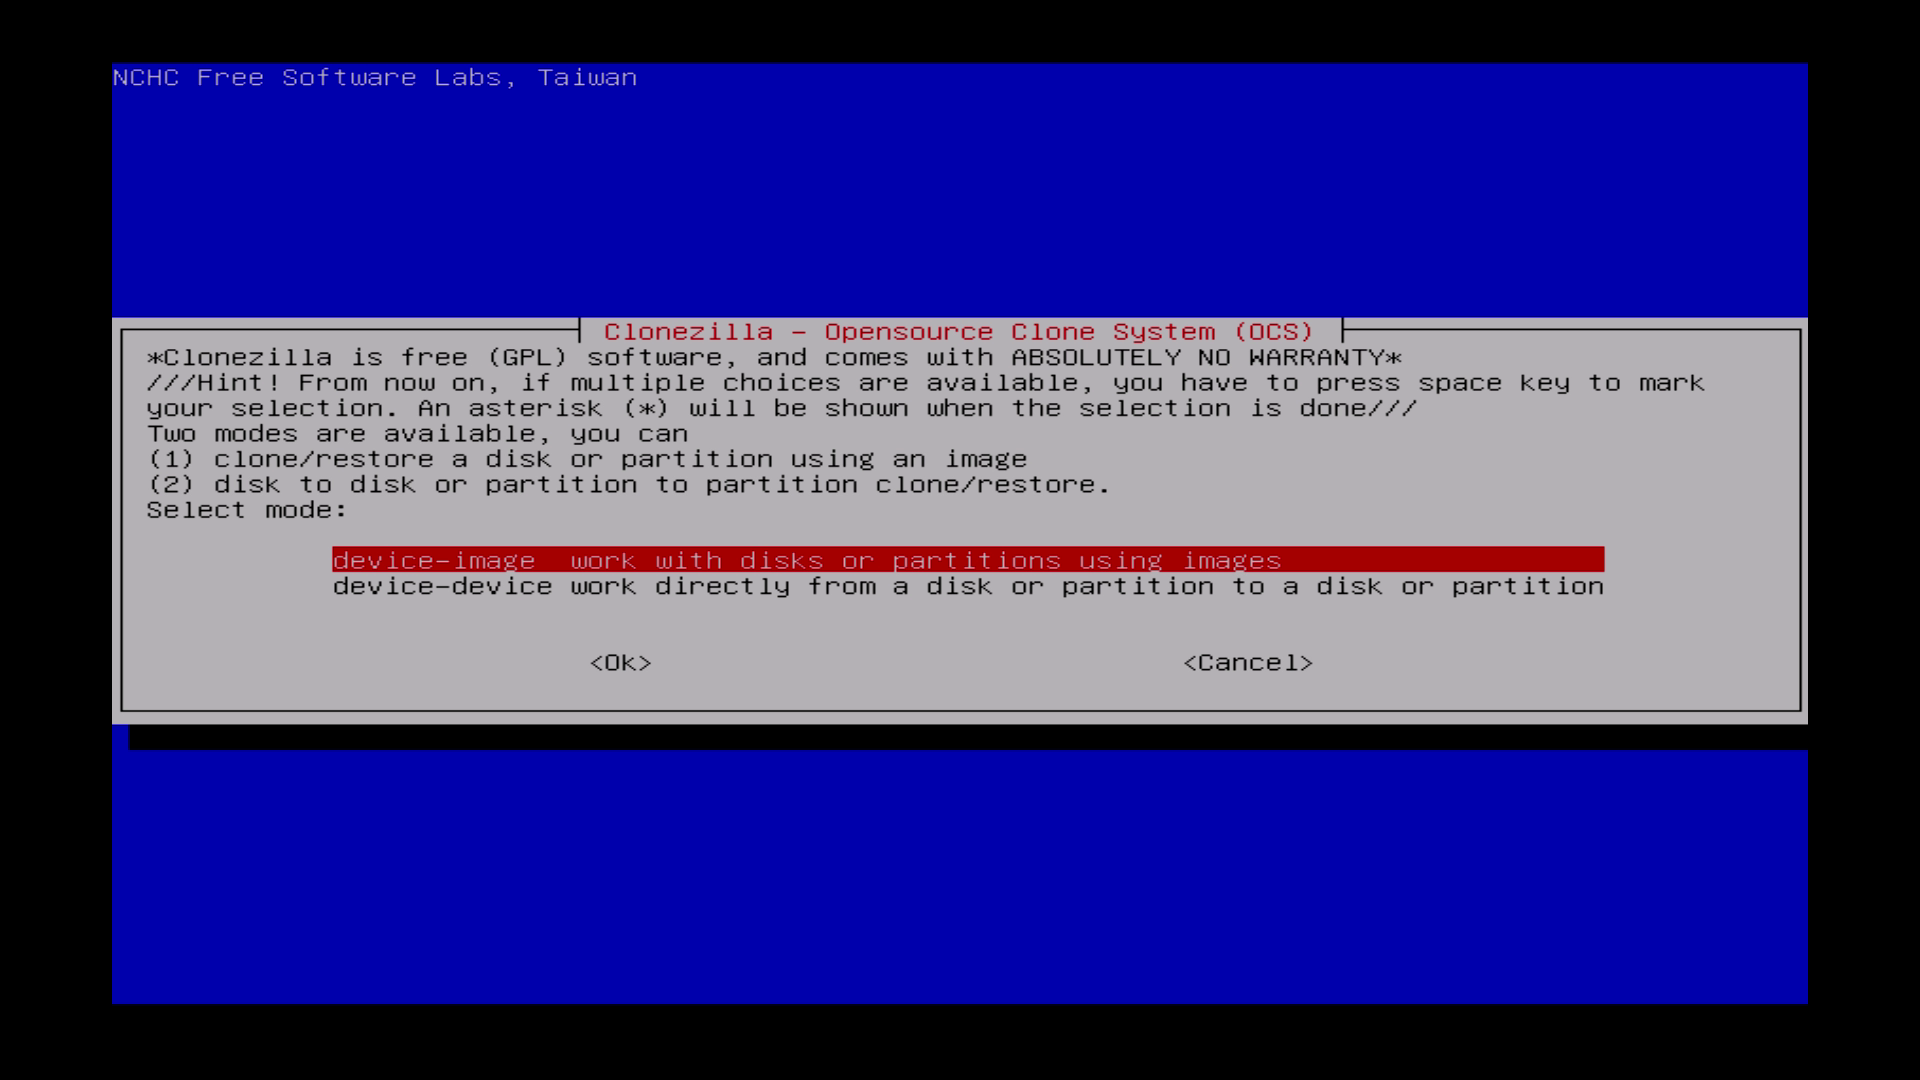
| Choose device-image. | Die erste Option: „device-image work…“ auswählen. |
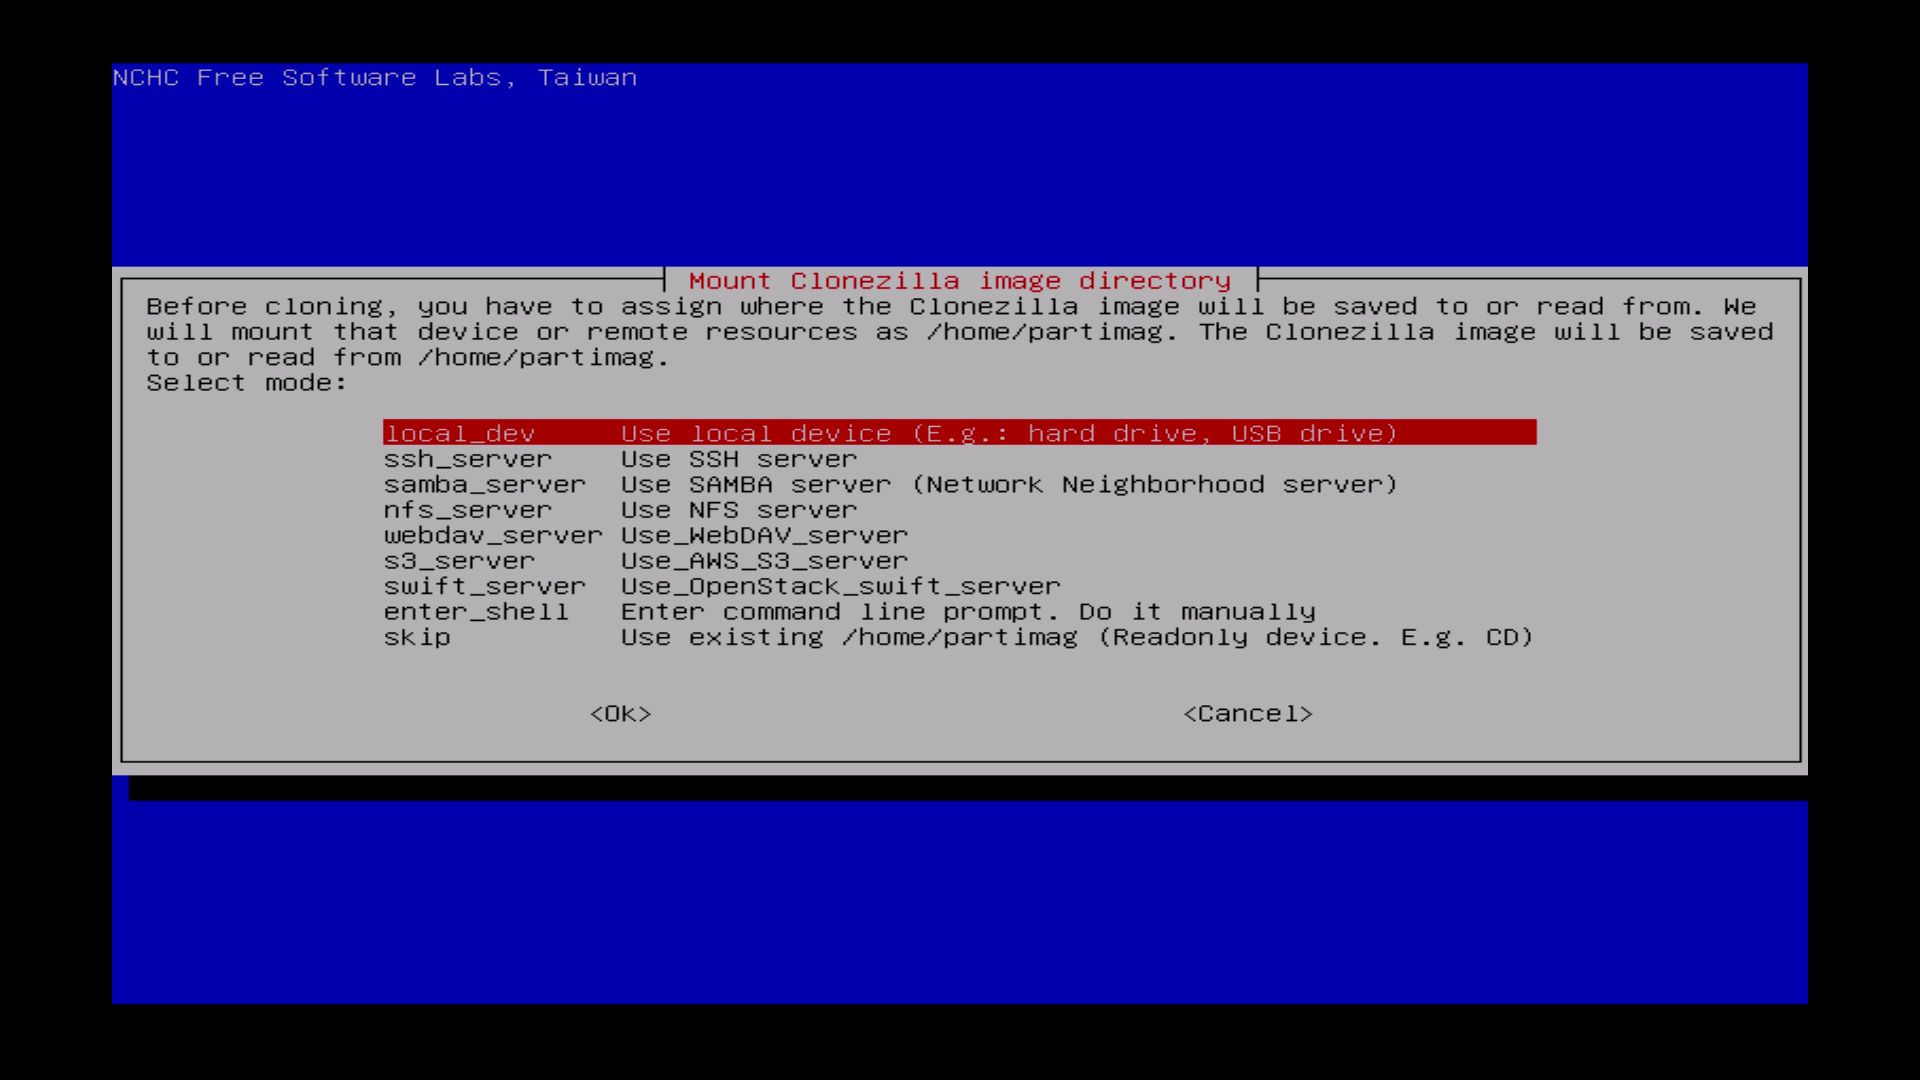
| Choose „local_dev“ | „local_dev“ auswählen. |
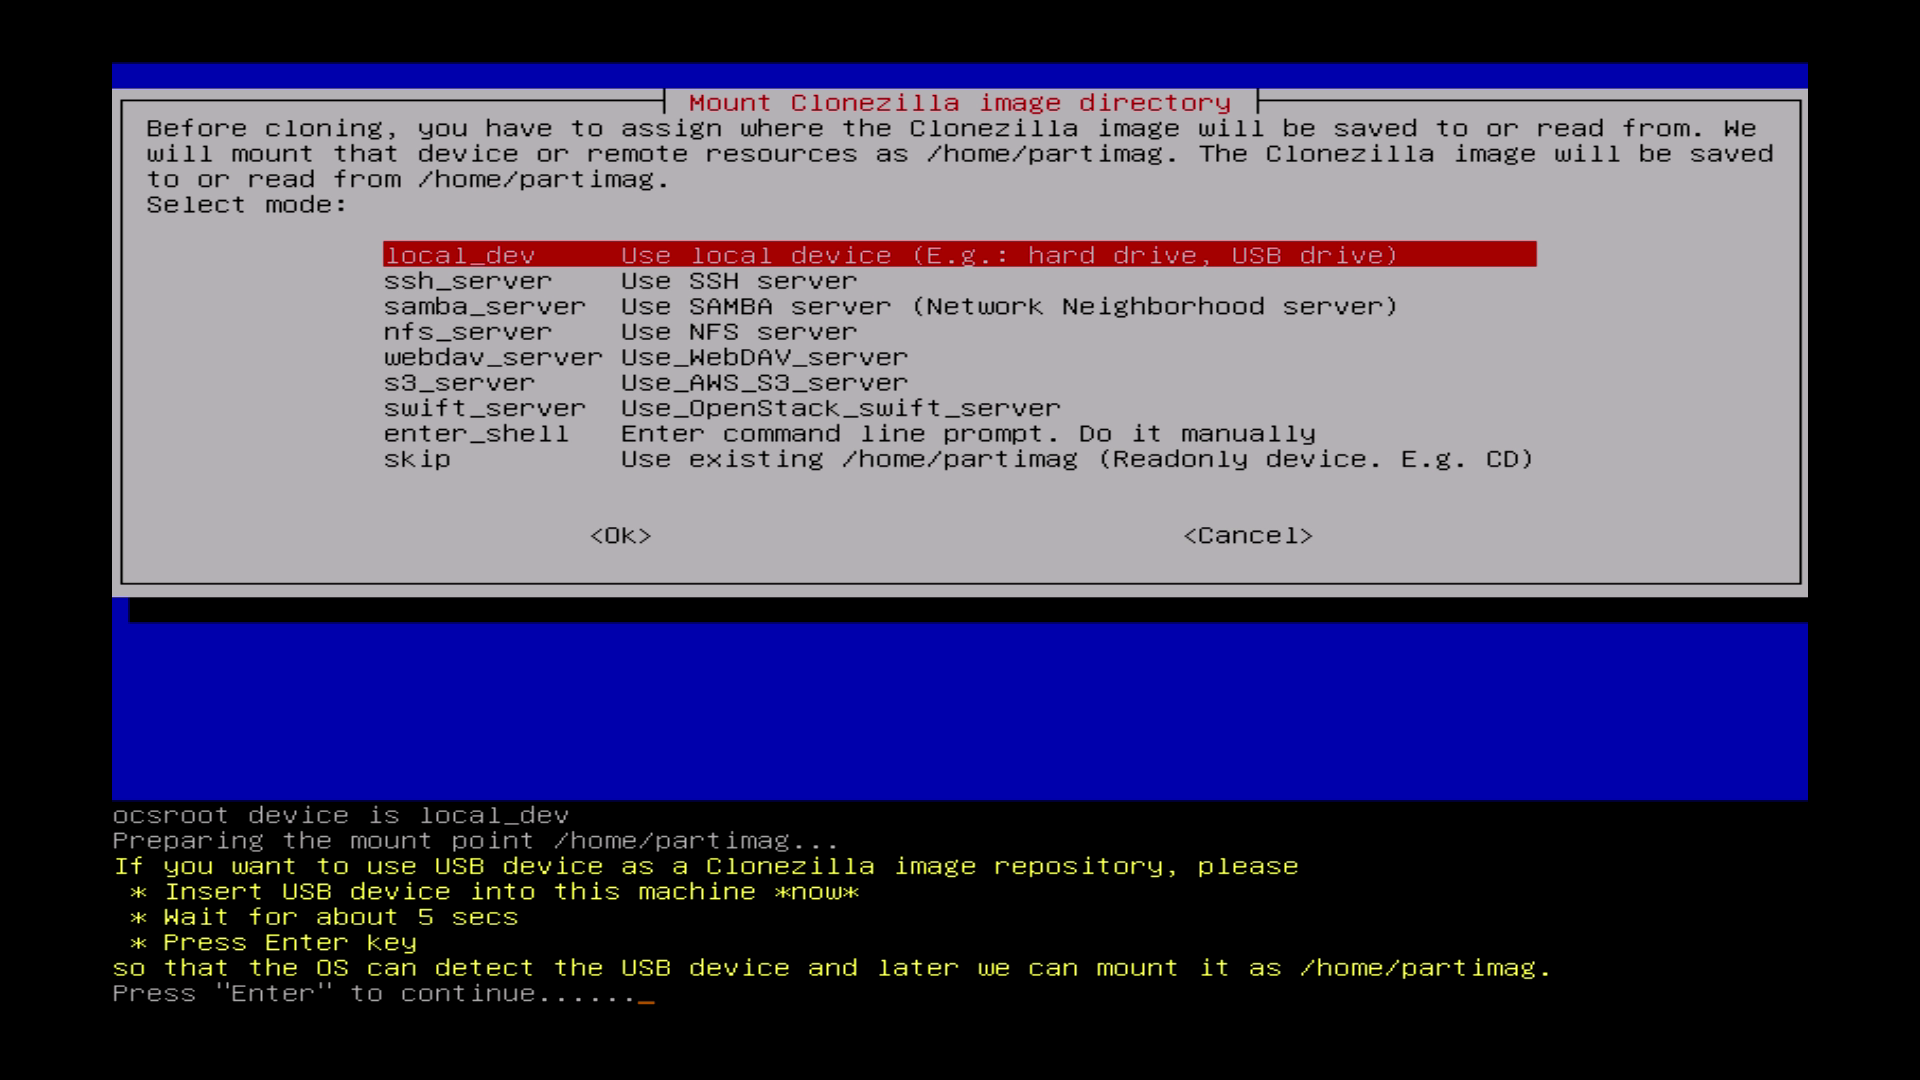
| Clonezilla is looking for drives. | Clonezilla such nach Platten. |
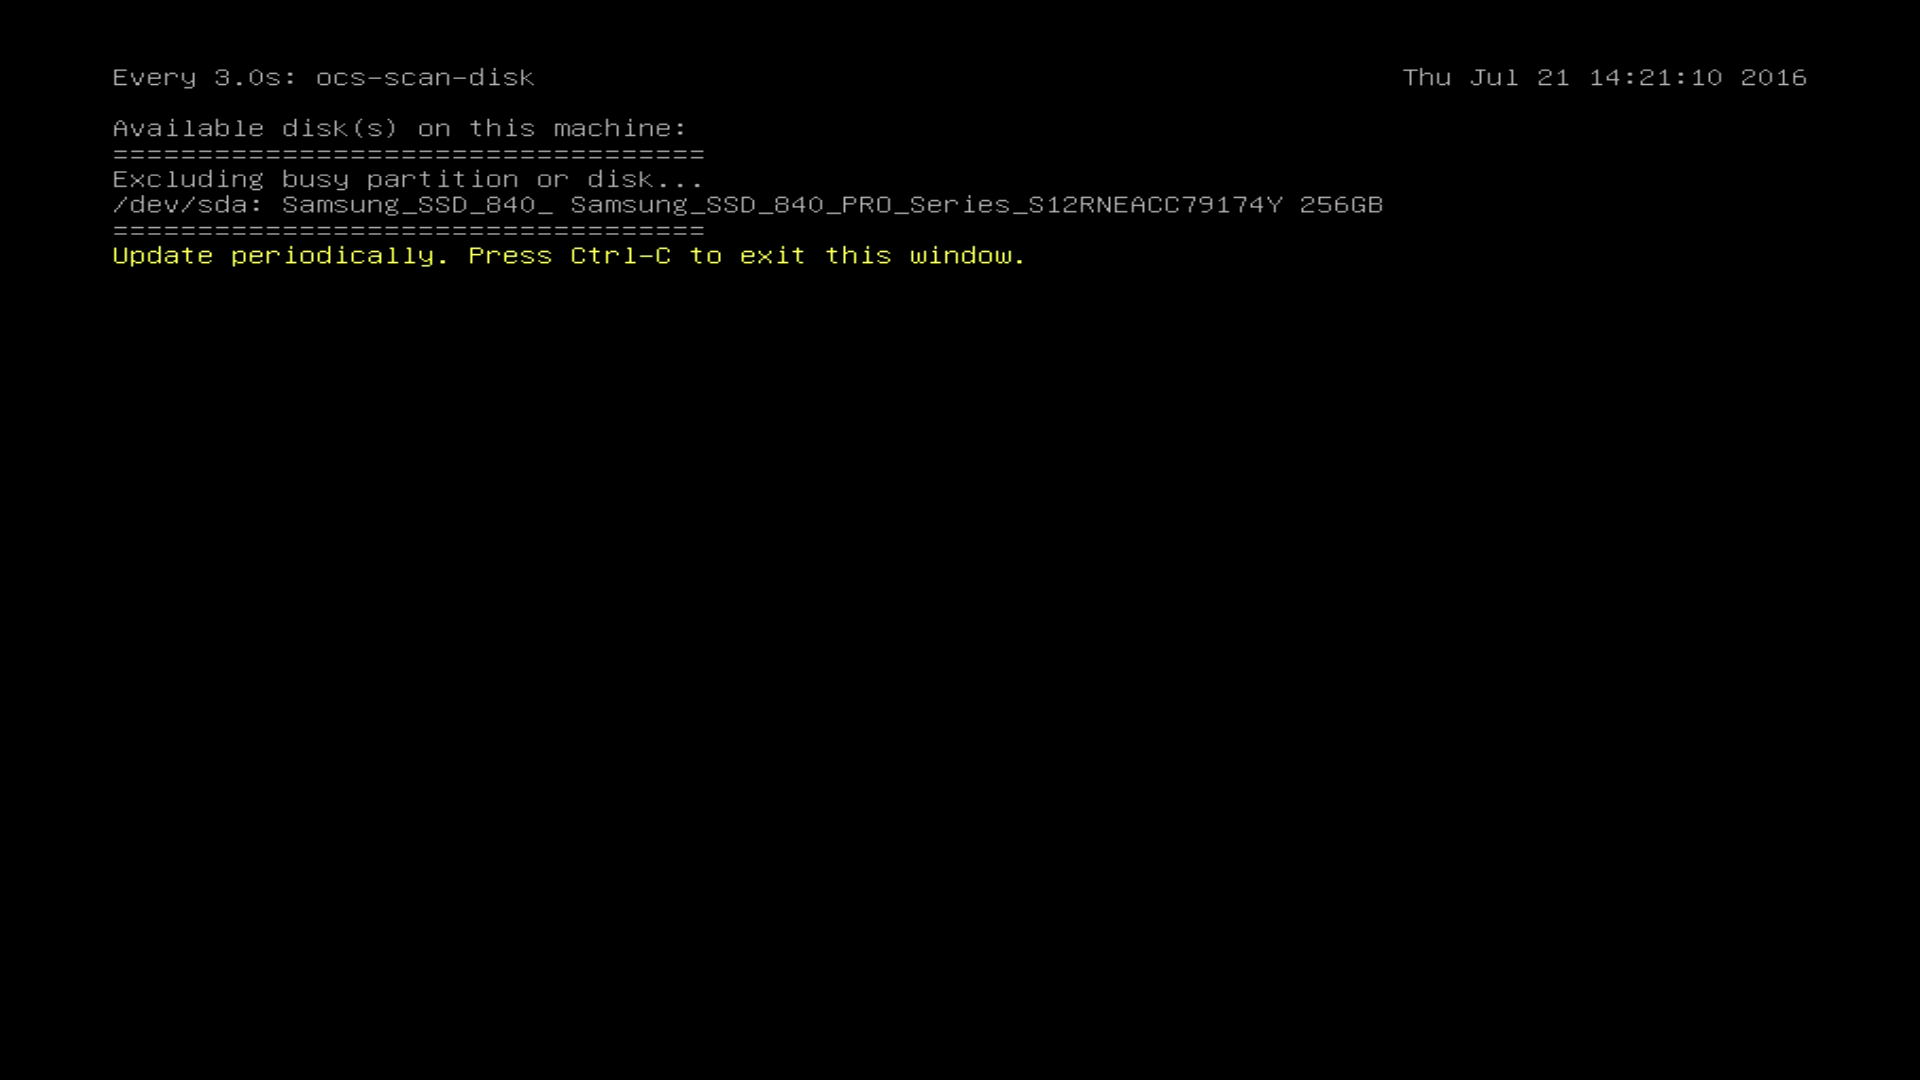
| Available disk(s) on this machine… Press Ctrl+C to exit this window. |
Verfügbare Platten in diesem PC…
Strg+C drücken, um das Fenster zu schließen. |
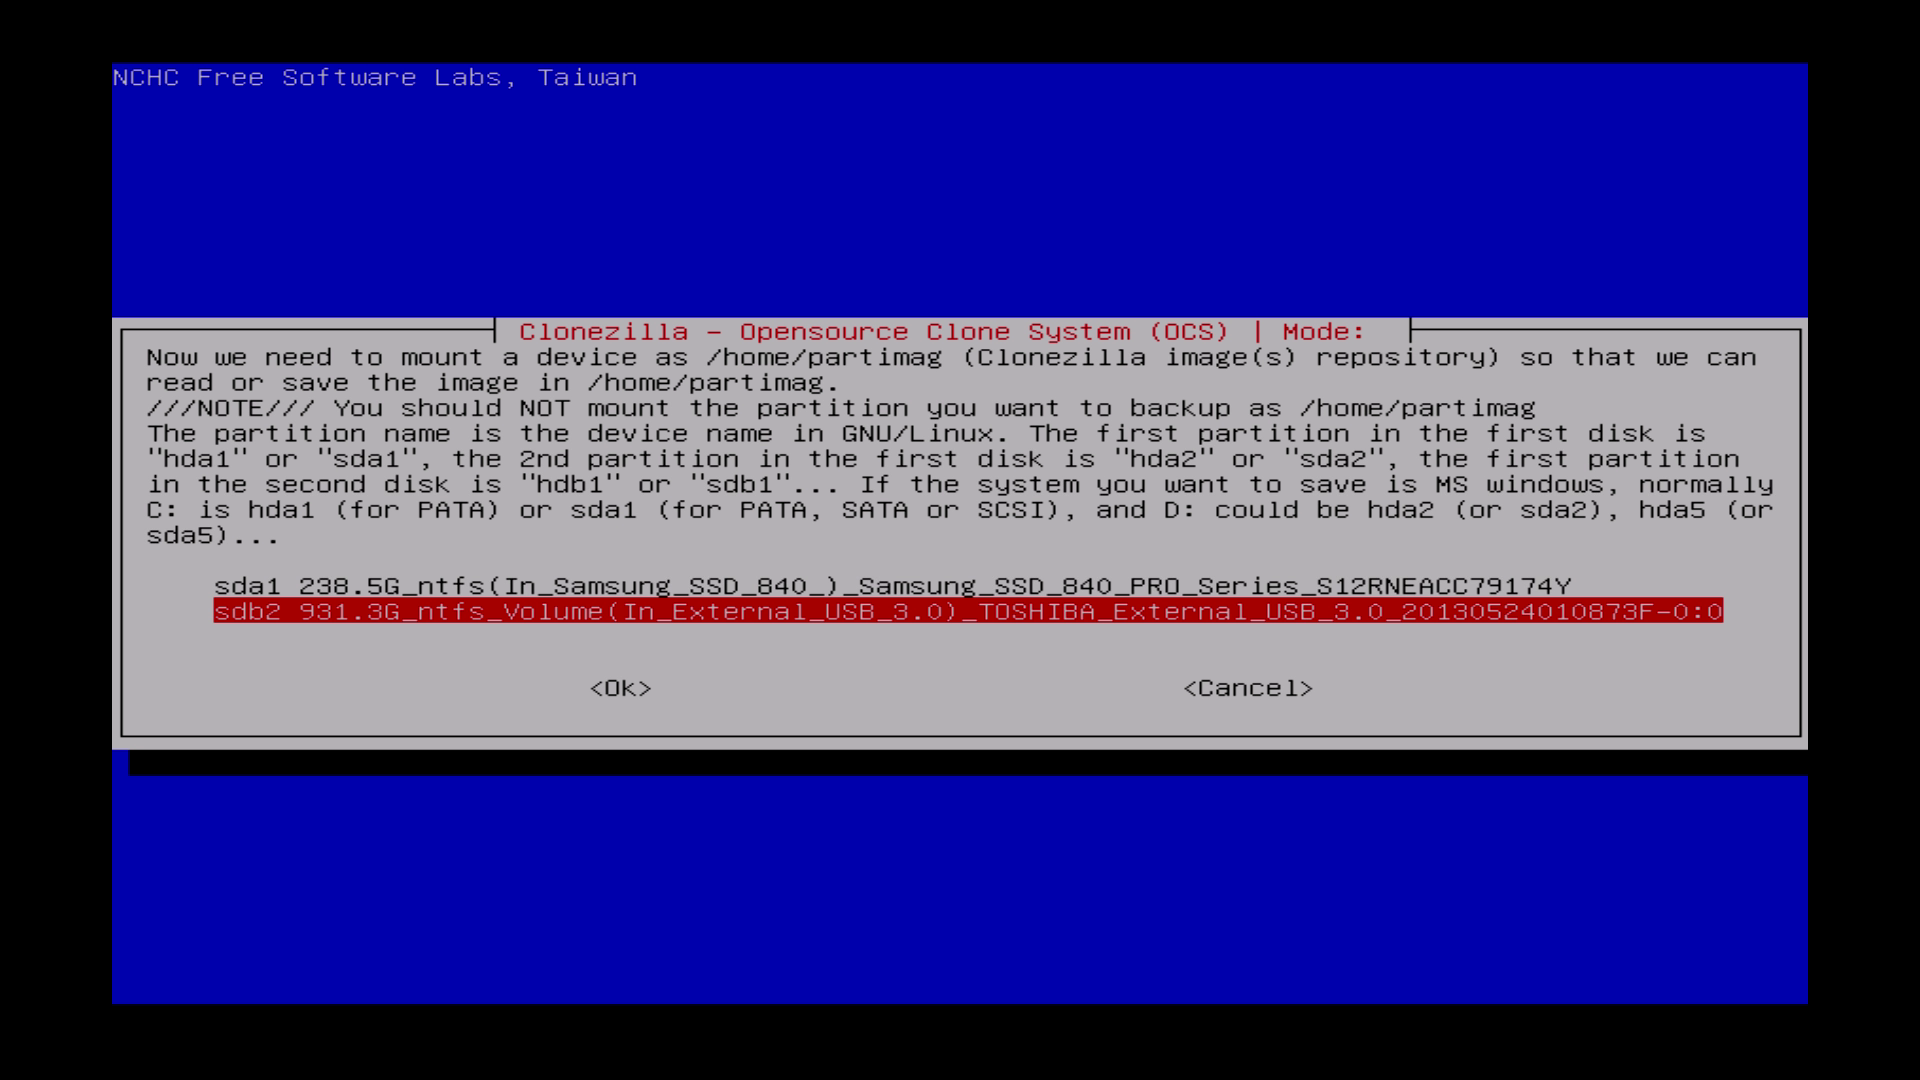
| Choose your USB-Drive to save the clone image there. | USB-Platte auswählen um das Image der Platte dort zu speichern. |
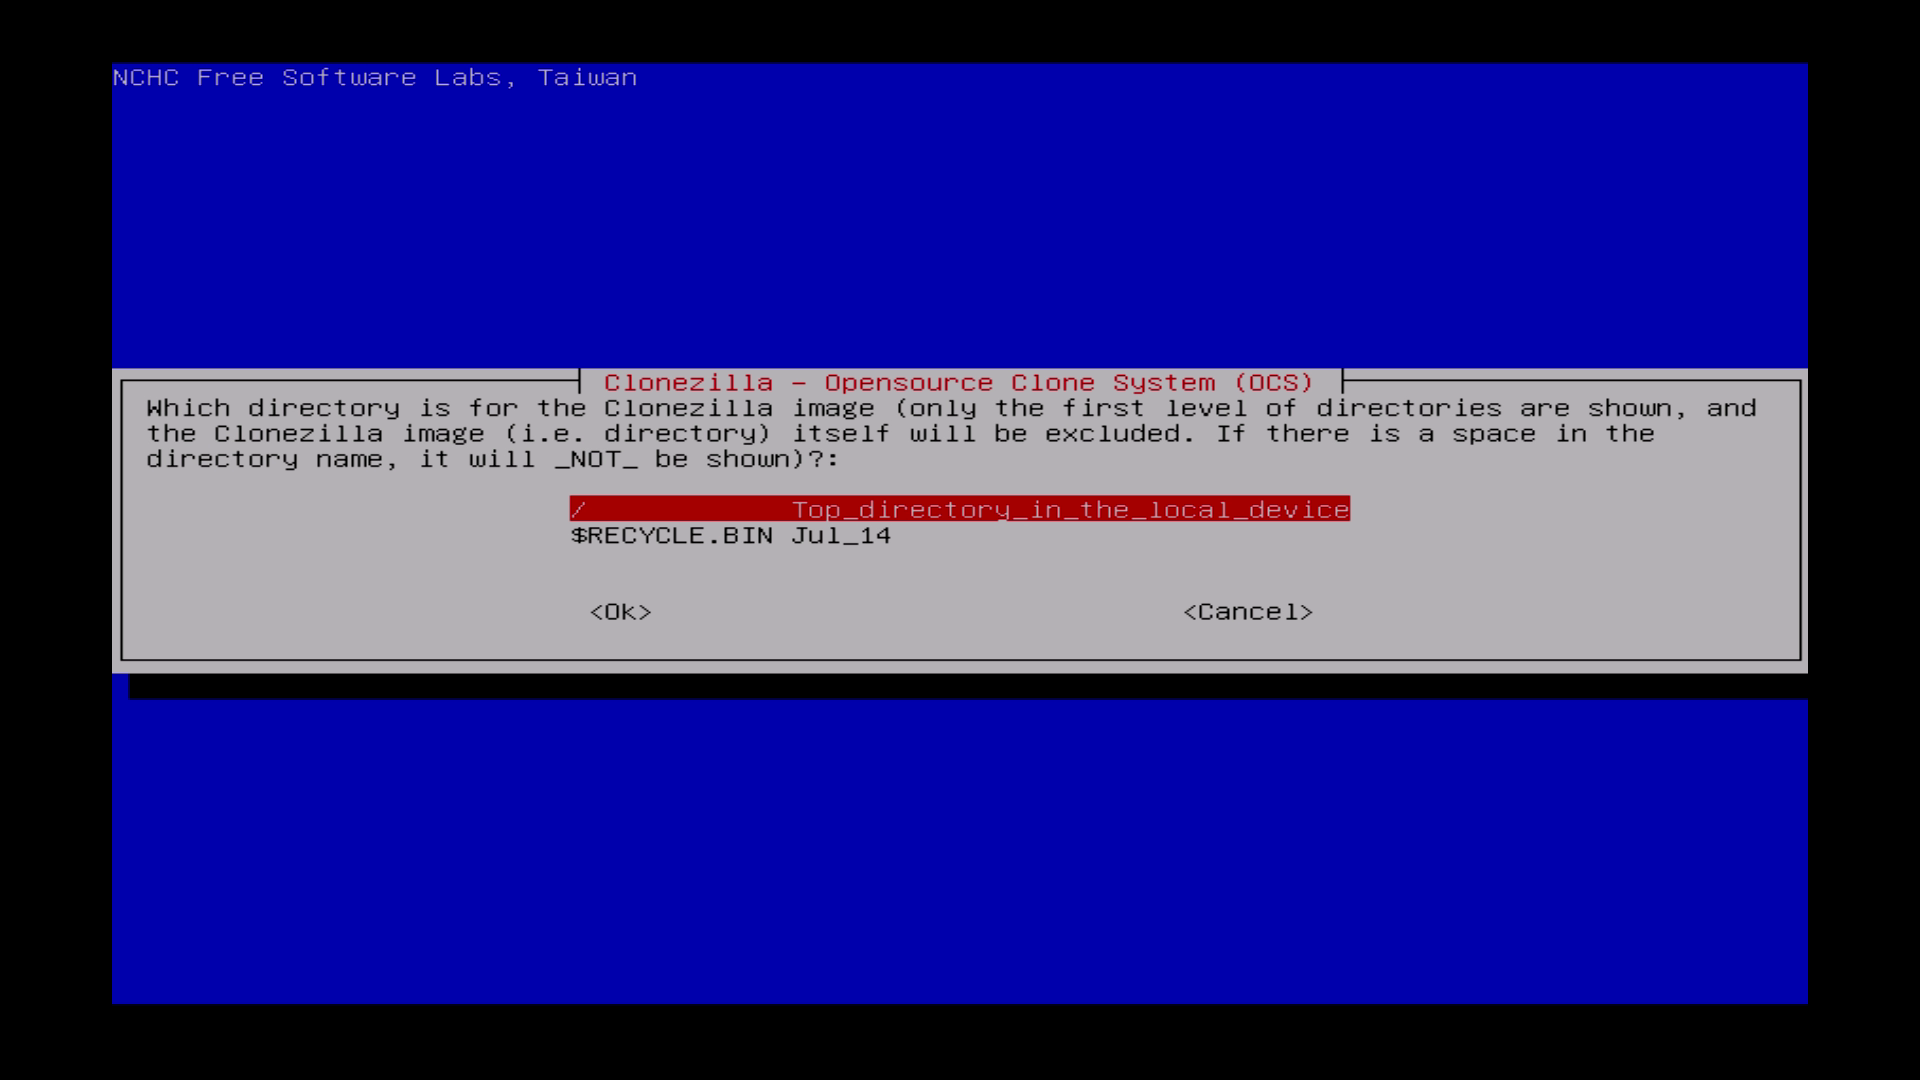
| Choose „Top_directory…“ | Hier „Top_directory…“ auswählen. |
| Press „Enter“. | „Enter“ Drücken. |
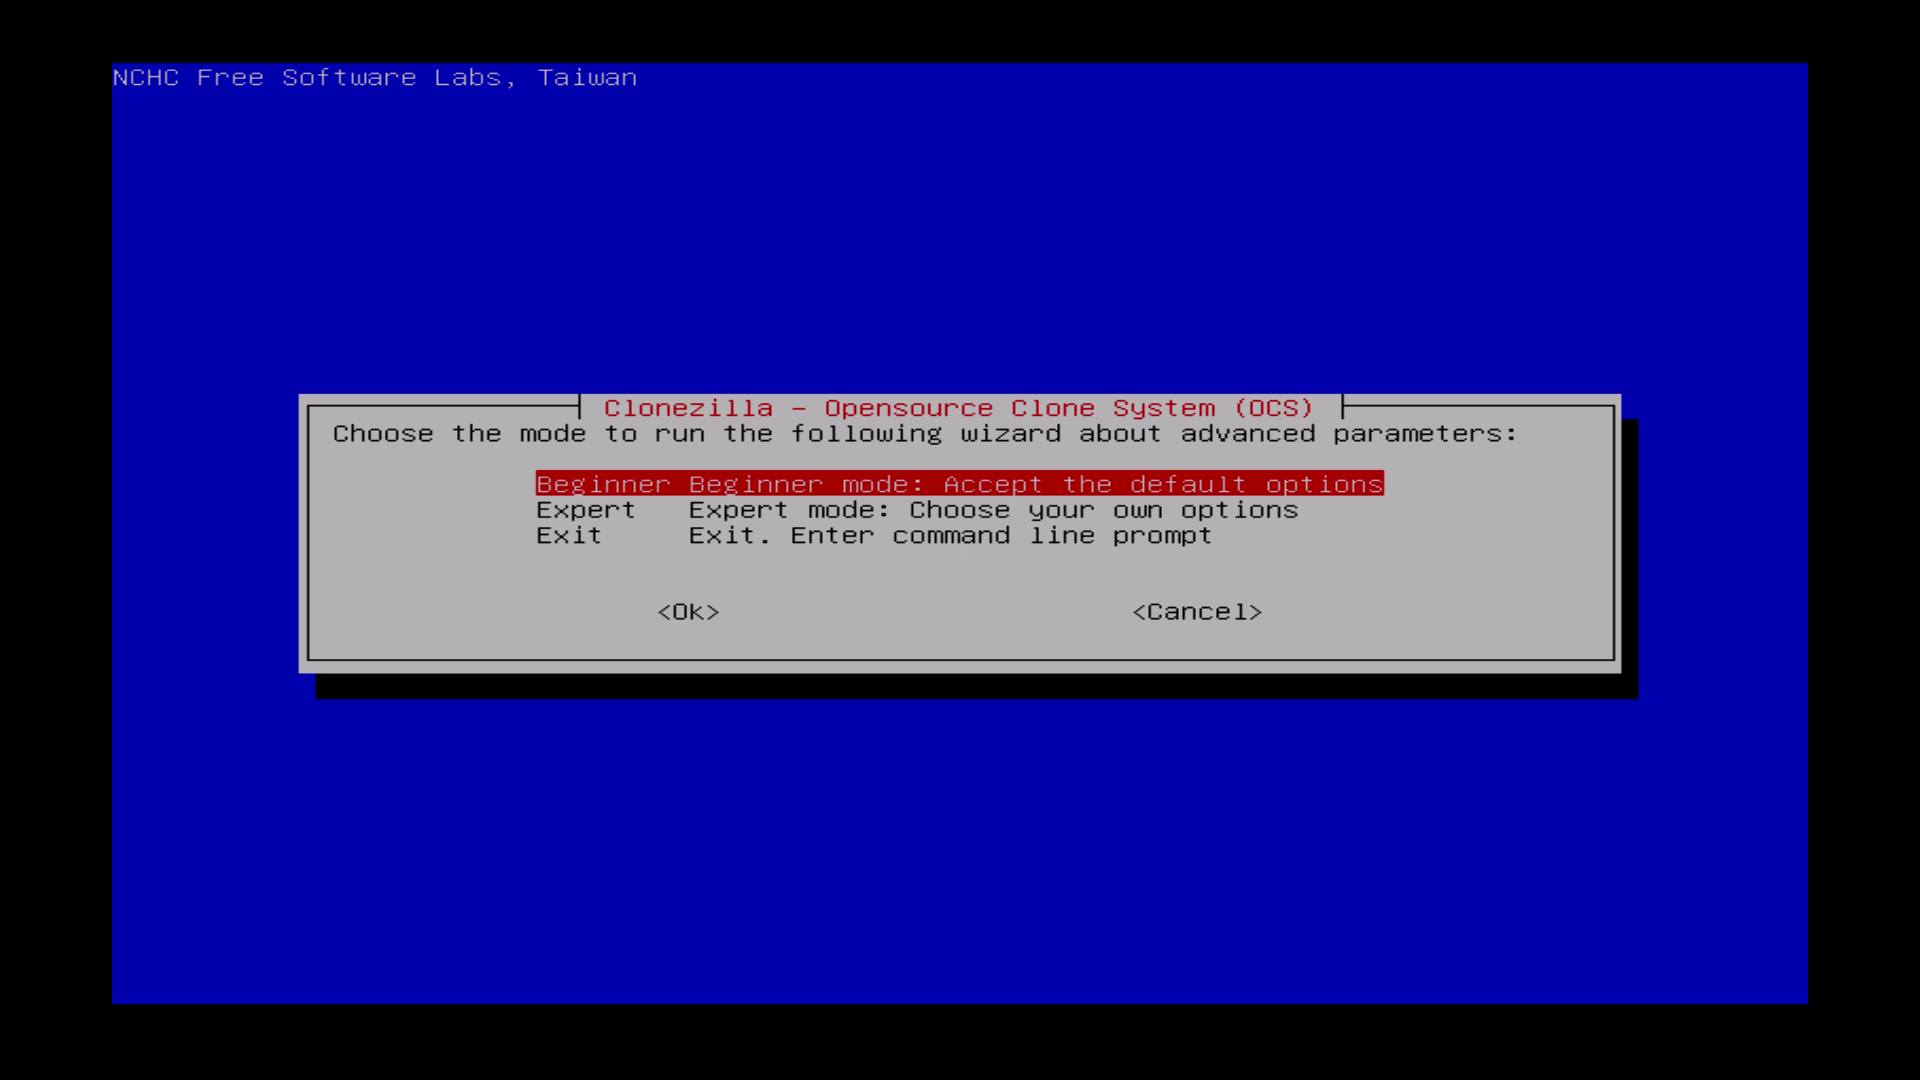
| Choose „Beginner“ | „Beginner“ wählen. |
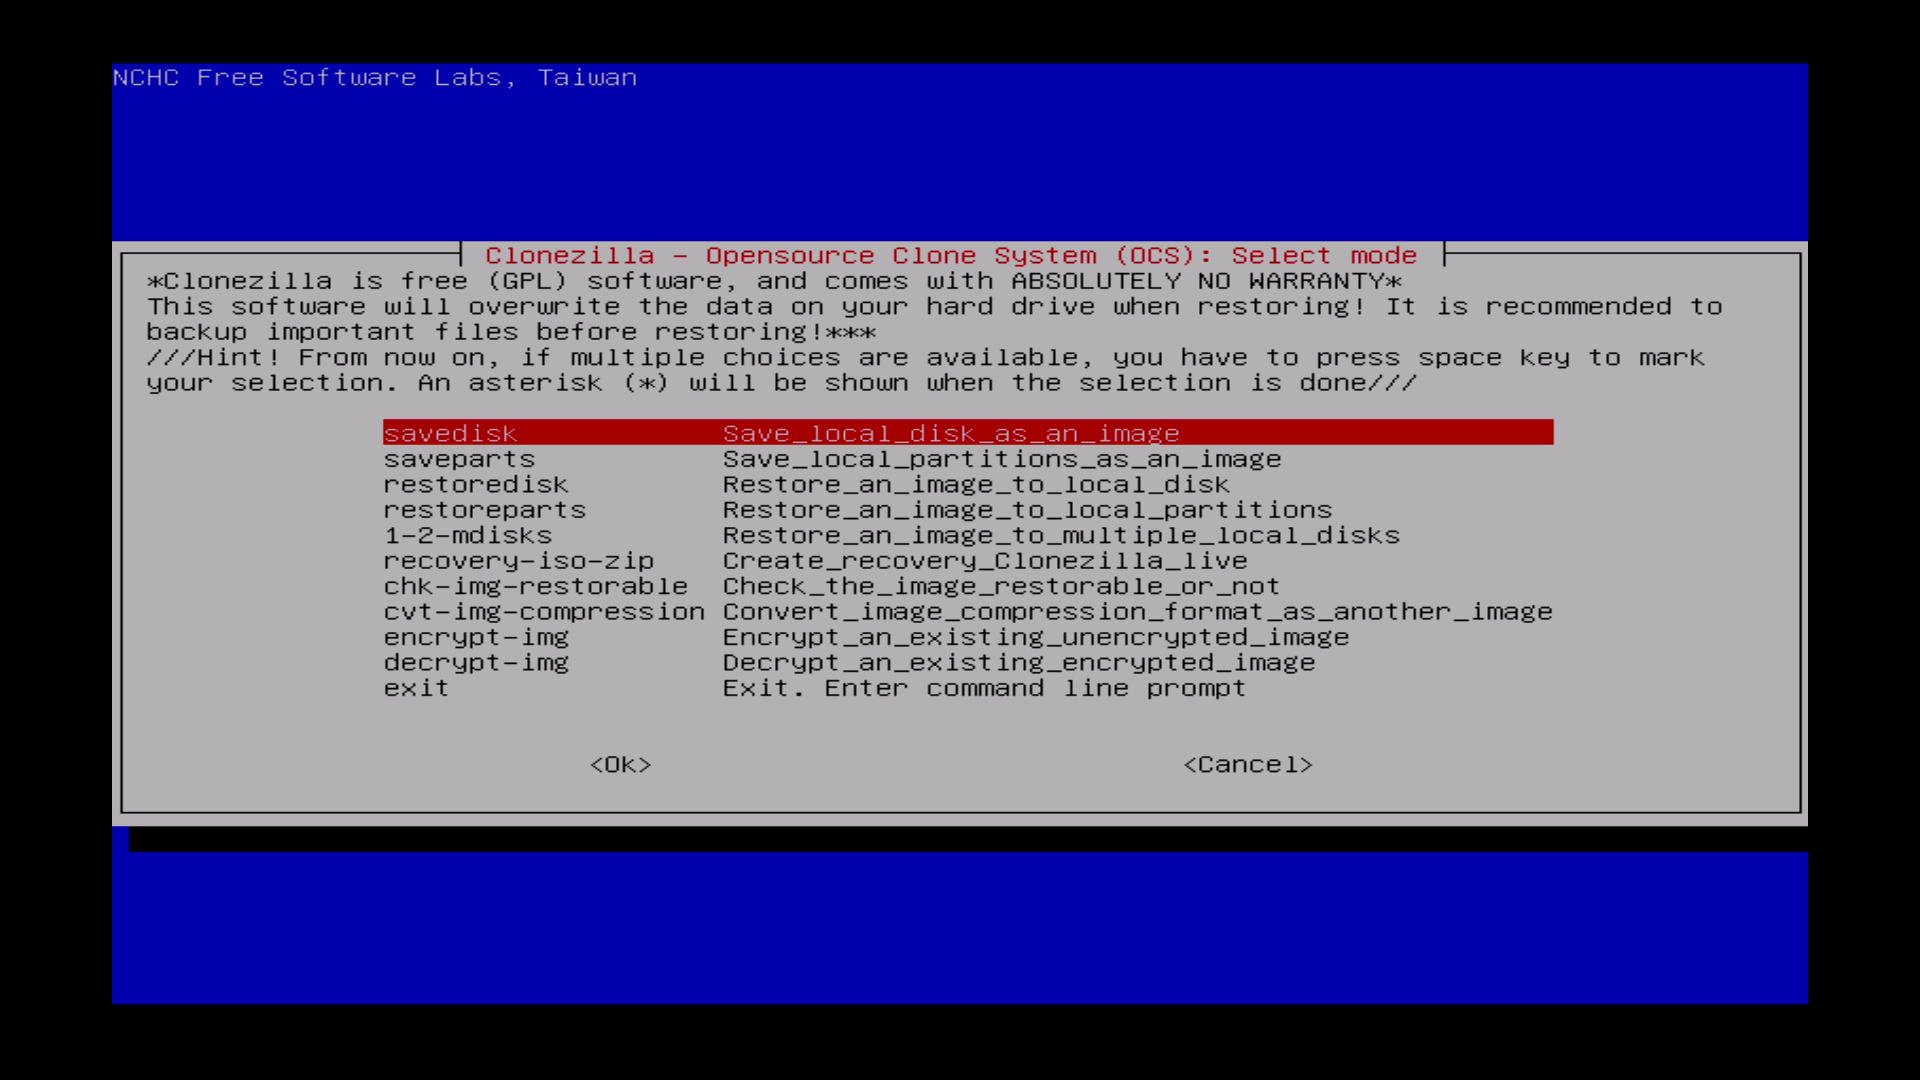
| Choose „savedisk“ | Hier bitte „savedisk“ auswählen. |
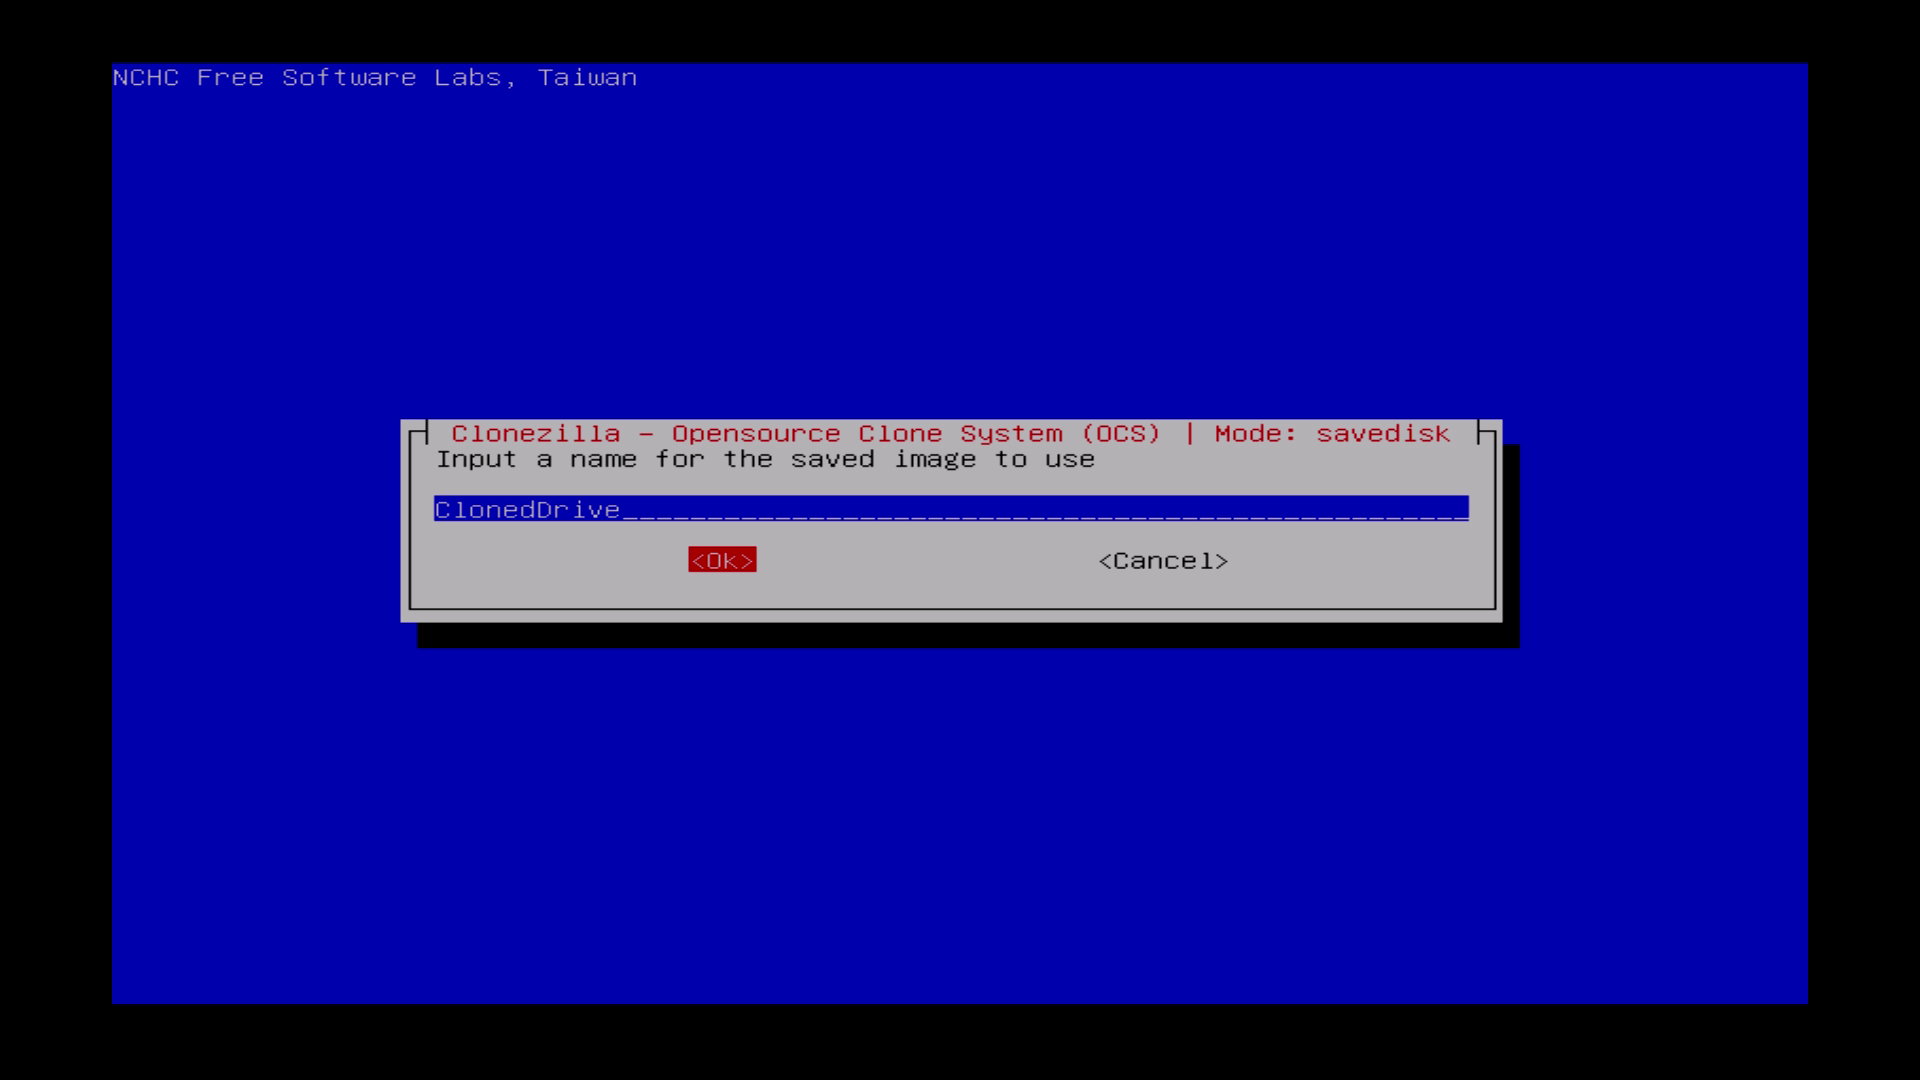
| Insert a name for your new image and hit “Enter”. | Nun einen Namen für das neue Image eingeben und mit „Enter“ bestätigen. |
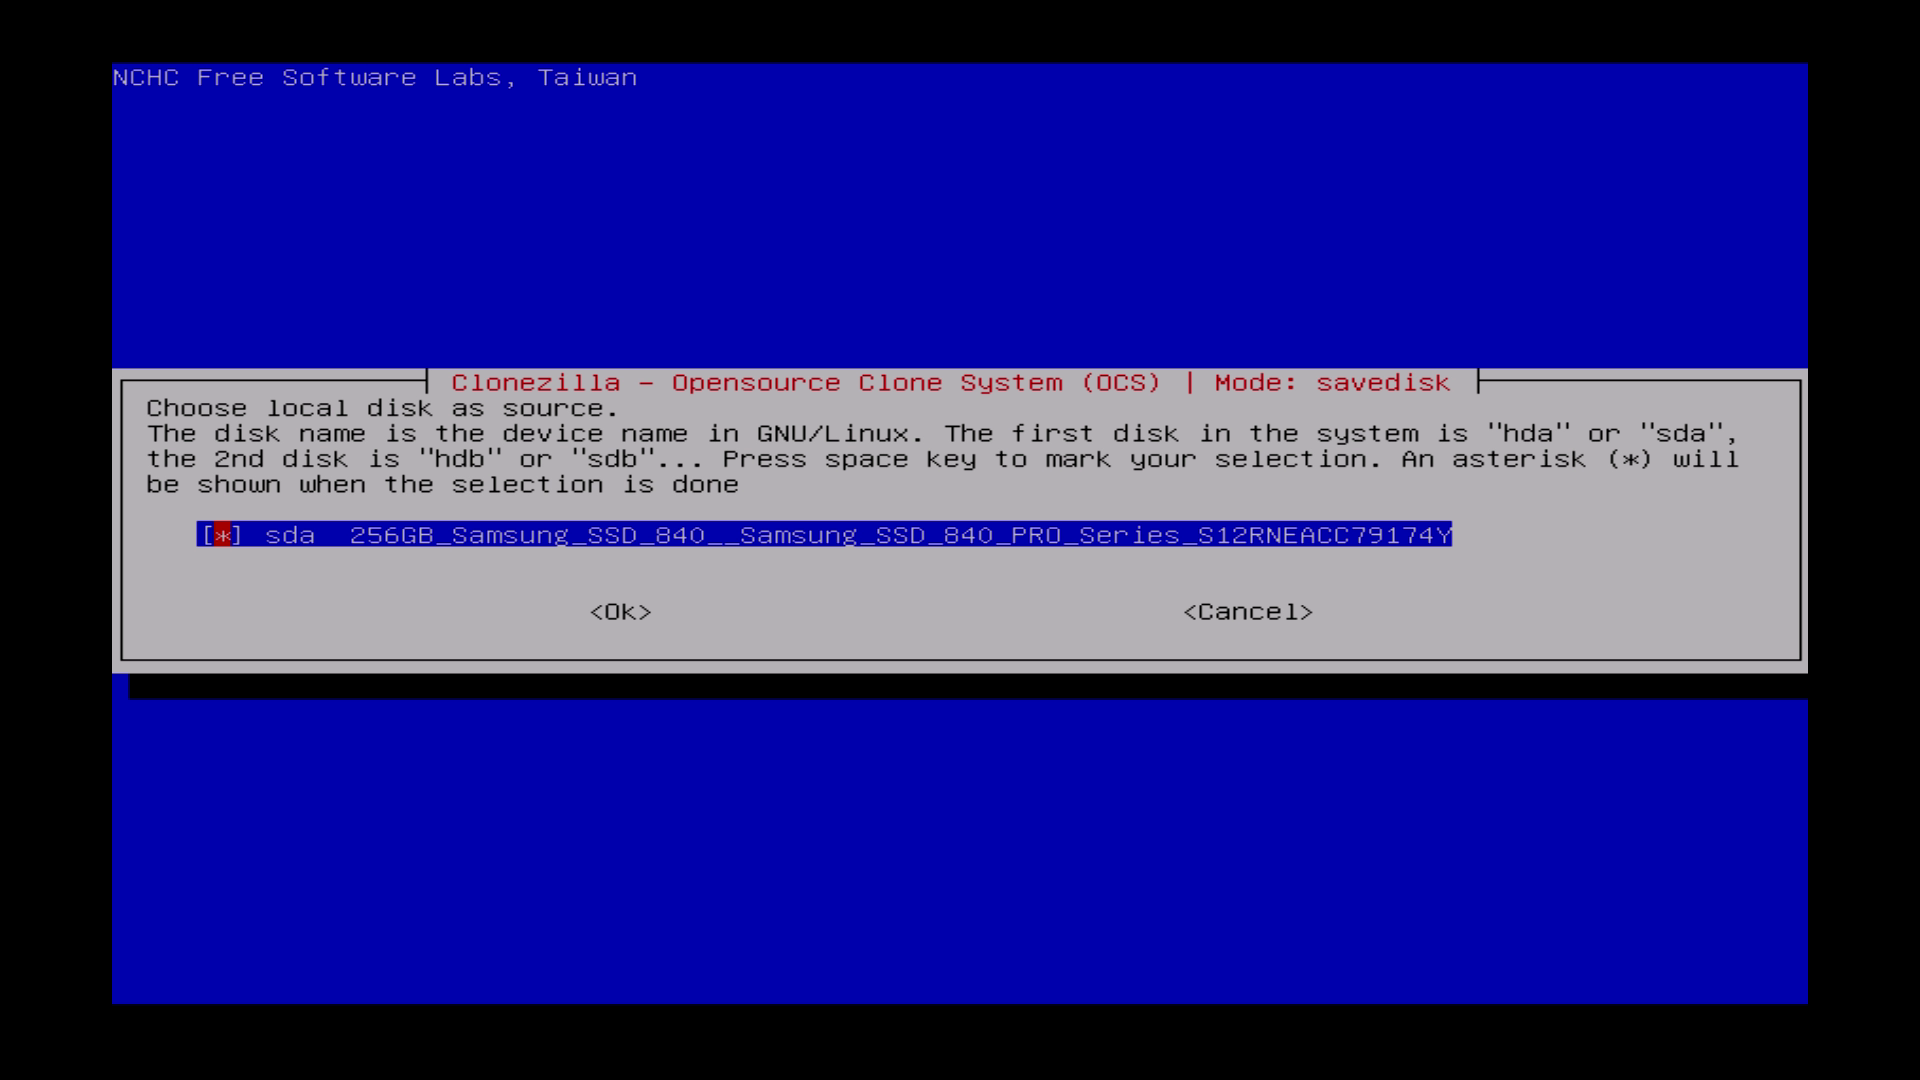
| Choose your local disk as source. | Die lokale Festplatte als Quelle auswählen. |
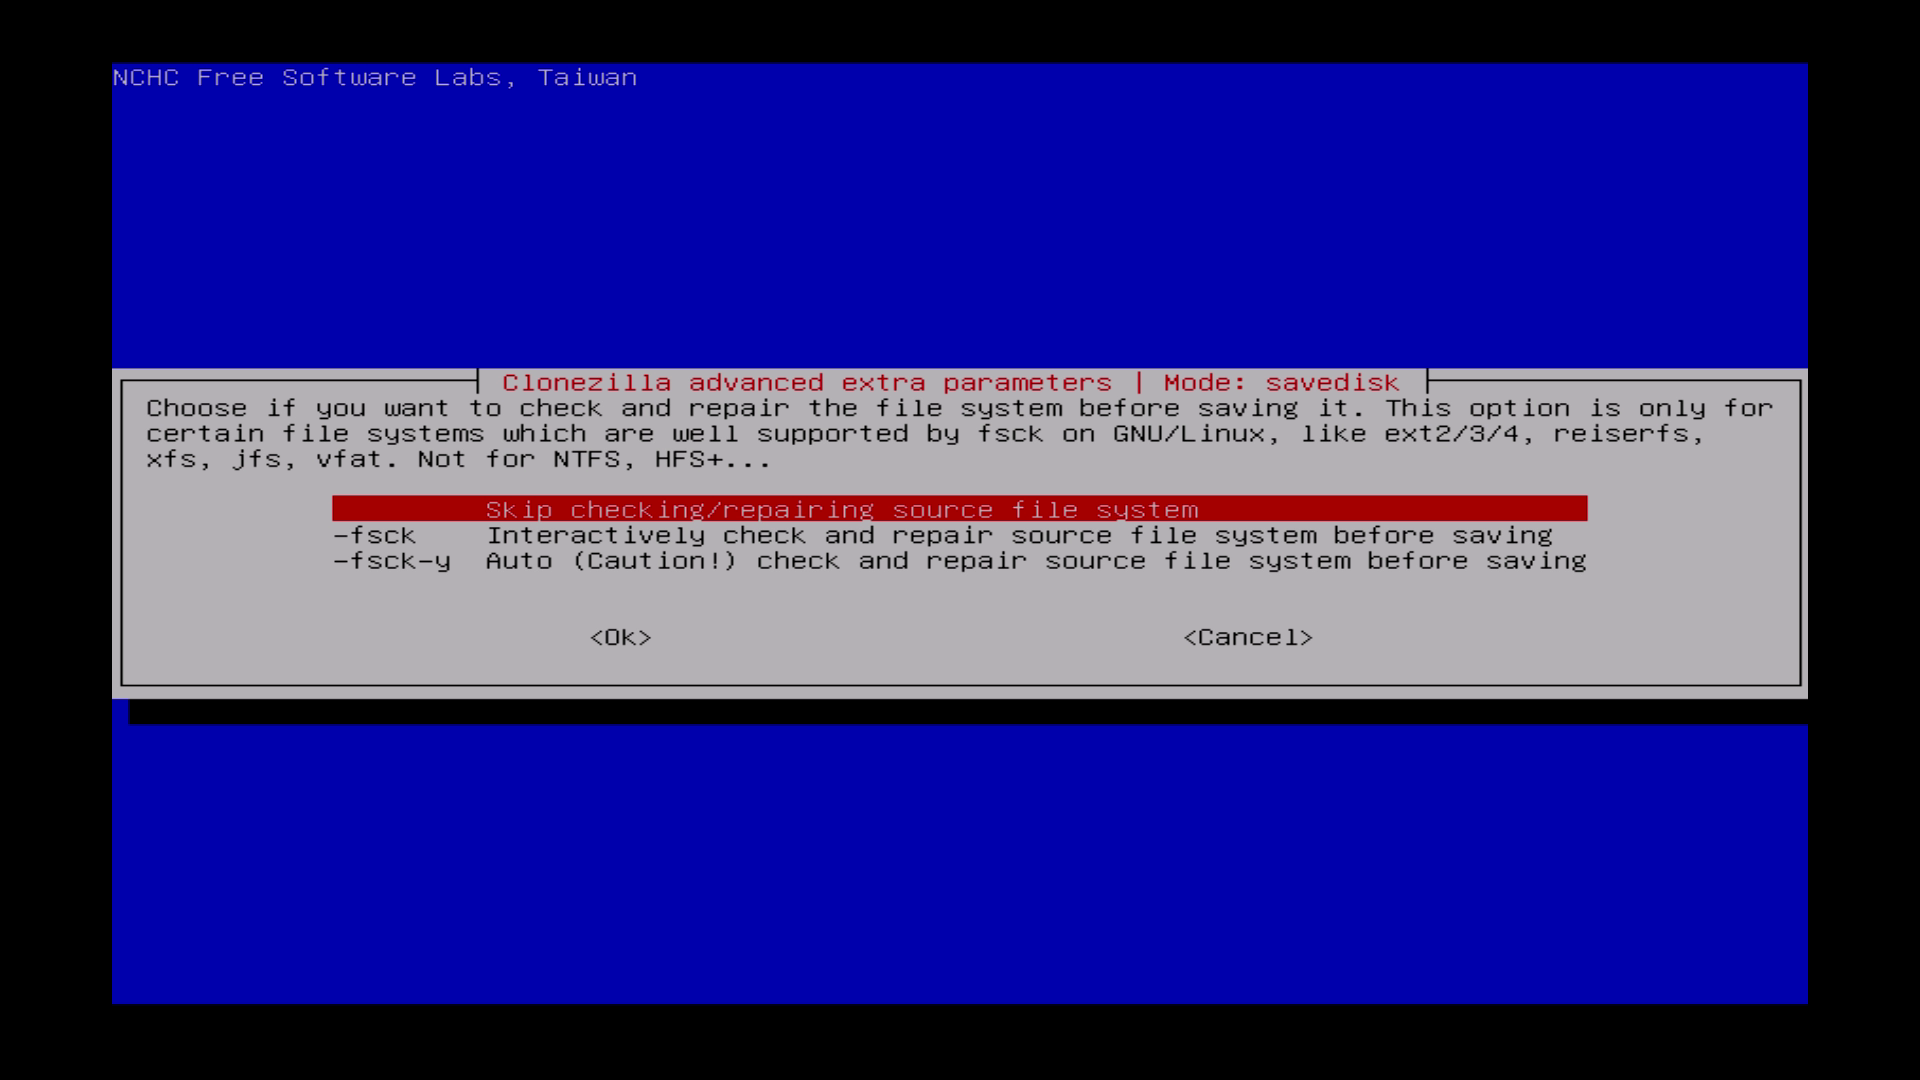
| Skip the checking/repairing. | Hier „Skip“ wählen, da die Überprüfung sehr viel Zeit in Anspruch nimmt. Bestätigen. |
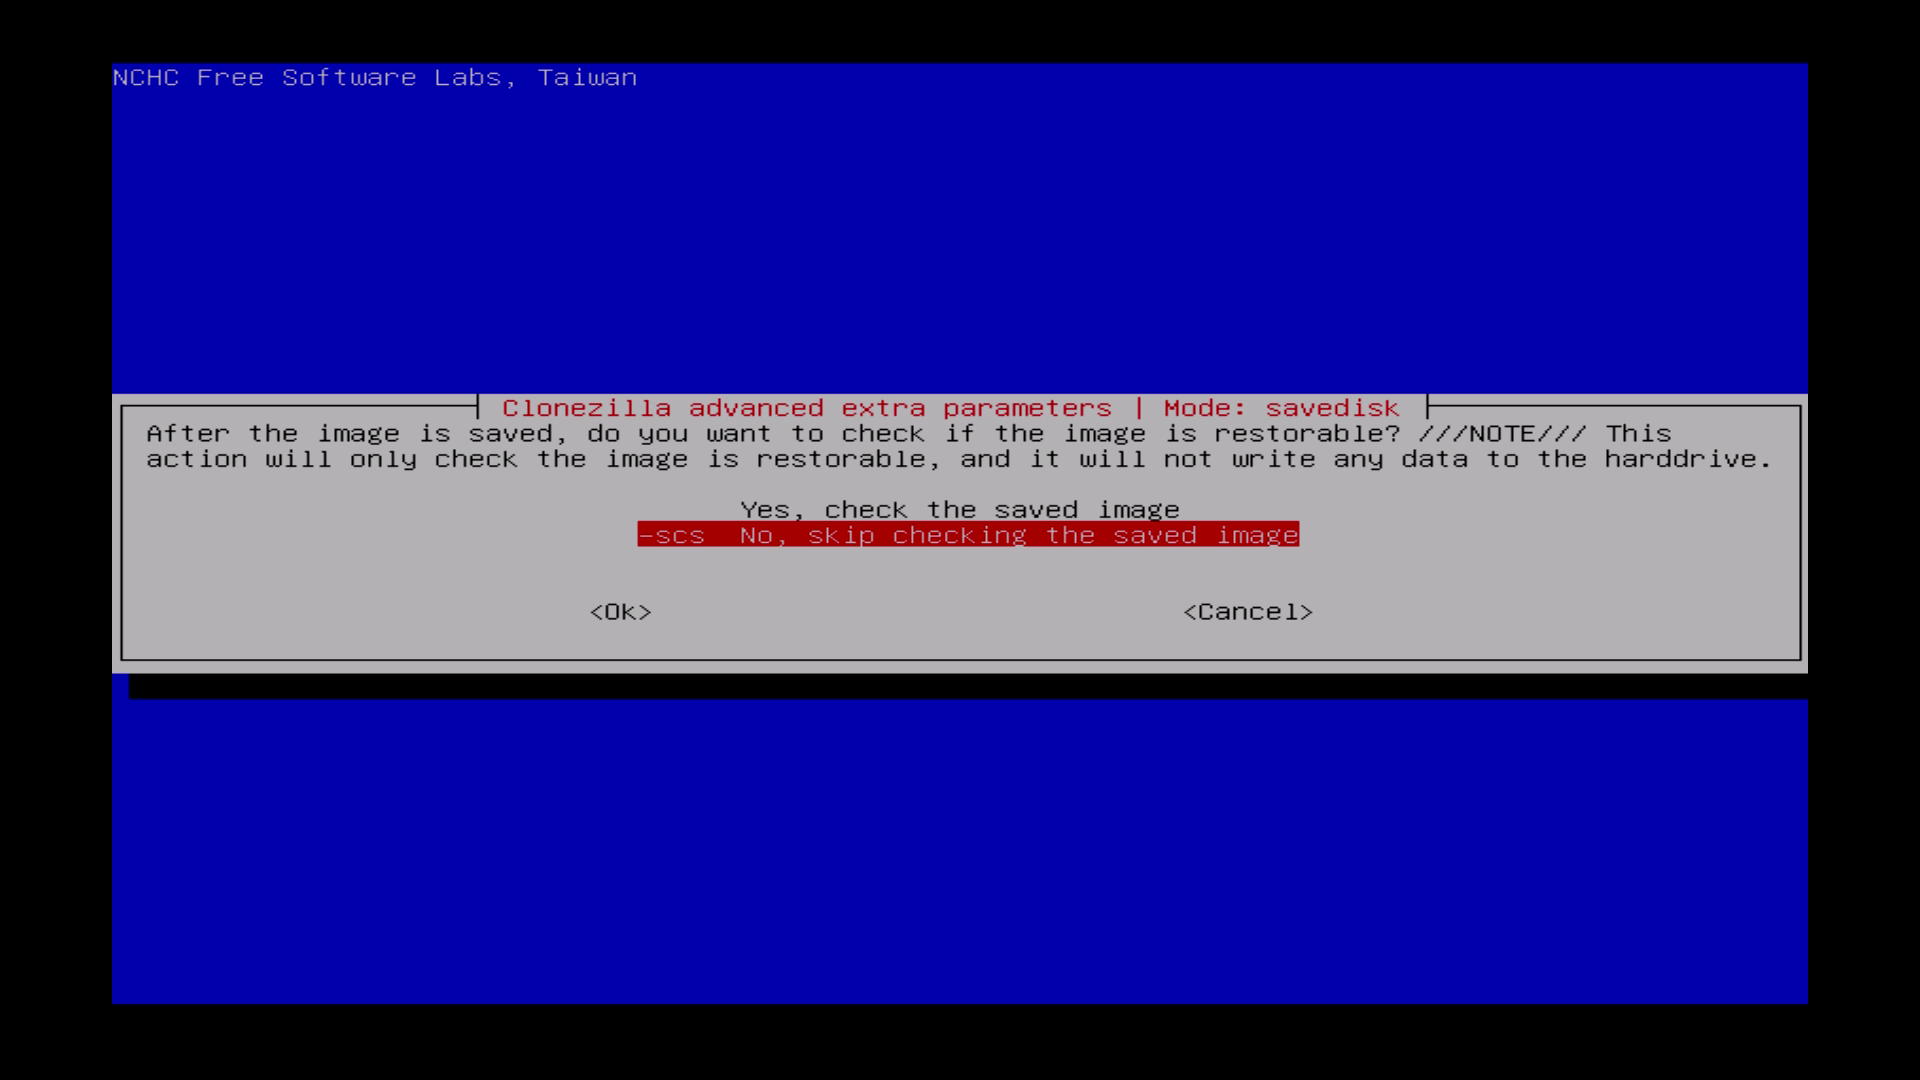
| Skip checking the saved image. | Das gespeicherte Image nicht auf Fehler prüfen. „No, skip…“ auswählen. |
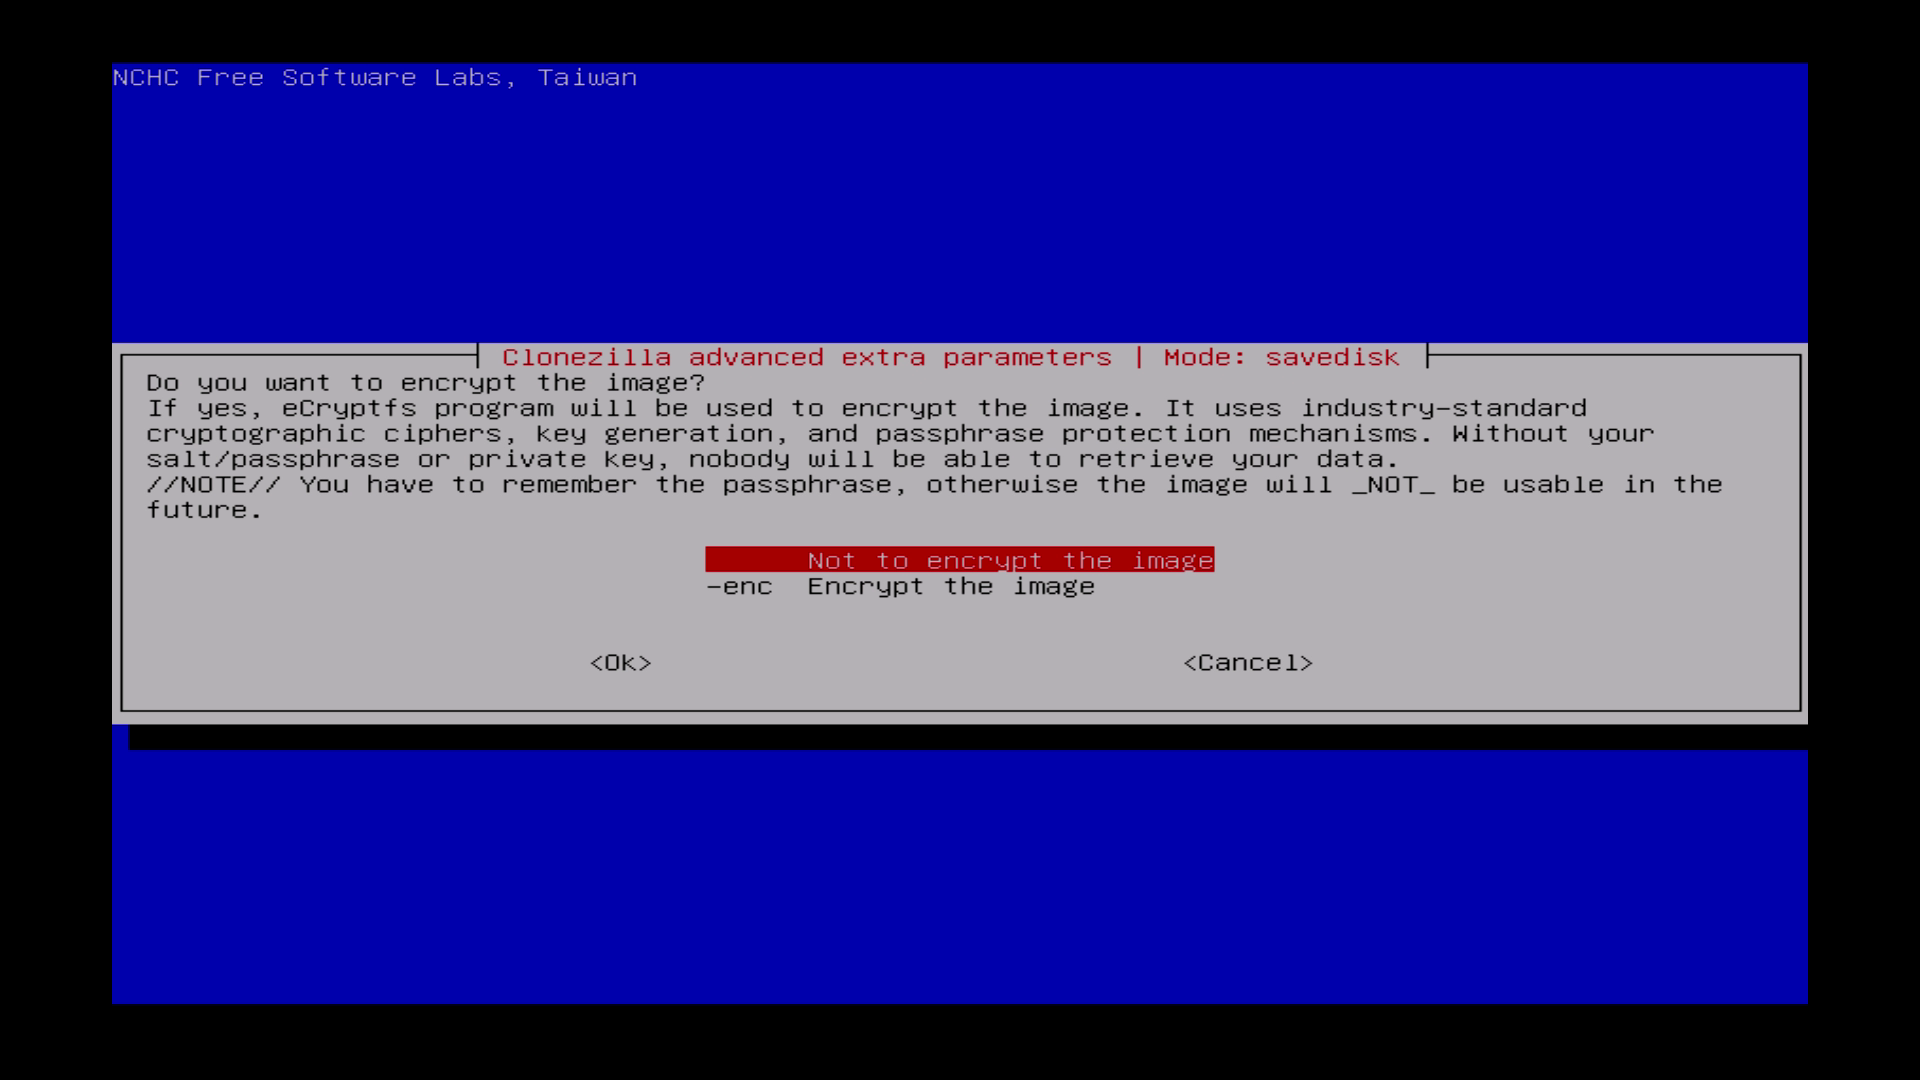
| Choose „not to encrypt the image“ | „Not to encrypt the image“ auswählen. |
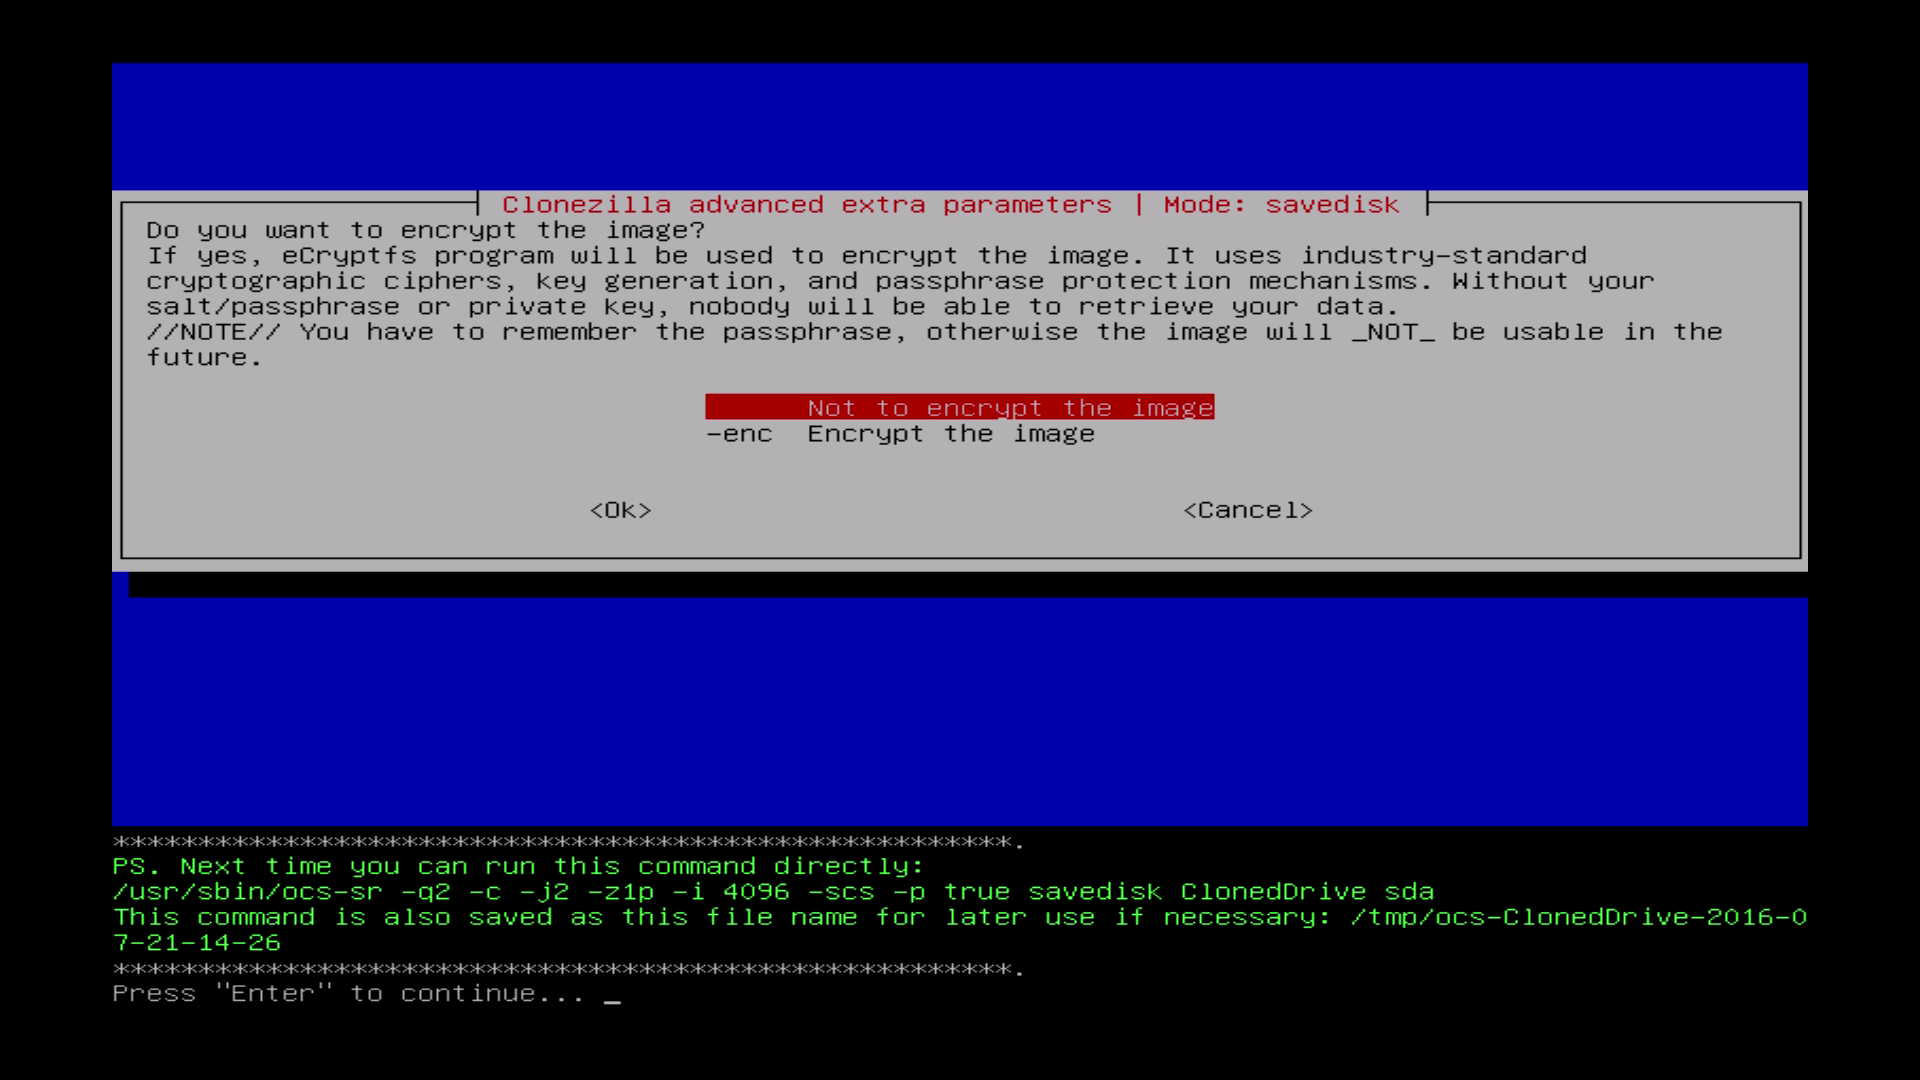
| Press Enter. | Einmal „Enter“ Drücken. |
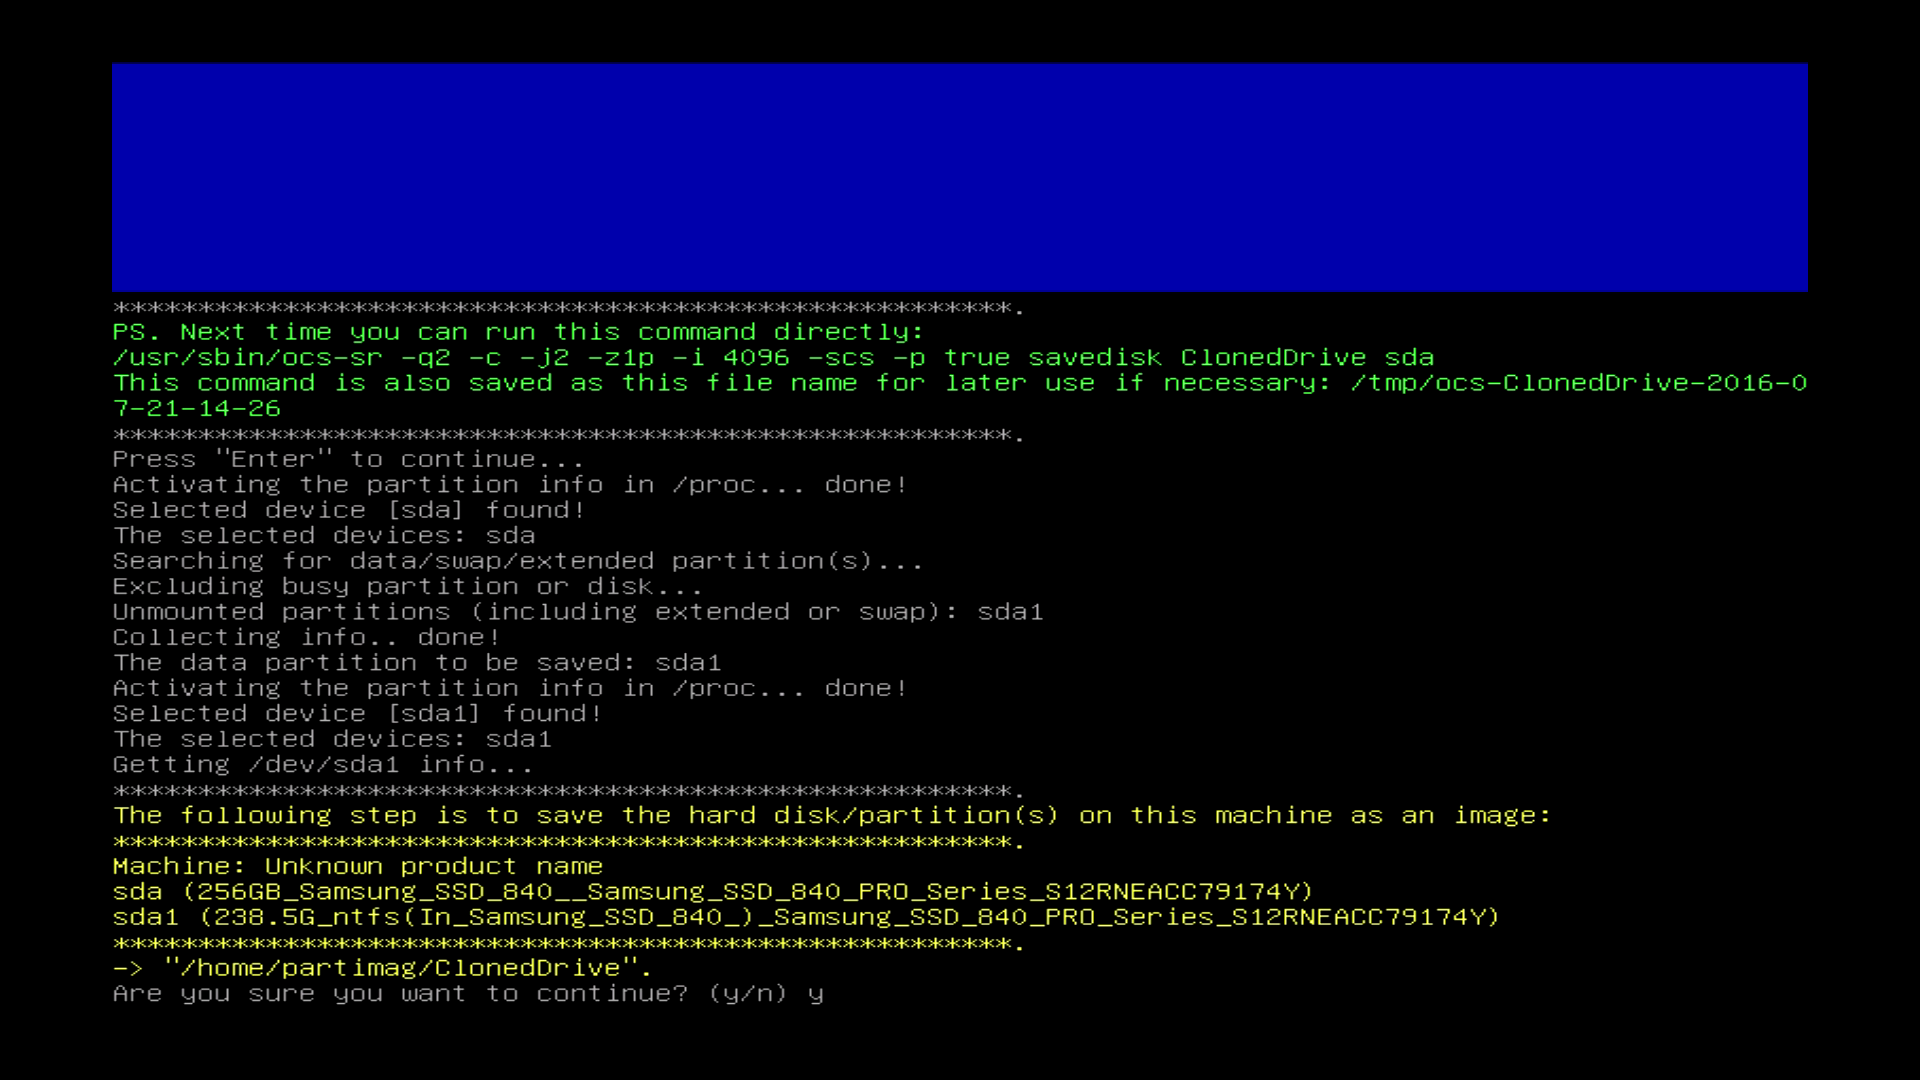
| Confirm with „y.“ | Mit „y“ bestätigen. Hier auf das Tastaturlayout achten, je nach Wahl am Anfang y oder z drücken. |
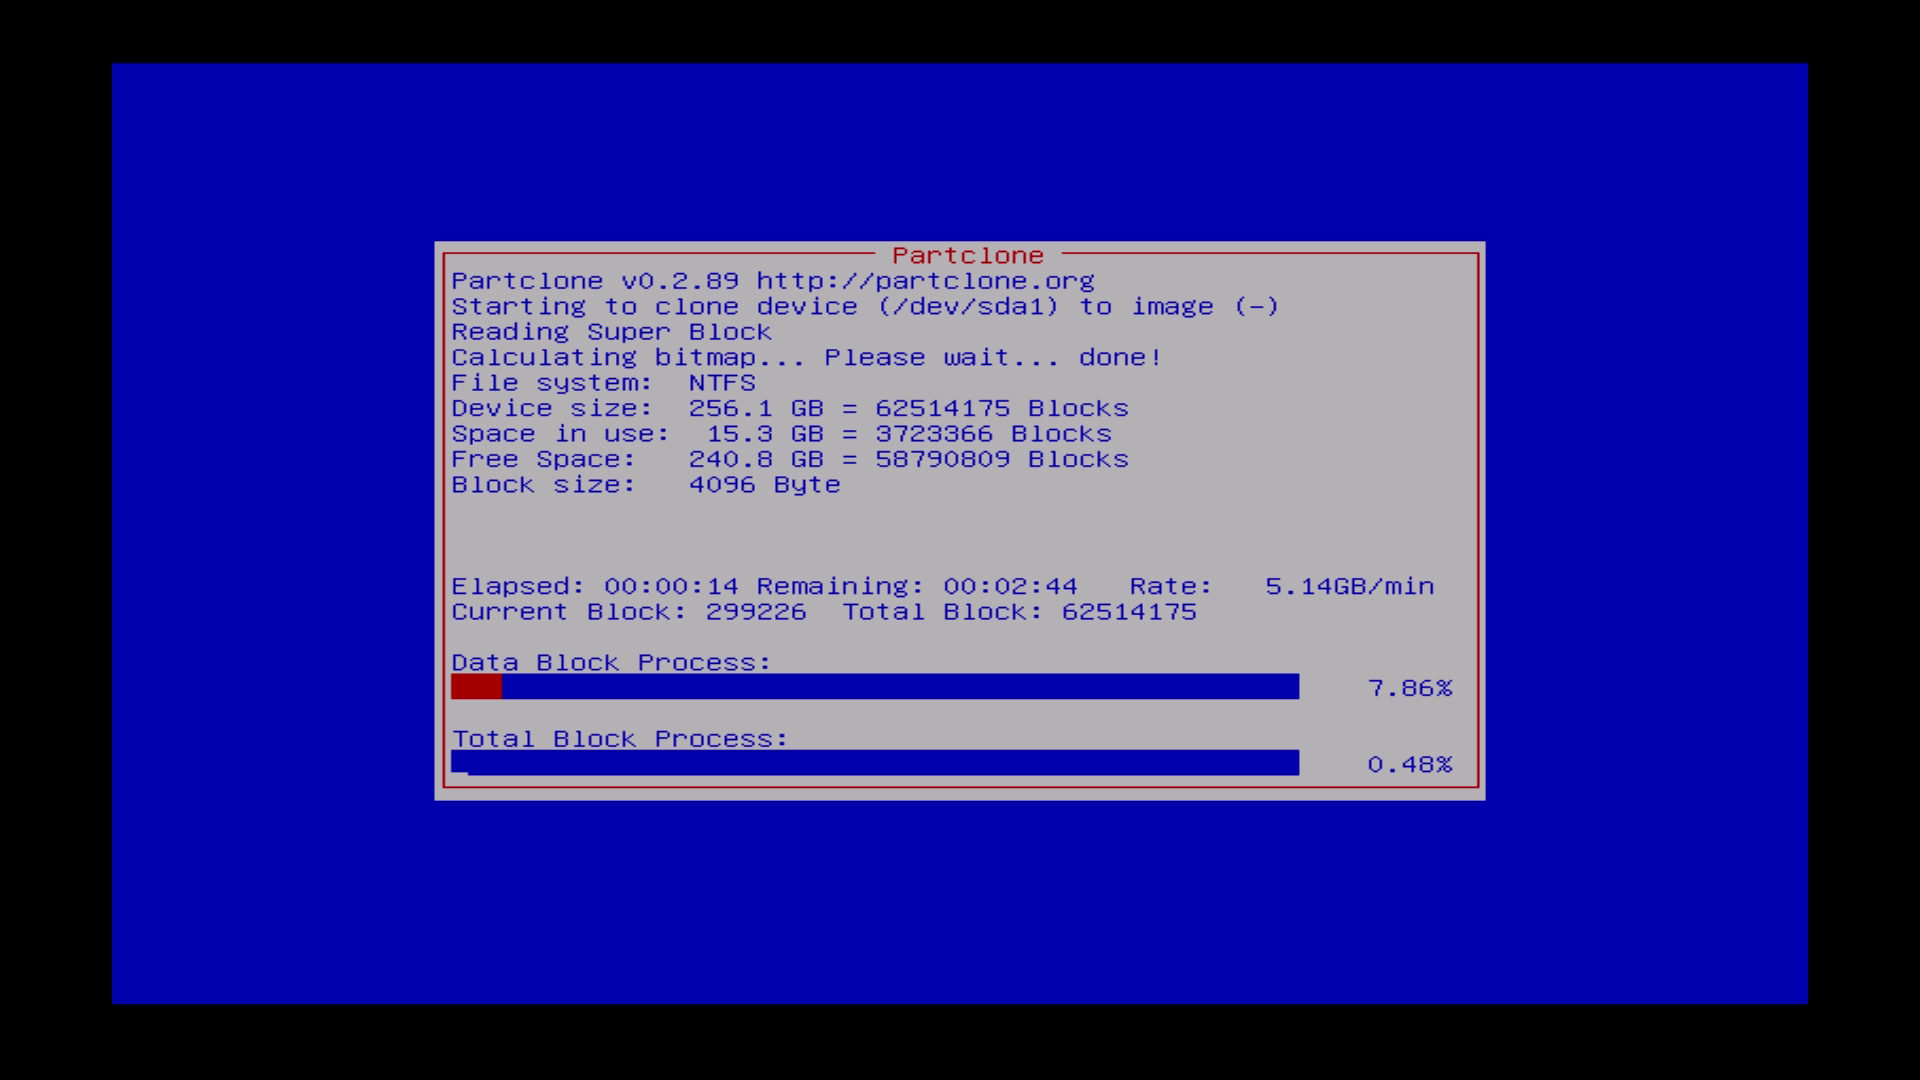
| Clonezilla is cloning now. It will take some time – depends on how big the source is. | Clonezilla klont nun die Festplatte auf das USB-Laufwerk. Das kann je nach Größe etwas dauern. |
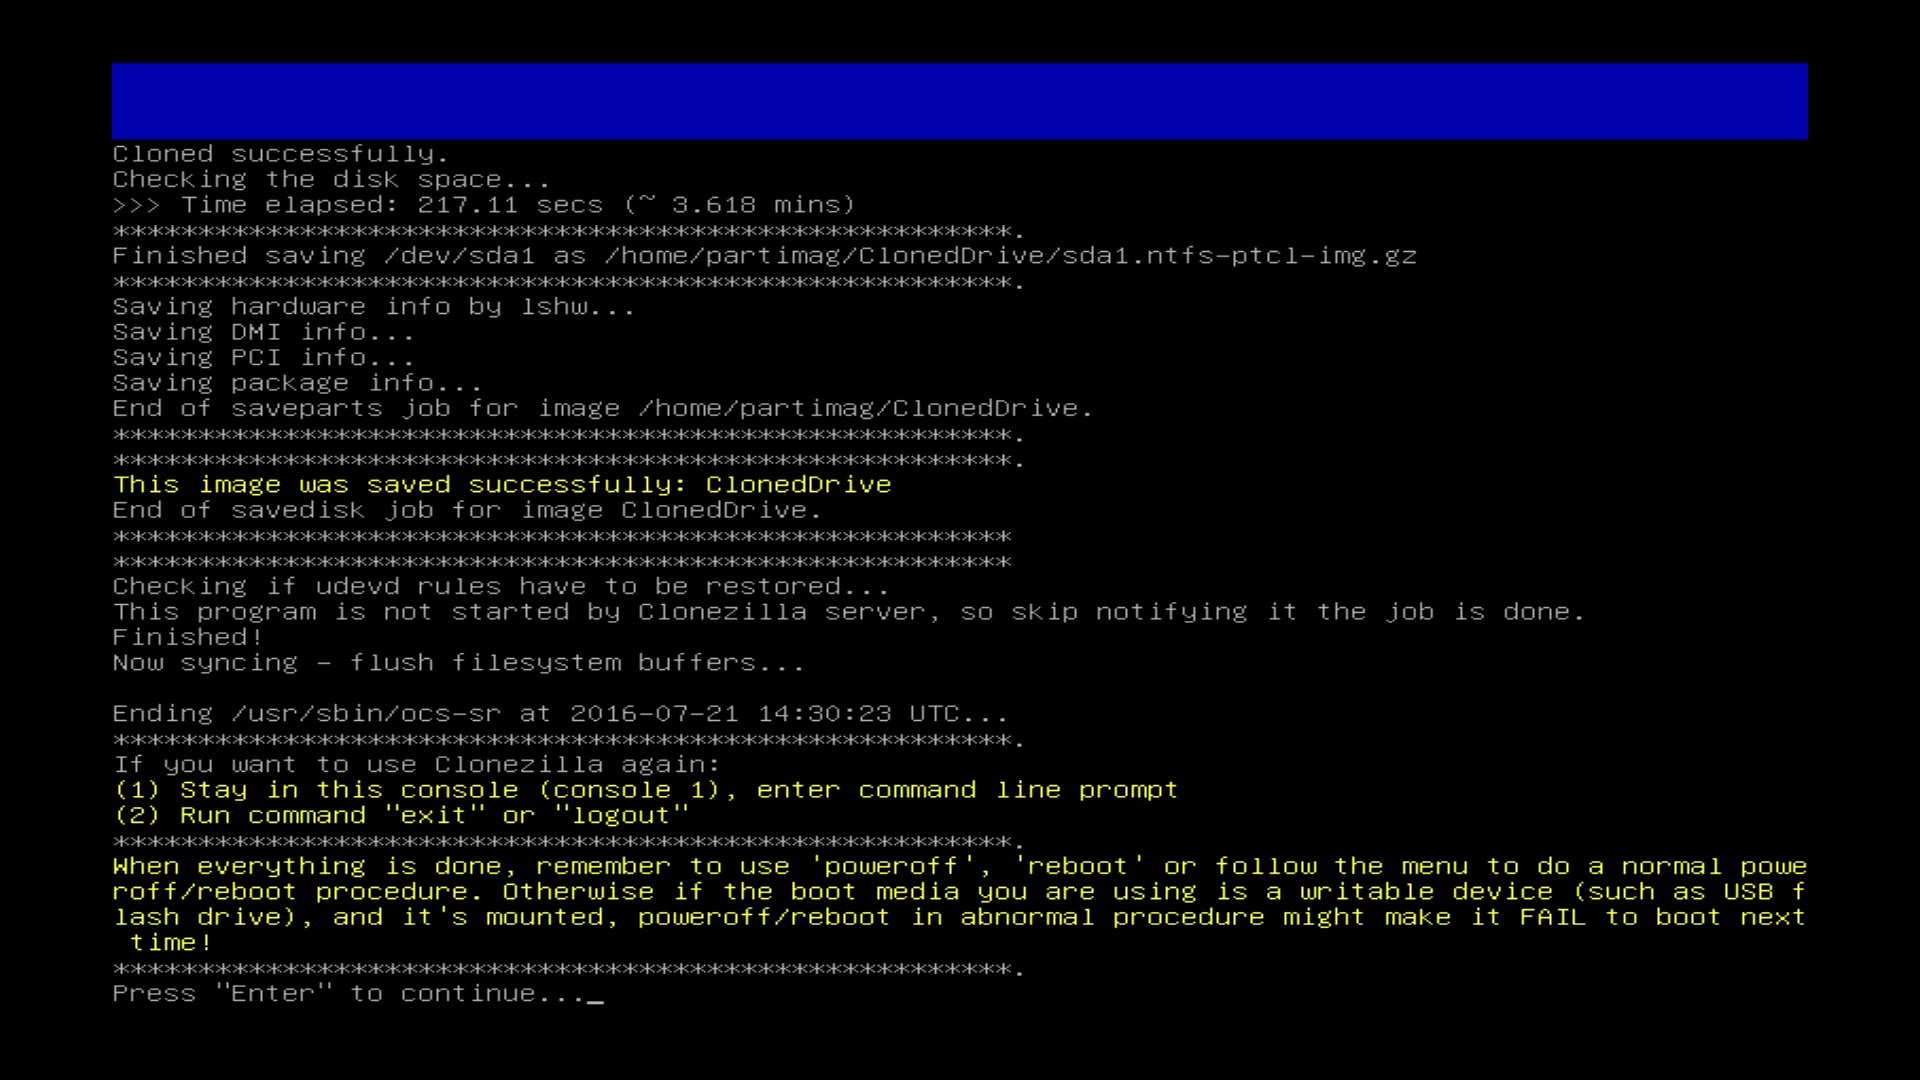
| Hit „Enter“ when the cloning is done. | Nach erfolgreichem Klonen einmal mit „Enter“ bestätigen. |

| You can reboot now the PC. Disconnect the USB drive. Restore the original BIOS boot settings.
After the restart the PC should load the installed Operation System without any issues. |
Der PC kann nun neu gestartet werden. Das USB-Laufwerk wieder entfernen und evtl. im BIOS wieder die alte Boot-Reihenfolge einstellen. Der PC sollte nun wie gewohnt mit dem installierten Betriebssystem Starten.
Auf der USB-Platte befindet sich die Sicherung und kann jederzeit zurückgespielt werden. |
Step 2 / Schritt 2
Restore / Wiederherstellen
| Restore Imagefrom USB drive to your local drive. | Vom USB-Laufwerk die Sicherung zurück auf die Festplatte. |
| In the boot menu, choose a proper resolution. You can also choose Failsafe mode if there are any problems during the cloning process. | Clonezilla bootet. Nun eine Auflösung auswählen und bestätigen. Sollten Probleme auftreten, kann auch der Failsafe mode verwendet werden. |
| Choose your language. | Sprache auswählen. Es ist nicht zwingend notwendig Deutsch zu wählen. Englisch ist ausreichend, allerdings kann am Anfang eine deutsche Erklärung sehr hilfreich sein. |
| The default keyboard layout is US keybaord, therefore if you are using US keyboard, just press enter. | Hier „Don´t touch keymap“ auswählen.
Bei diesem Layout stehen allerdings keine Umlaute zur Verfügung. |
| Choose „Start Clonezilla“ | Start Clonezilla auswählen. |
| Choose device-image. | Die erste Option: „device-image work…“ auswählen. |
| Choose „local_dev“ option | Die „local dev“ Option auswählen. |
| Press „Enter to continue“. | „Enter“ drücken zum Fortfahren. |
| Press Ctrl+C to exit window. | Strg+C drücken, um das Fenster zu verlassen. |
| Choose your external USB-drive. | Die externe USB-Platte auswählen. |
| Choose „Top_directory“. | „Top_directory“ auswählen. |
| Press „Enter“. | „Enter“ drücken. |
| Choose „Beginner“. | „Beginner“ auswählen. |
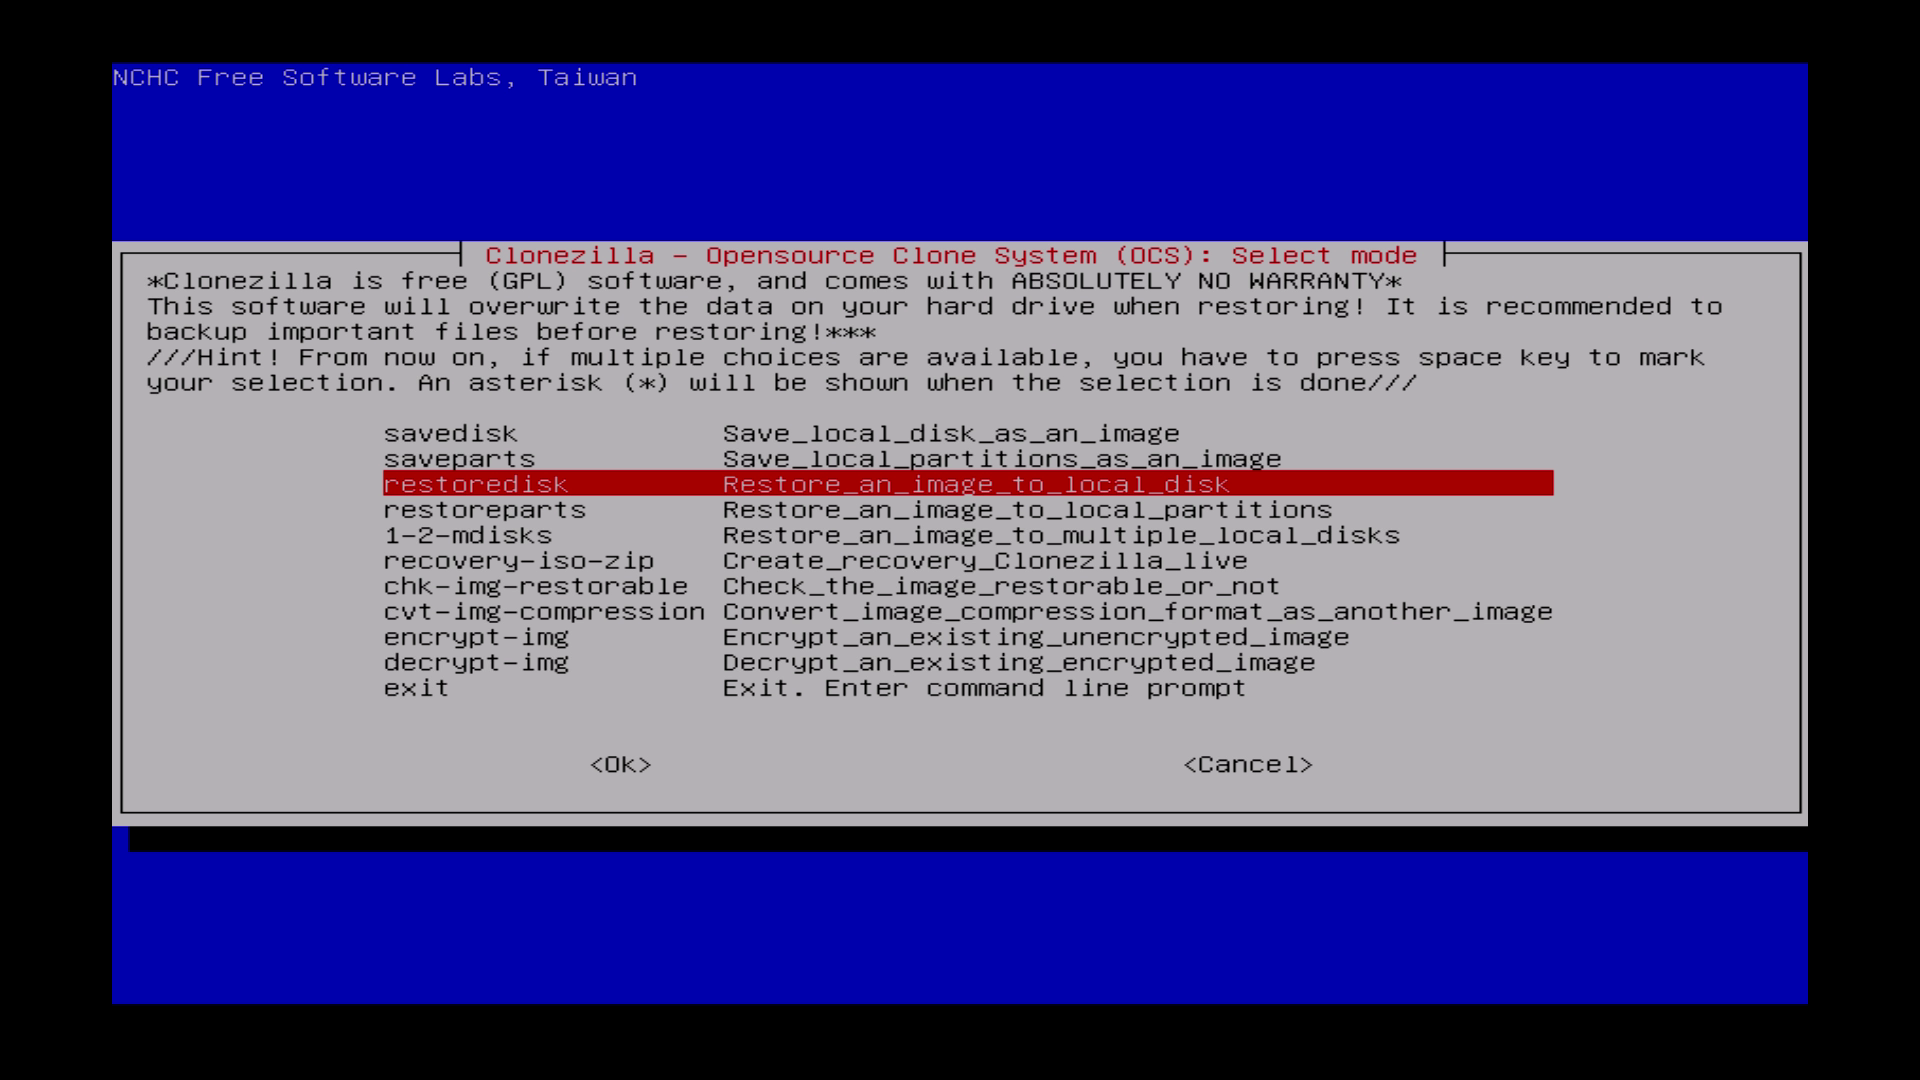
| Choose „restoredisk“. | „restoredisk“ auswählen. |
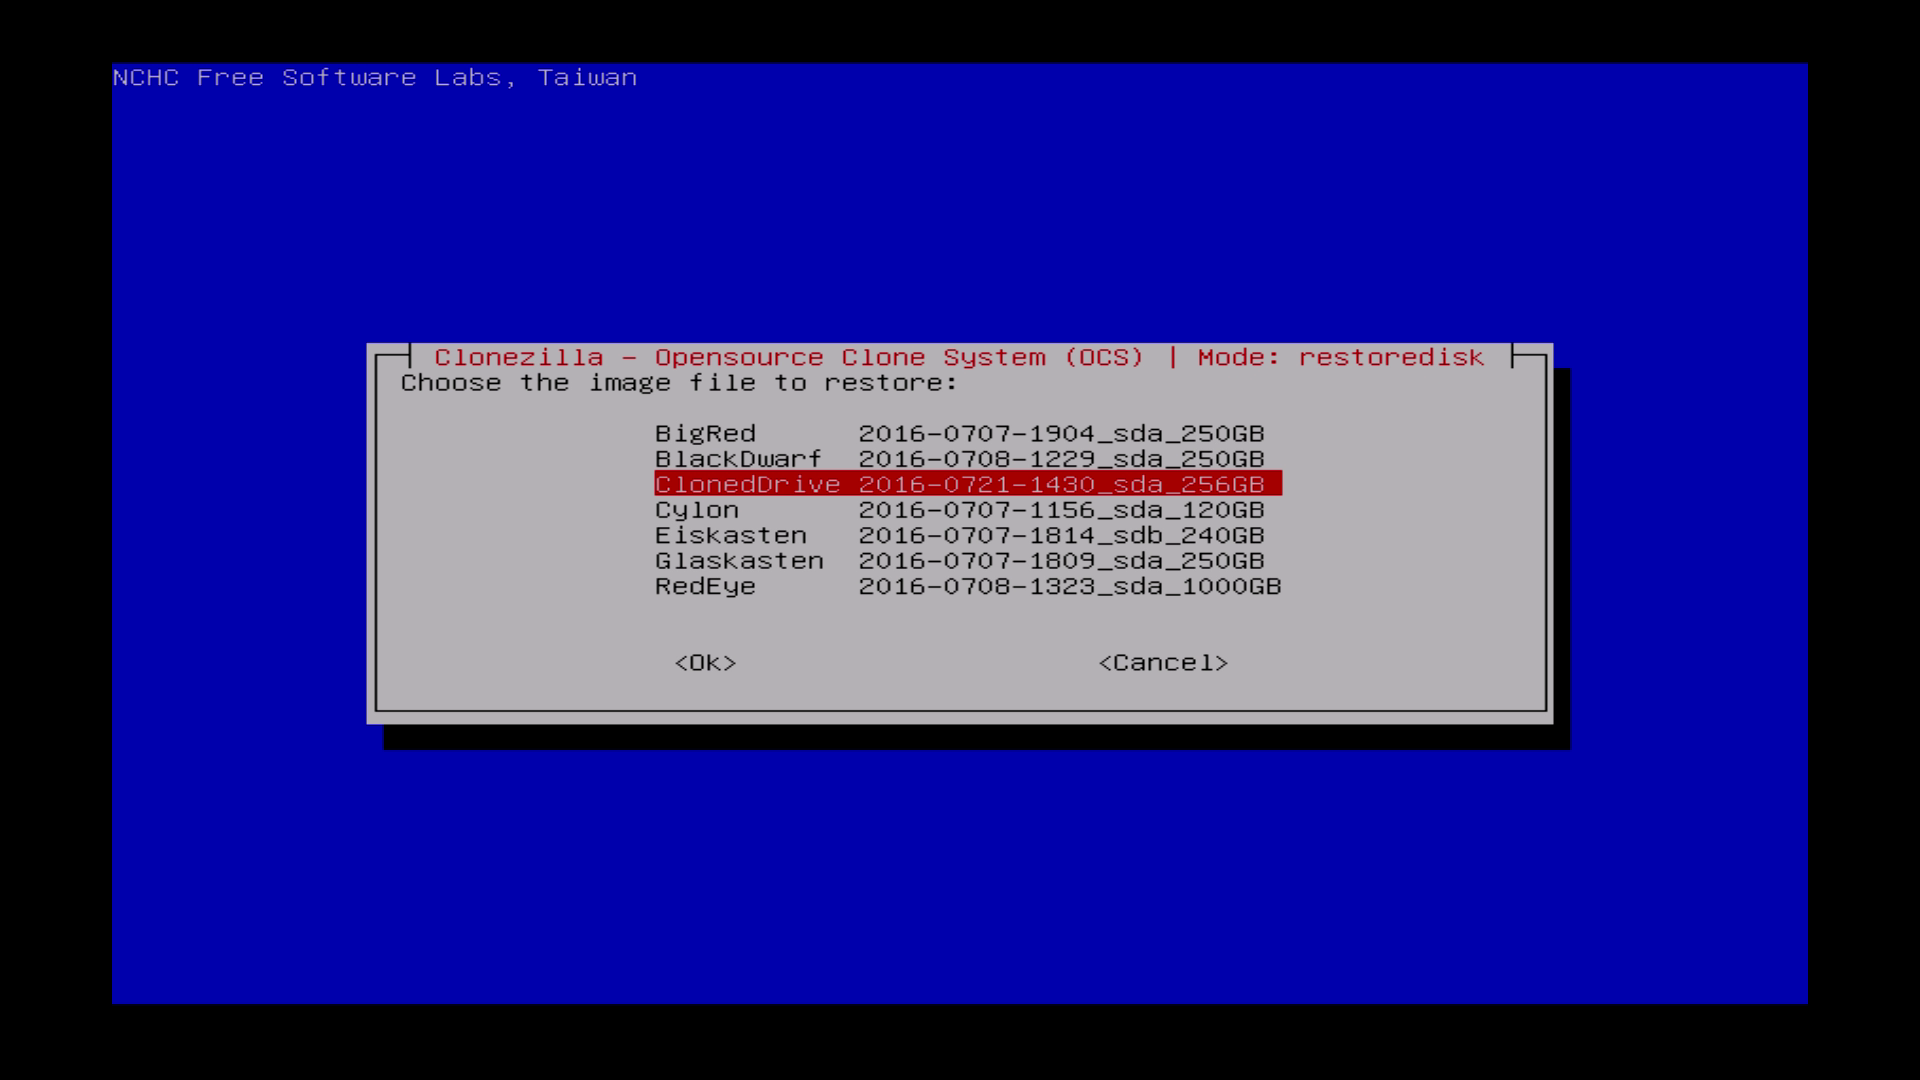
| Choose your saved clone image. In this case it´s “ClonedDrive”.
You will find here every cloned image on your USB-Drive. |
Das gewünschte Image zur Wiederherstellung wählen. In diesem Fall ist es „ClonedDrive“. Es werden alle geklonten Images auf der USB-Platte angezeigt. |
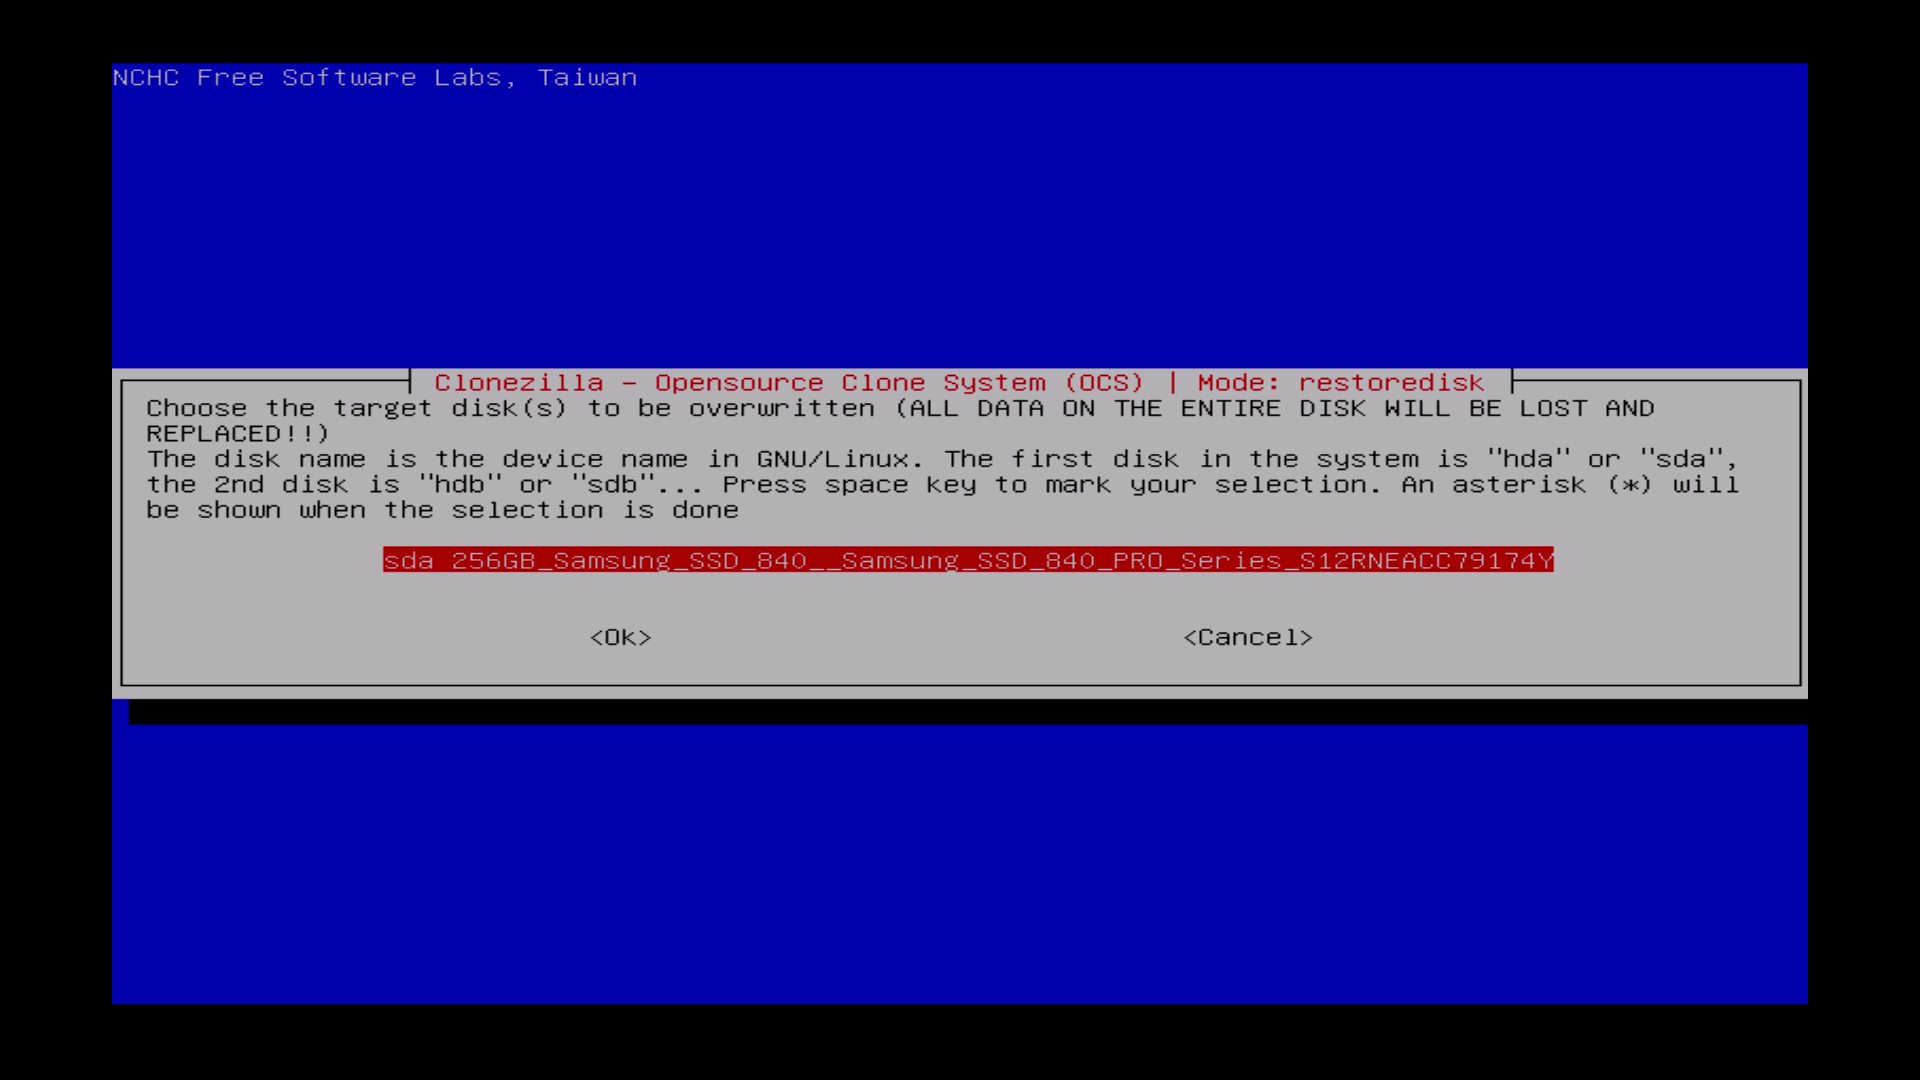
| Choose your local disk as destination. | Die lokale Platte als Ziel für das Image wählen. |
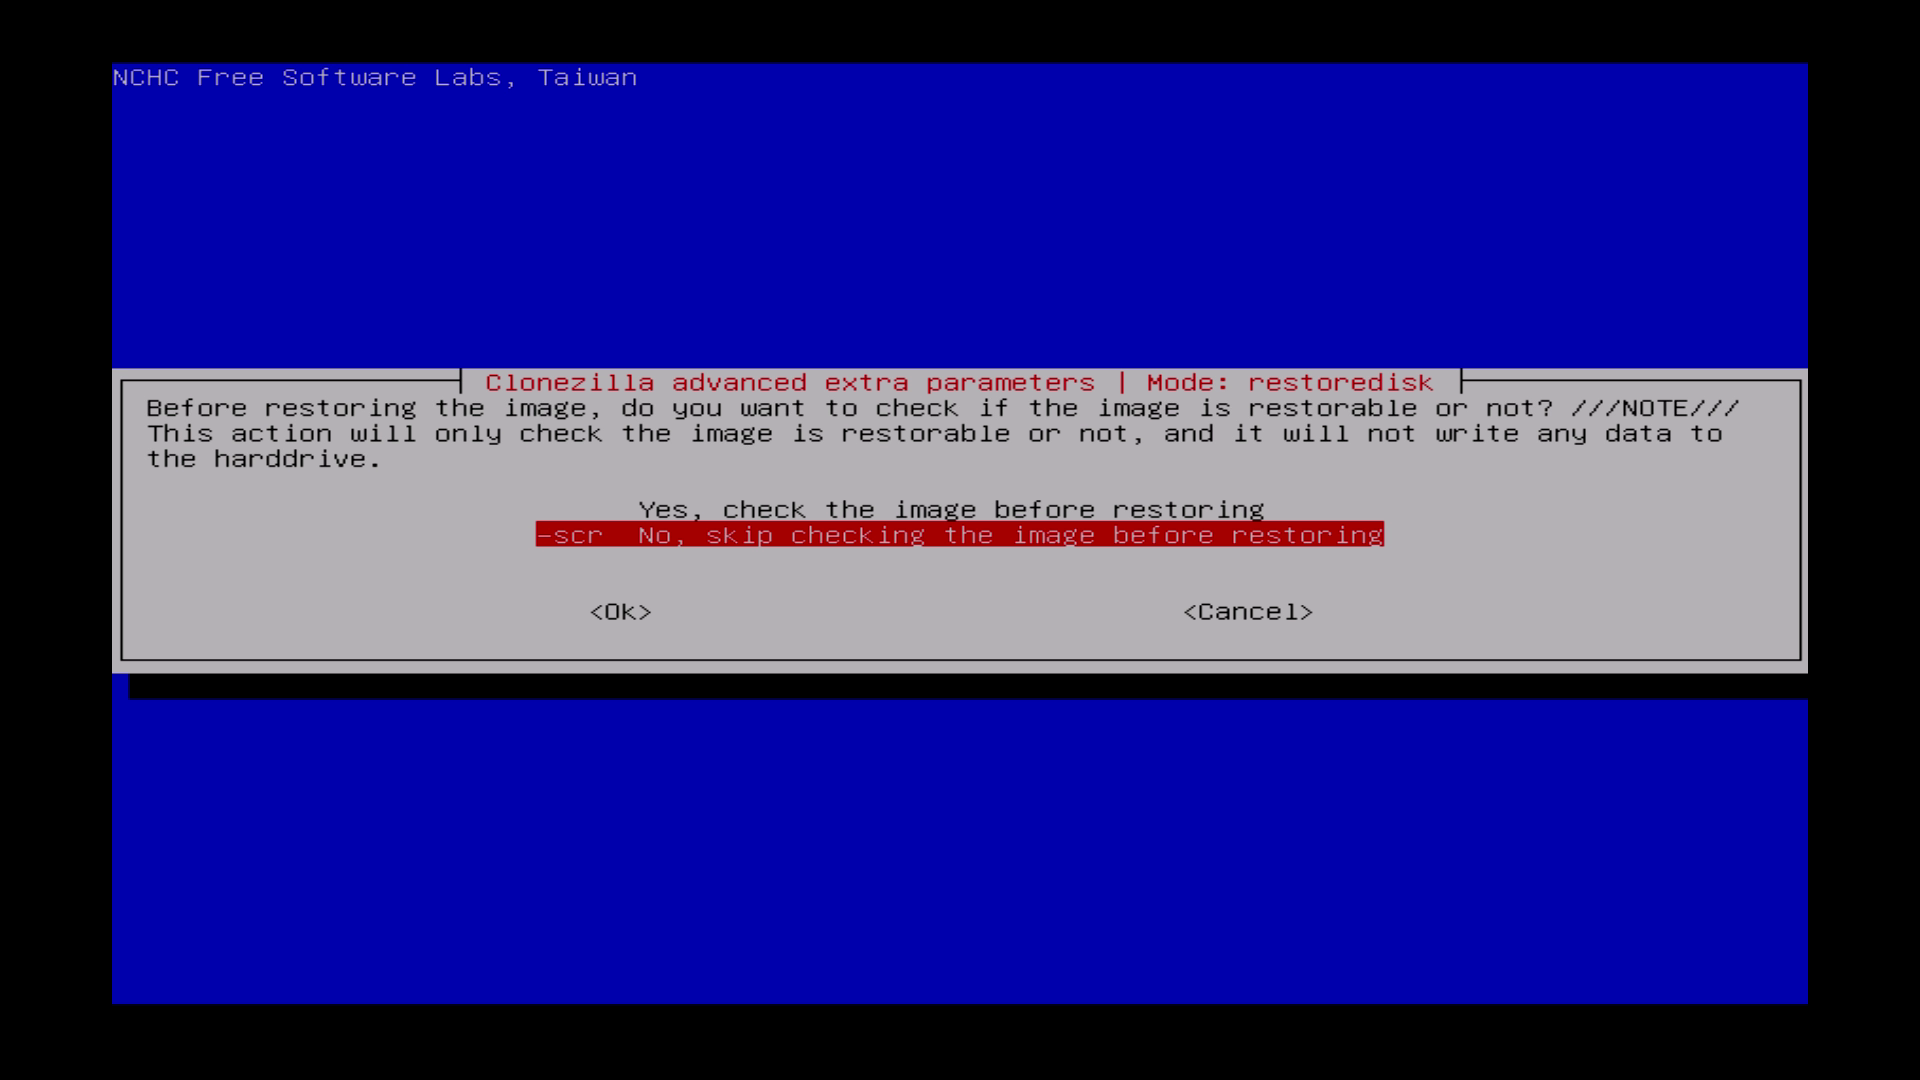
| Skip the checking. | Hier “skip checking” wählen. |
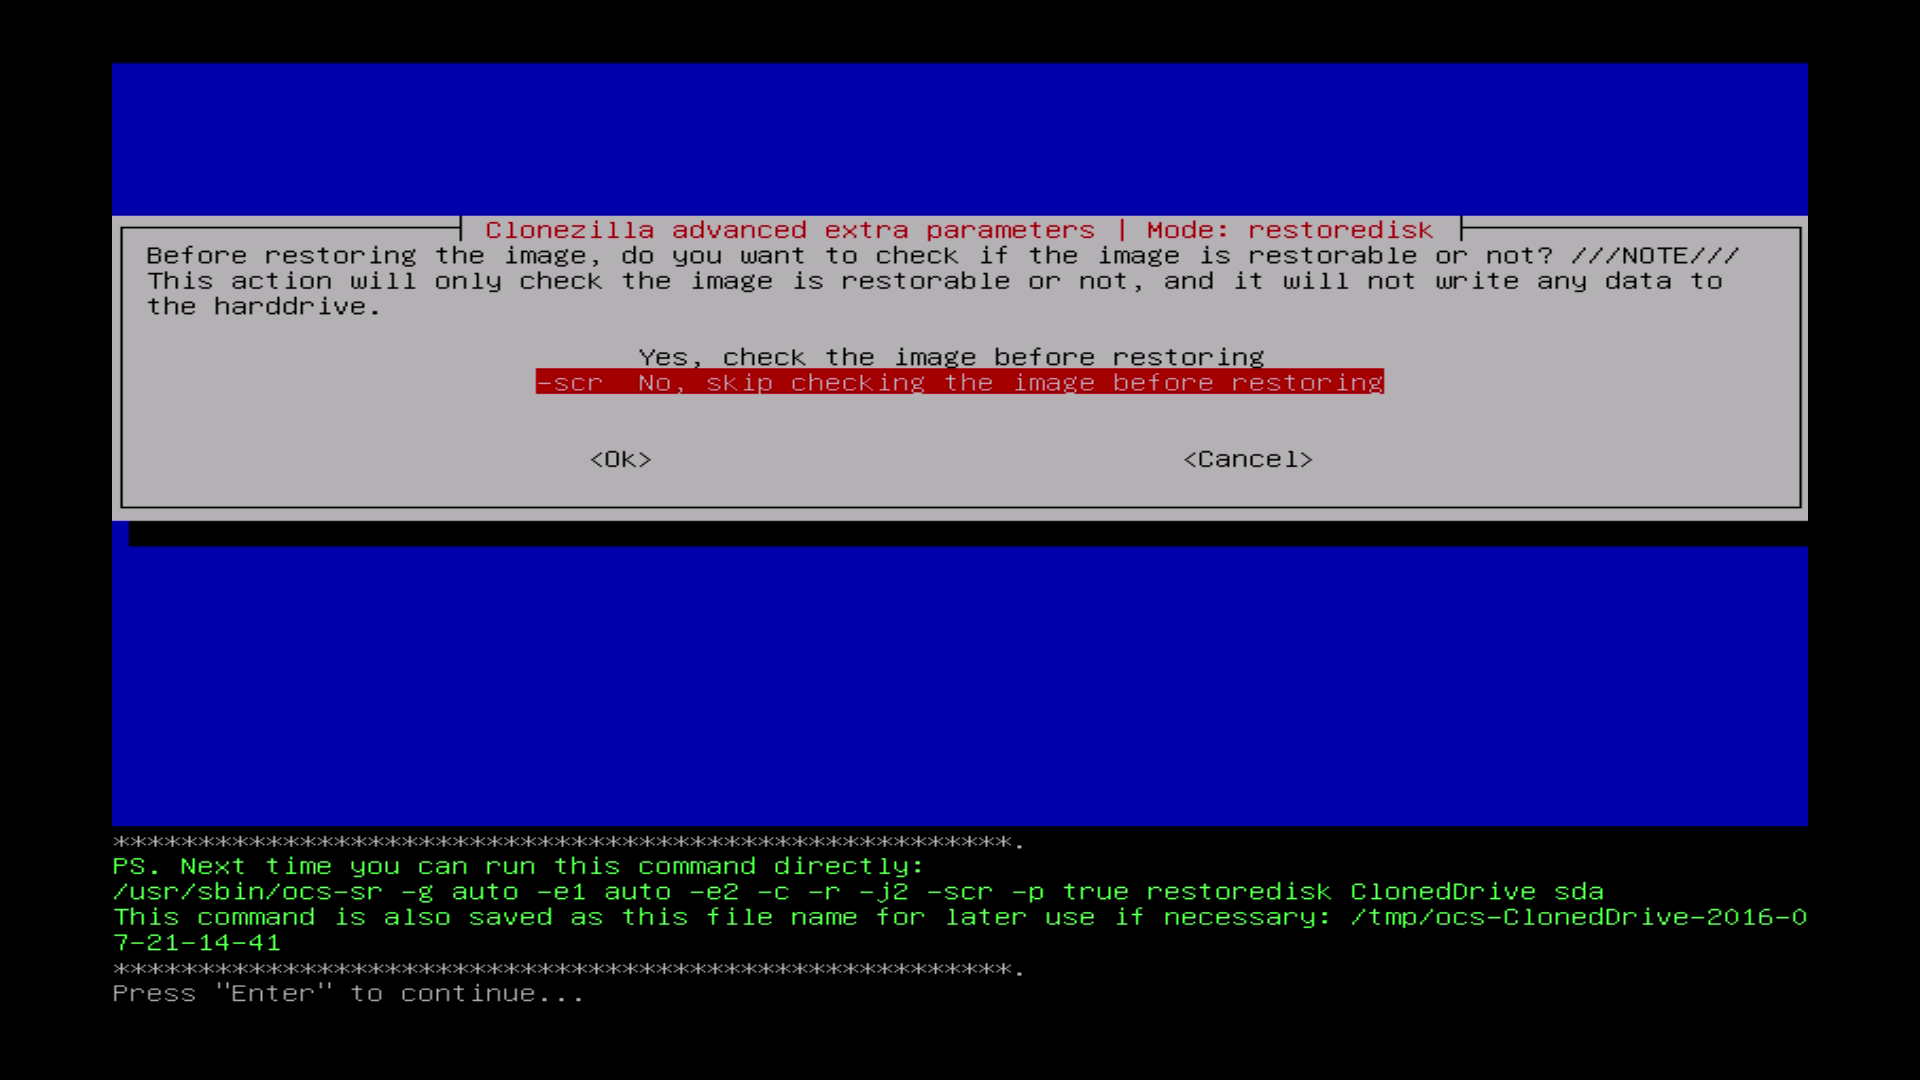
| Press “Enter”. | “Enter” drücken. |
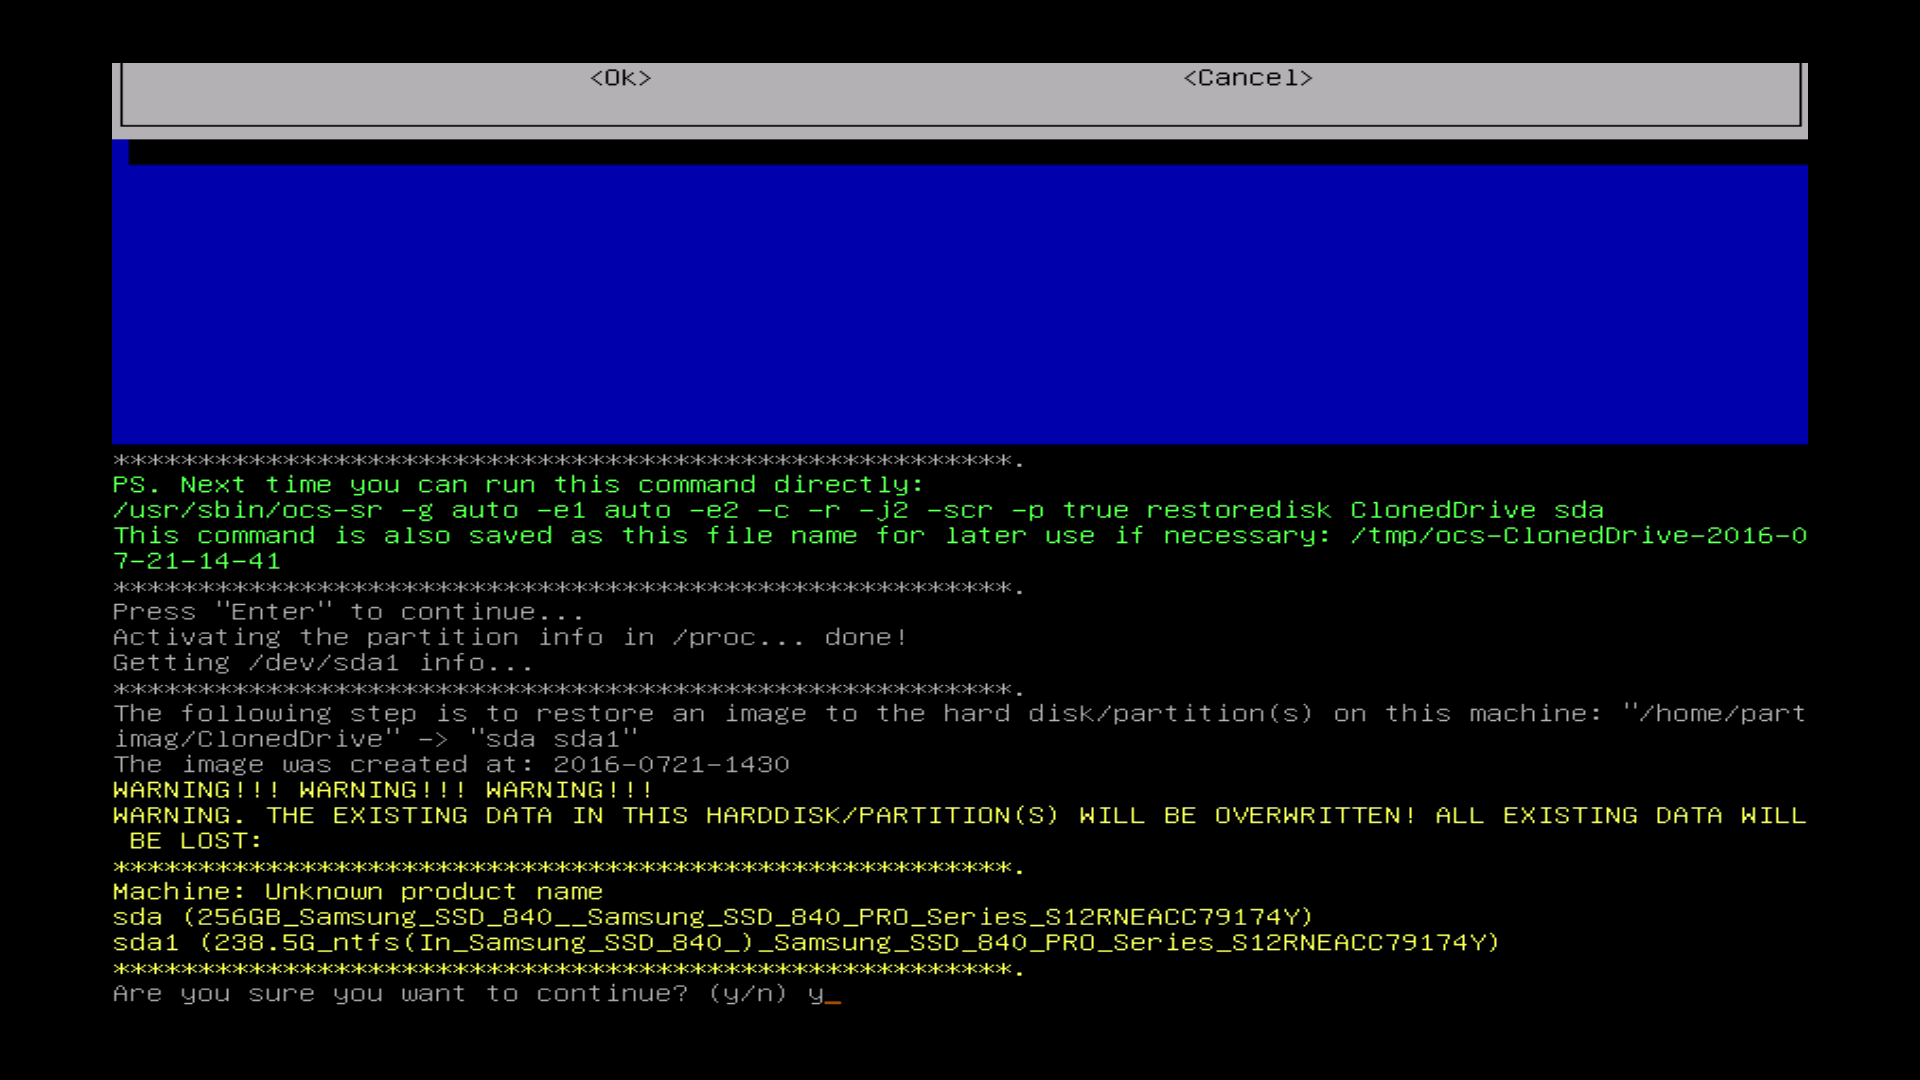
| Press “y” to confirm. | Zum Bestätigen “y” drücken. |
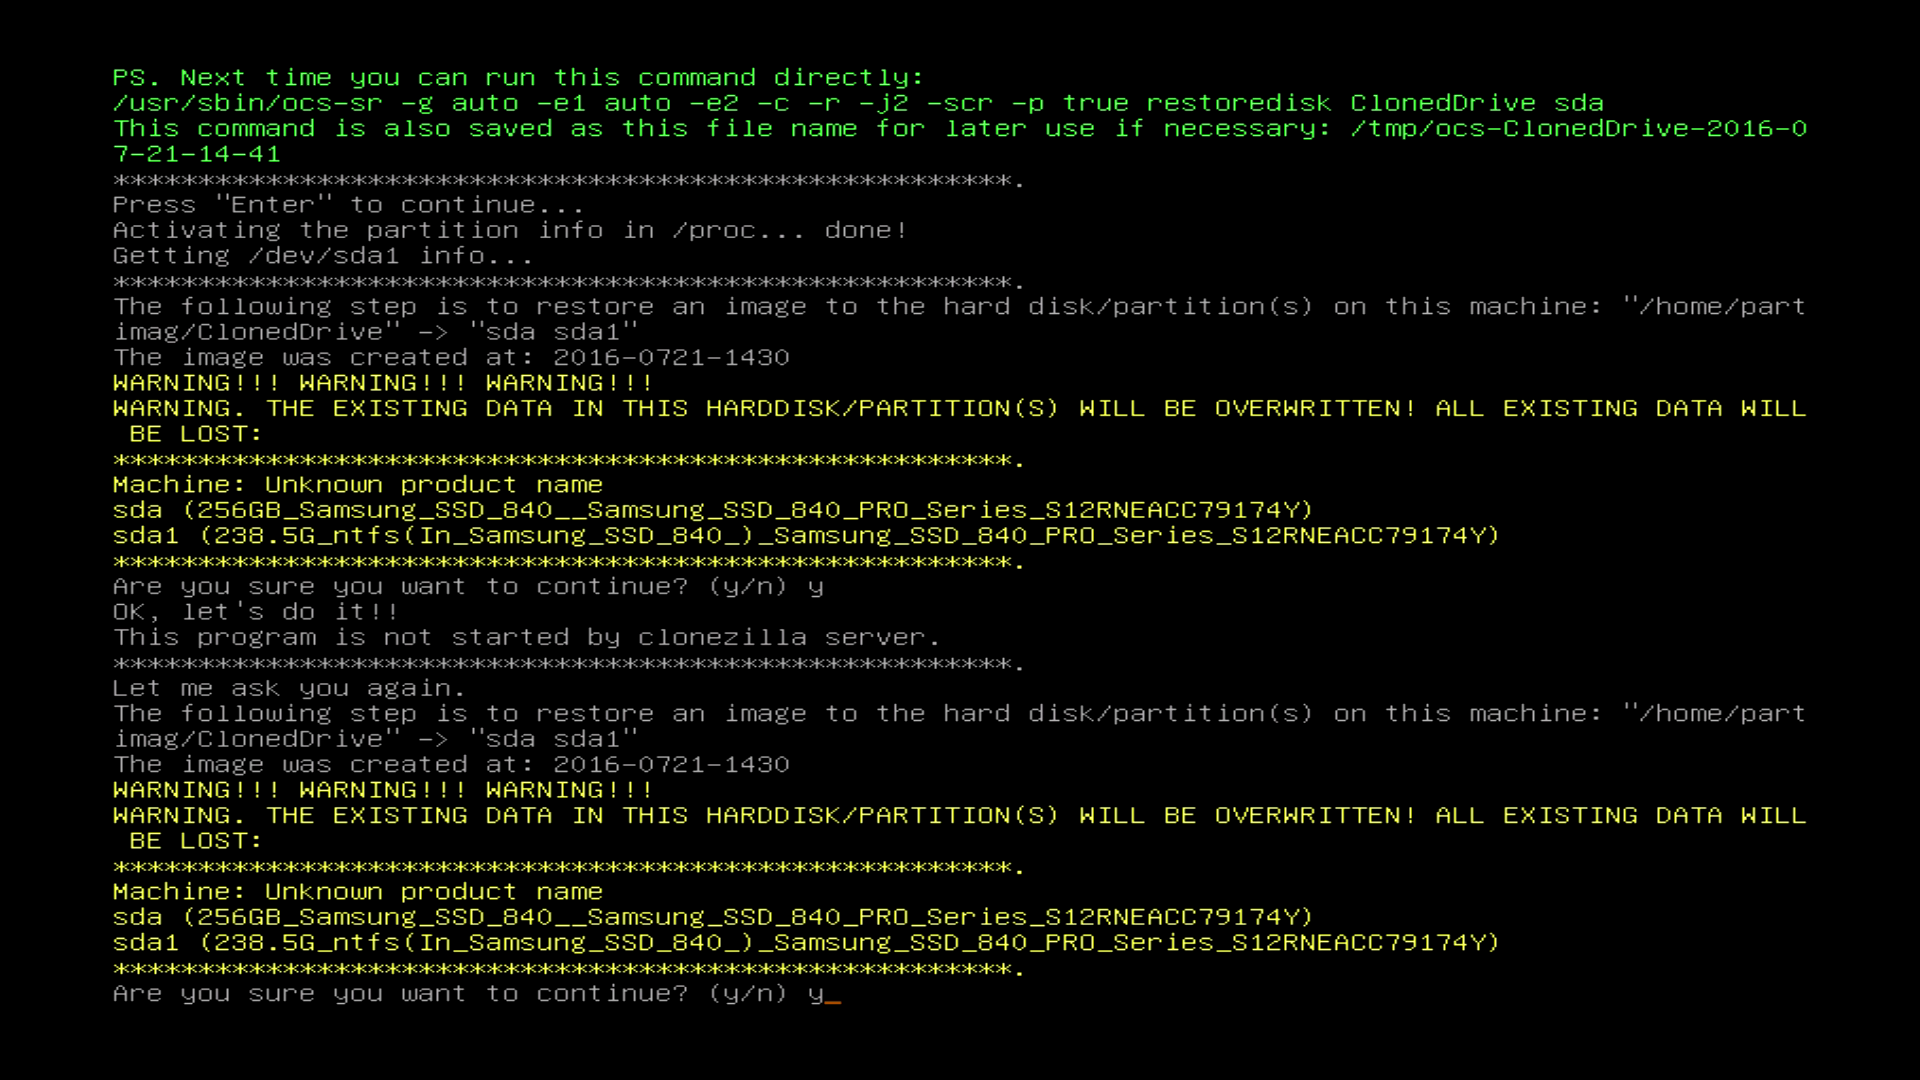
| Press “y” to confirm. | Zum Bestätigen “y” drücken. |

| Clonezilla is restoring your image to disk. | Clonezilla stellt das Image auf der Platte wieder her. |
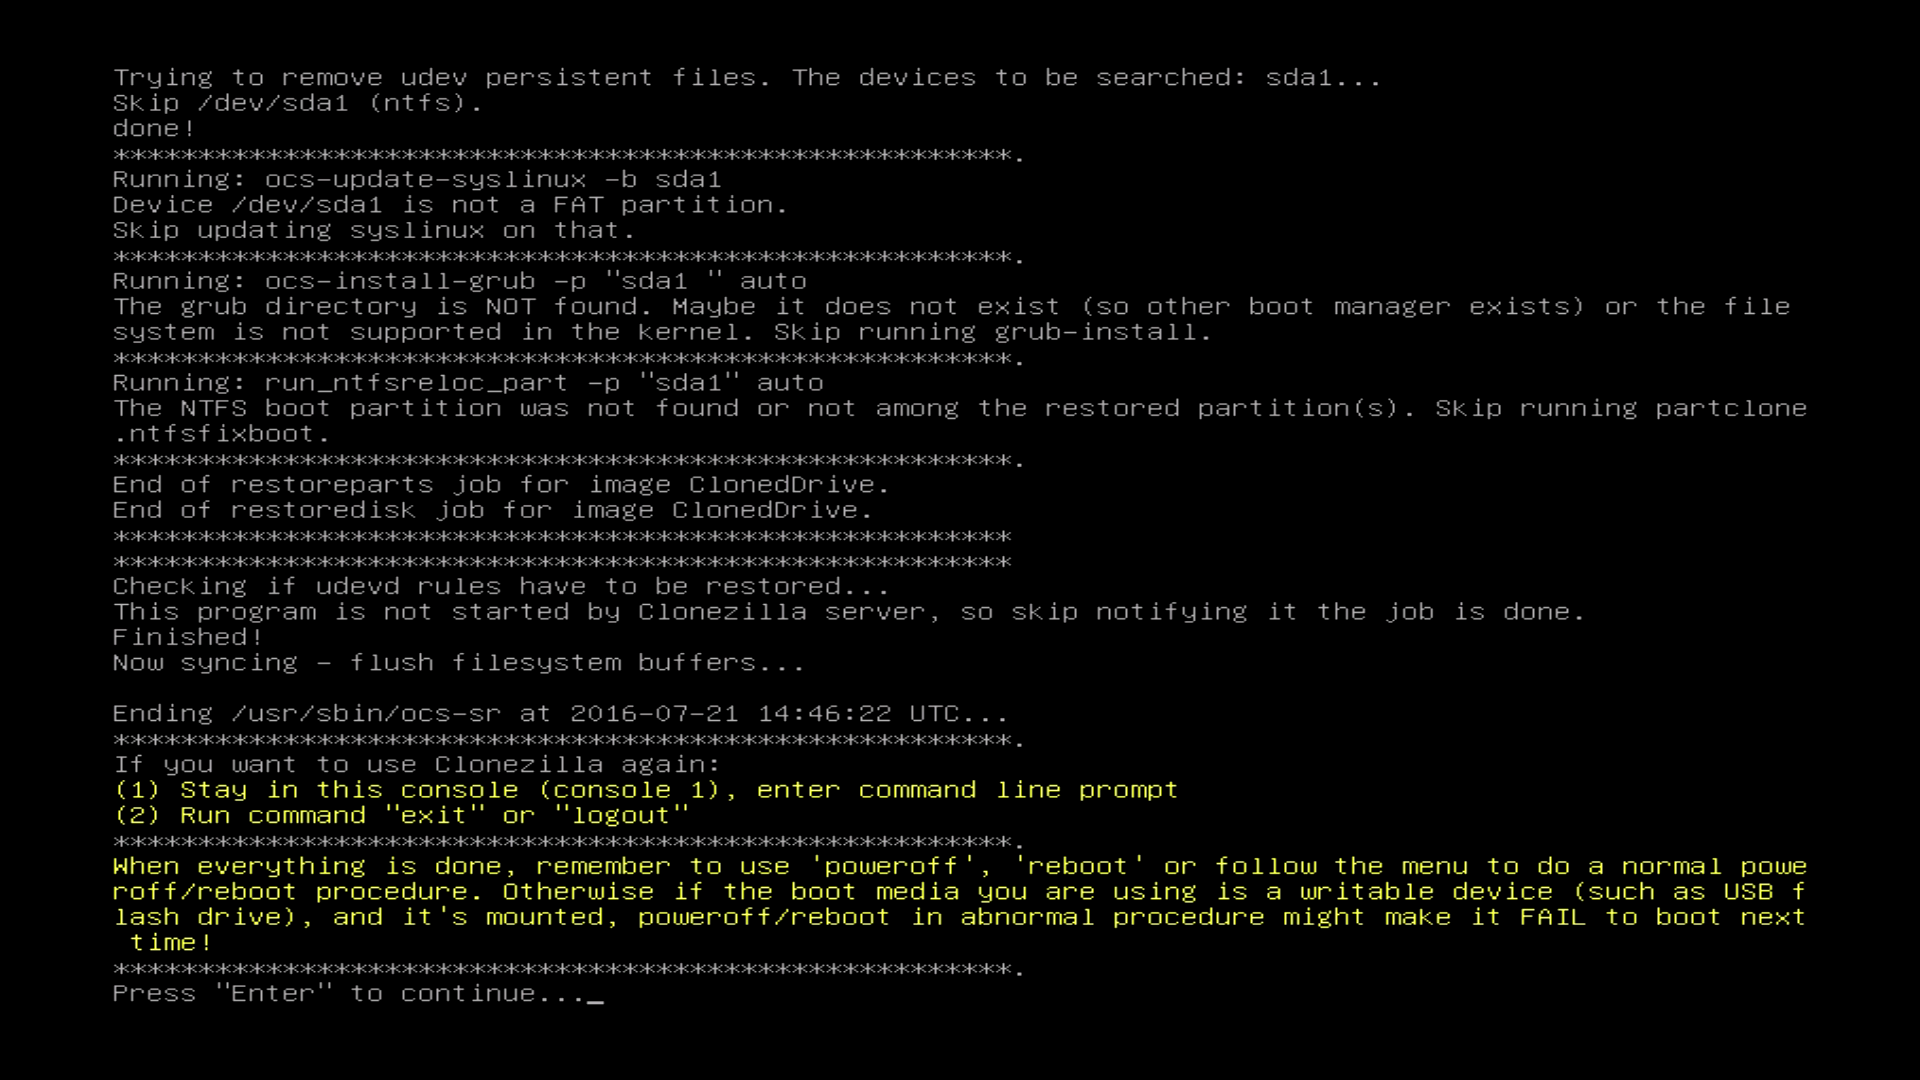
| Press „Enter“ | “Enter” drücken. |
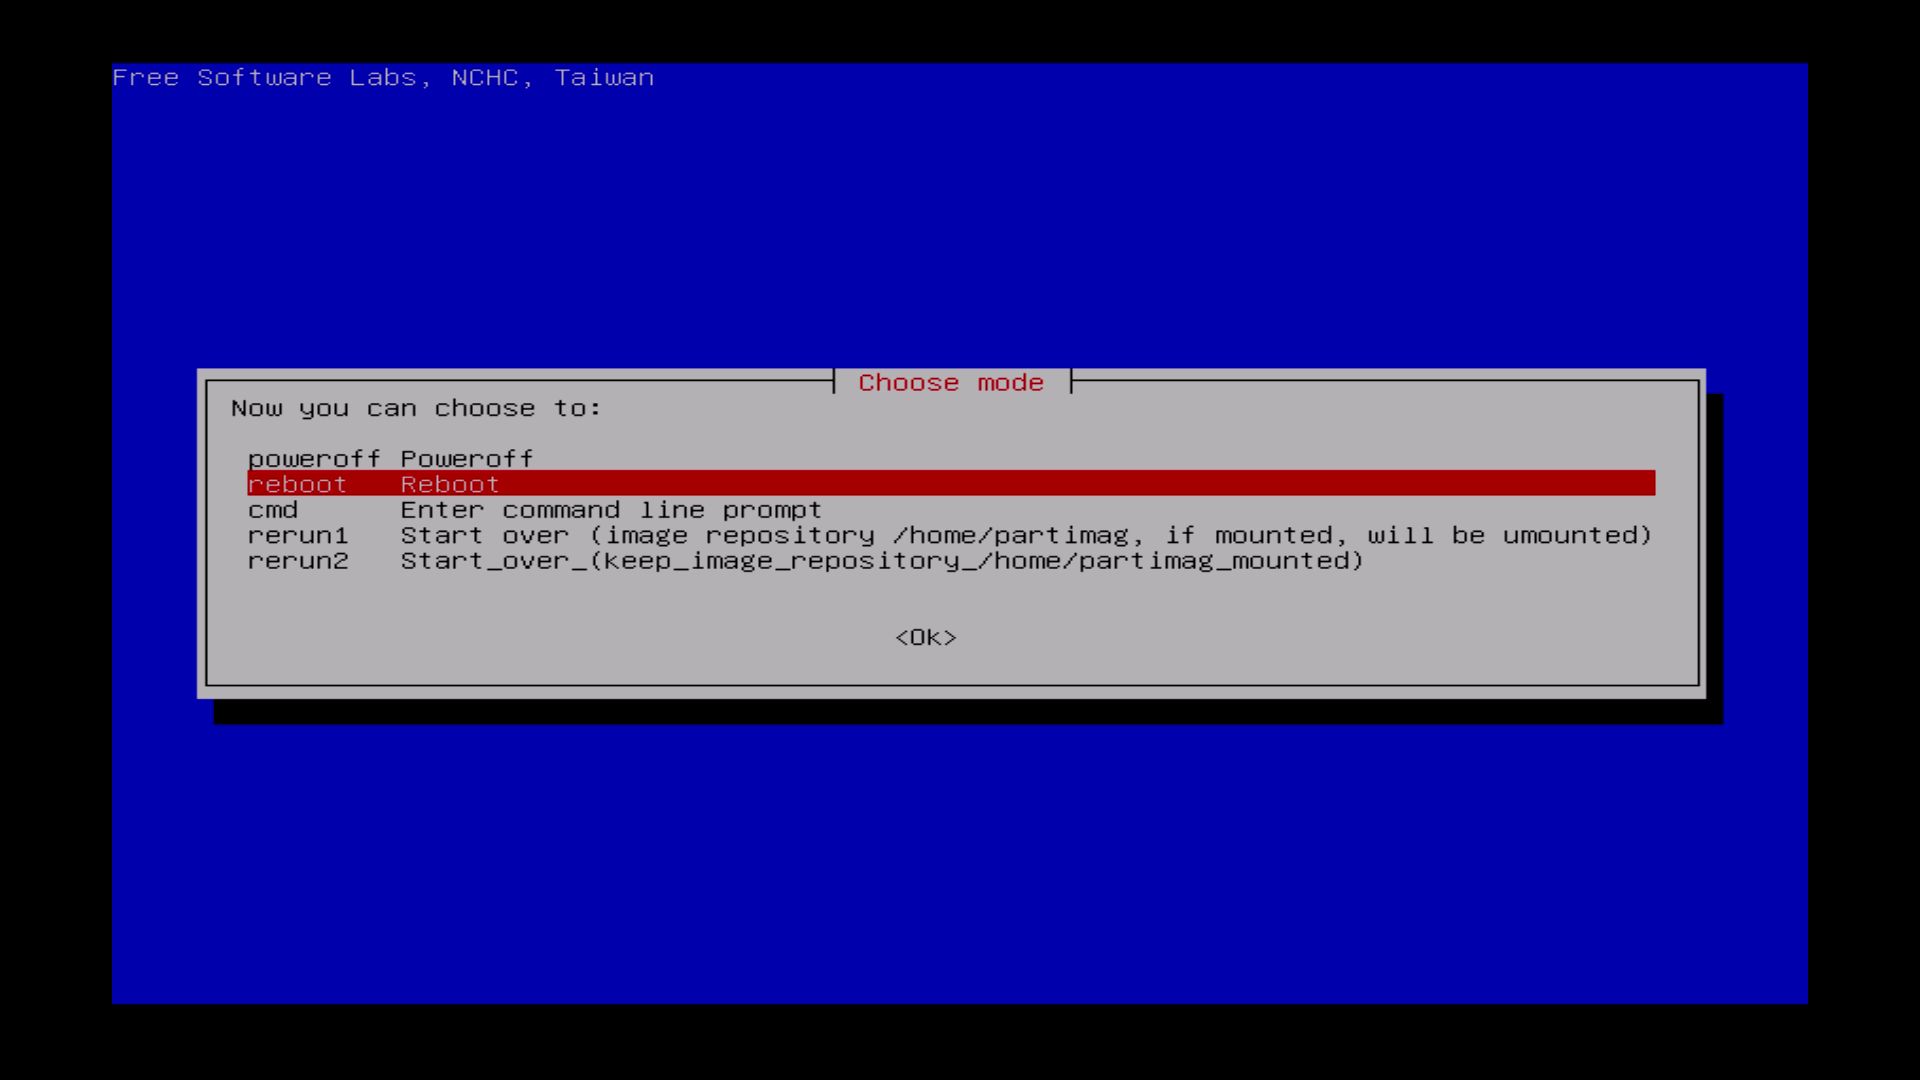
| Choose reboot and enter your BIOS. | Reboot wählen und ins BIOS gehen. |
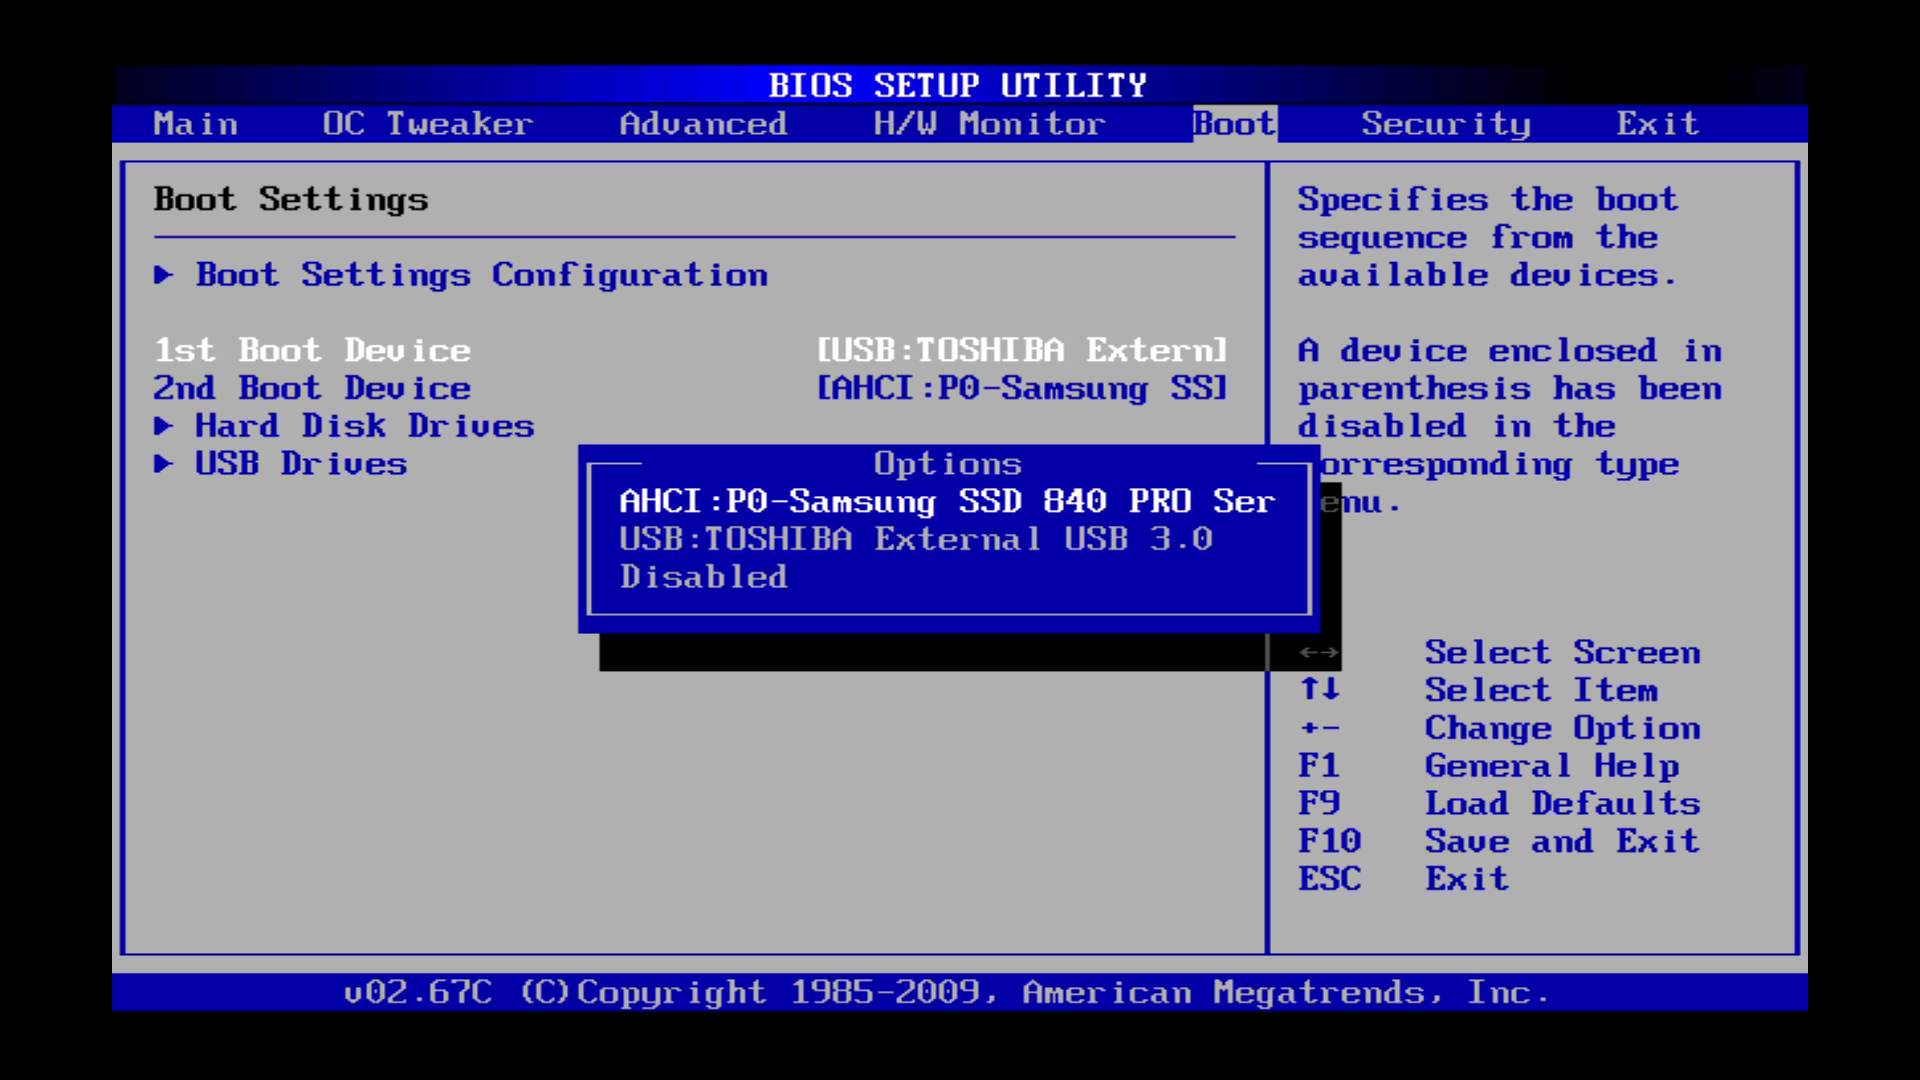
| Restore your old boot settings. Disconnect your USB-Drive. | Die alte Bootreihenfolge wiederherstellen. USB-Platte ausstecken. |
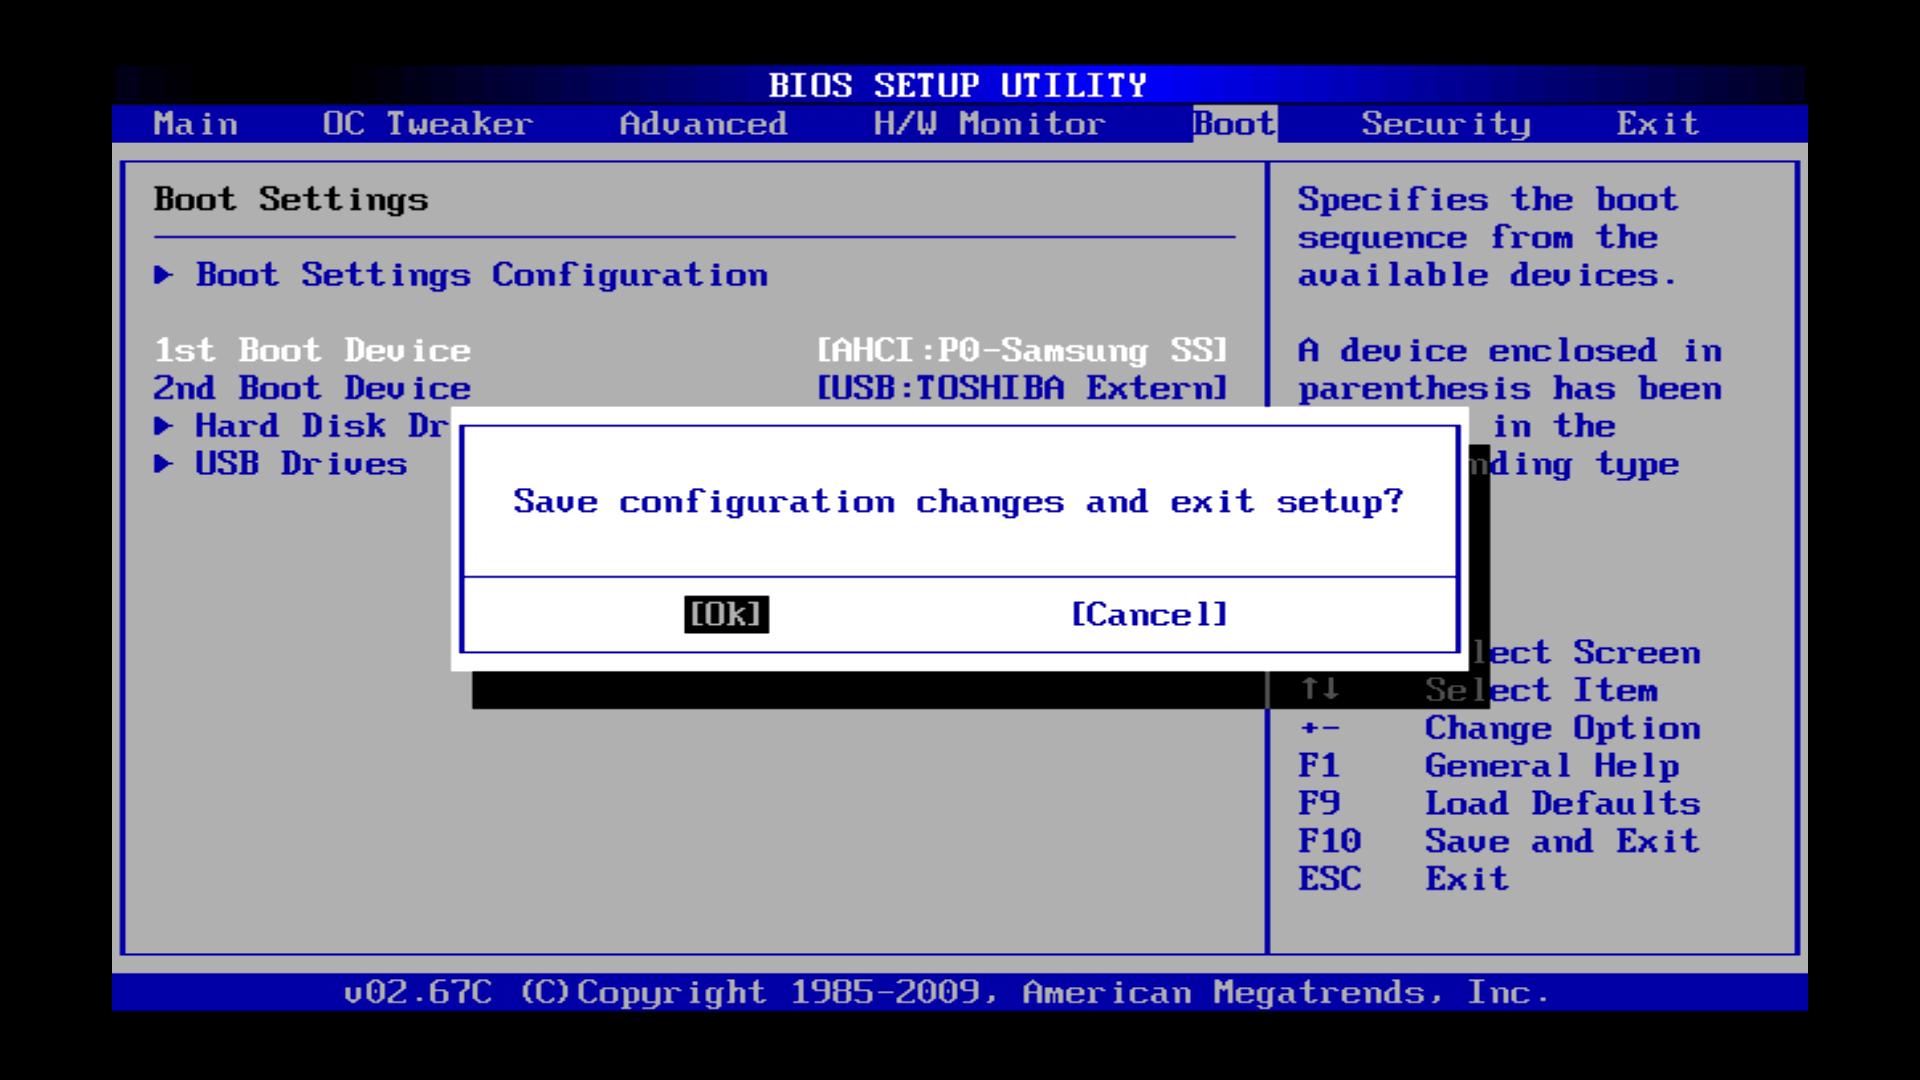
| Save settings and exit. Your system is restarting. | Speichern und Beenden. Das System startet nun wieder neu. |
| After the restart your OS is booting. | Das Betriebssystem wird nach dem Neustart geladen. |

Geschrieben von: Tim-Oliver Siegwart
Beim Mighty Games Mag der Mann für Hardware, Rennsimulationen und First Person Shooter. Mit dem 286er und MS-DOS aufgewachsen und das Internet auf seinen ersten Schritten begleitet. Beruflich in der Gamesbranche tätig.
Es gibt noch keine Kommentare.